Viking Coat Tutorial

Hello! Long time so see! I am back with another tutorial for you all! Today I will be sharing with you how to make a Viking Coat, something I have been wanting to add to my collection for a while now.

Before we get into the tutorial, I would like to announce that I have started a YouTube channel! (*excited cheers*). This tutorial is in video form if you are interested in checking it out!

Click here to see the video below! Hope you love it ๐Ÿ™‚

Brief History

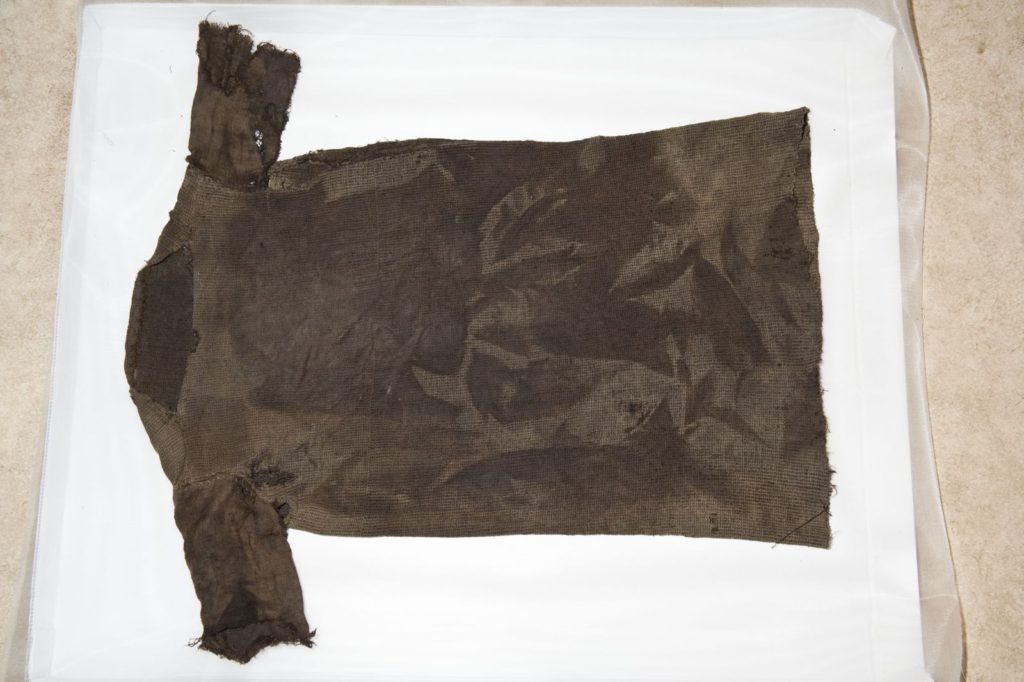
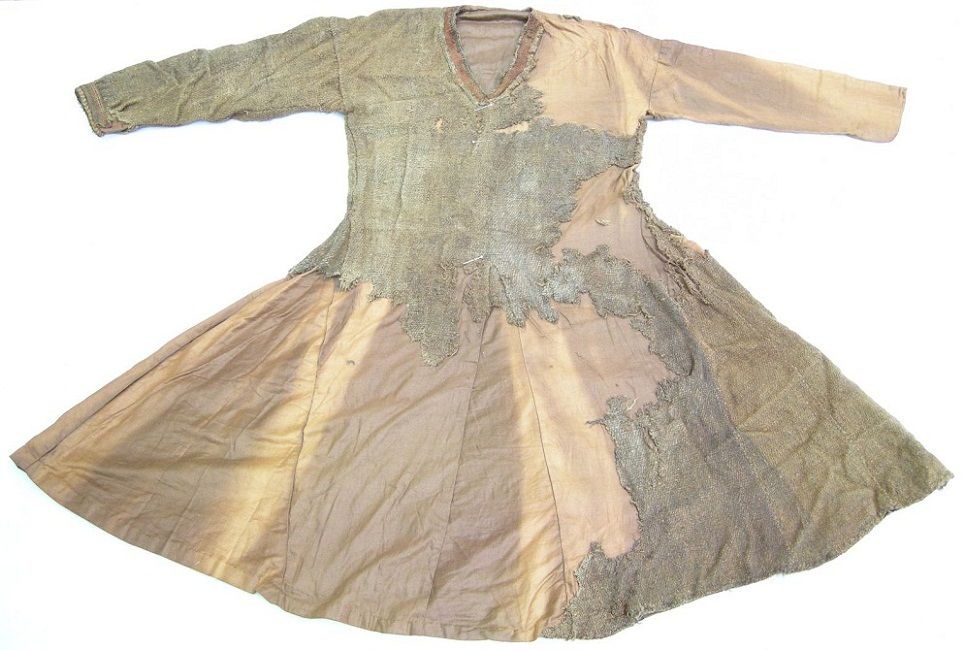
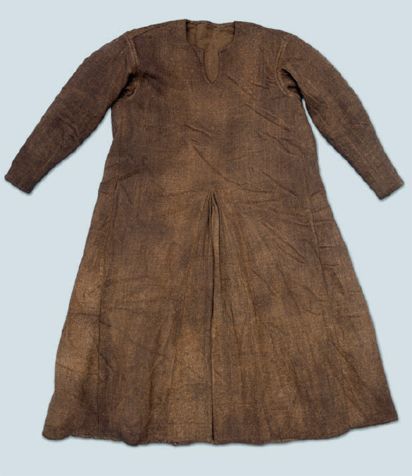
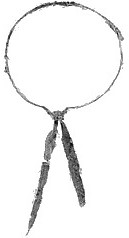
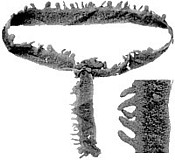
The Birka site was a treasure trove for archaeologists. It was there that fragments of a garment believed to be a coat were found. It would’ve most likely been a mens coat, however, who’s to say a woman didn’t steal her mans clothes back then too ๐Ÿ˜‰

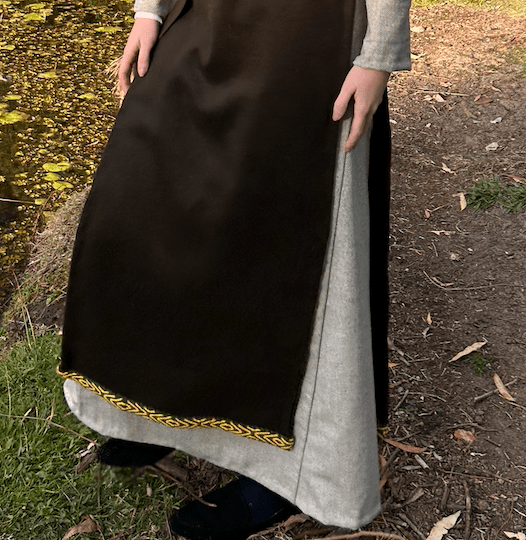
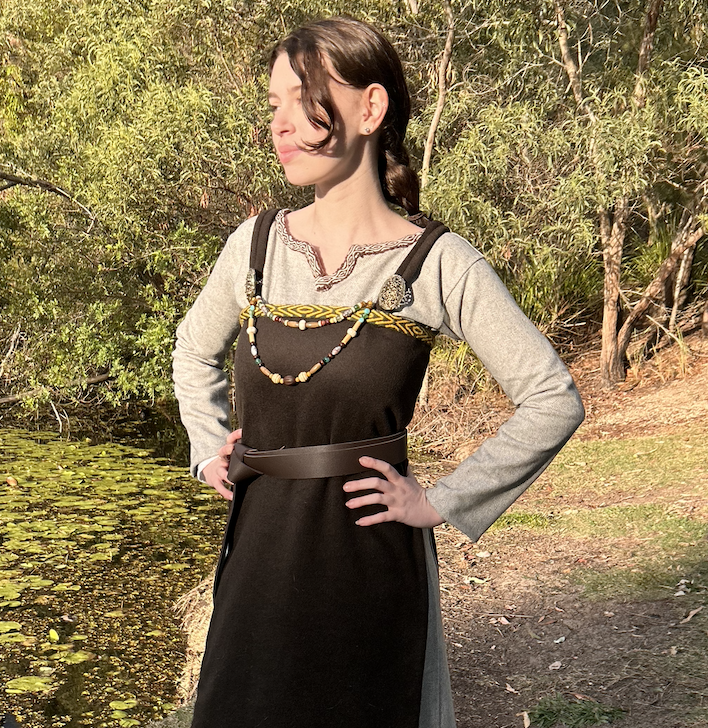
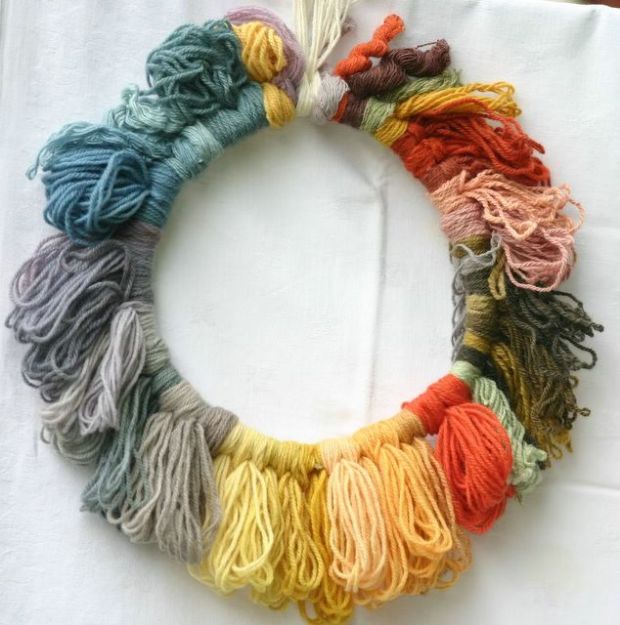
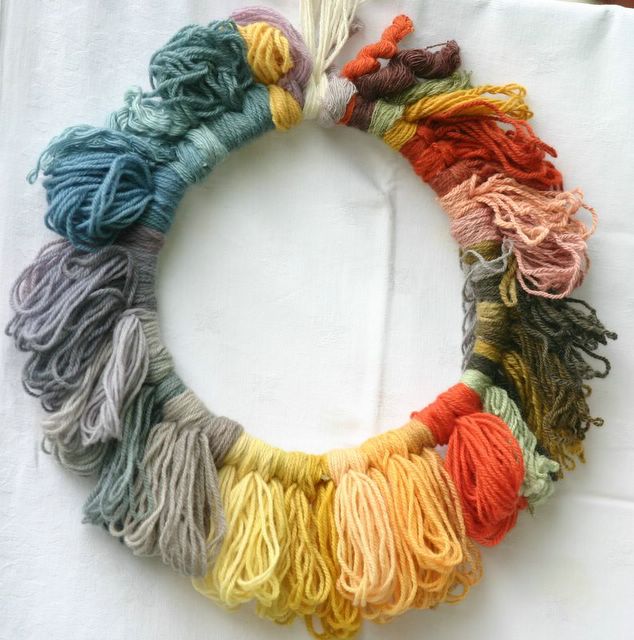
For fabric, I would suggest choosing wool, I get my wool from Super Cheap Fabrics. Herringbone weave has been found at such sites too, so that would be a safe choice! I went with a basic wool with no identifiable weave, in a brown colour, something easily accessible. Don’t forget though! The vikings had access to an array of fun and bright colours, I just chose to go with a colour I could wear with ANY of my outfits.

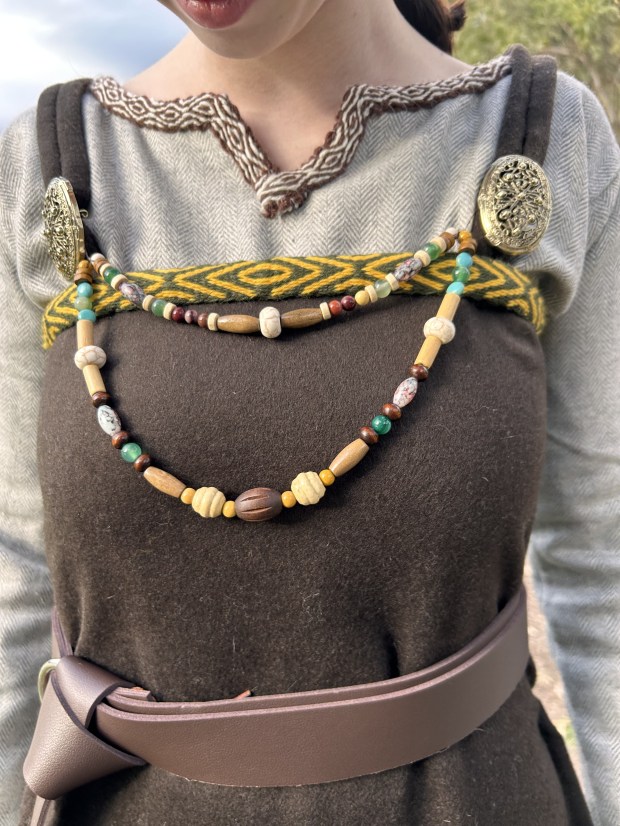
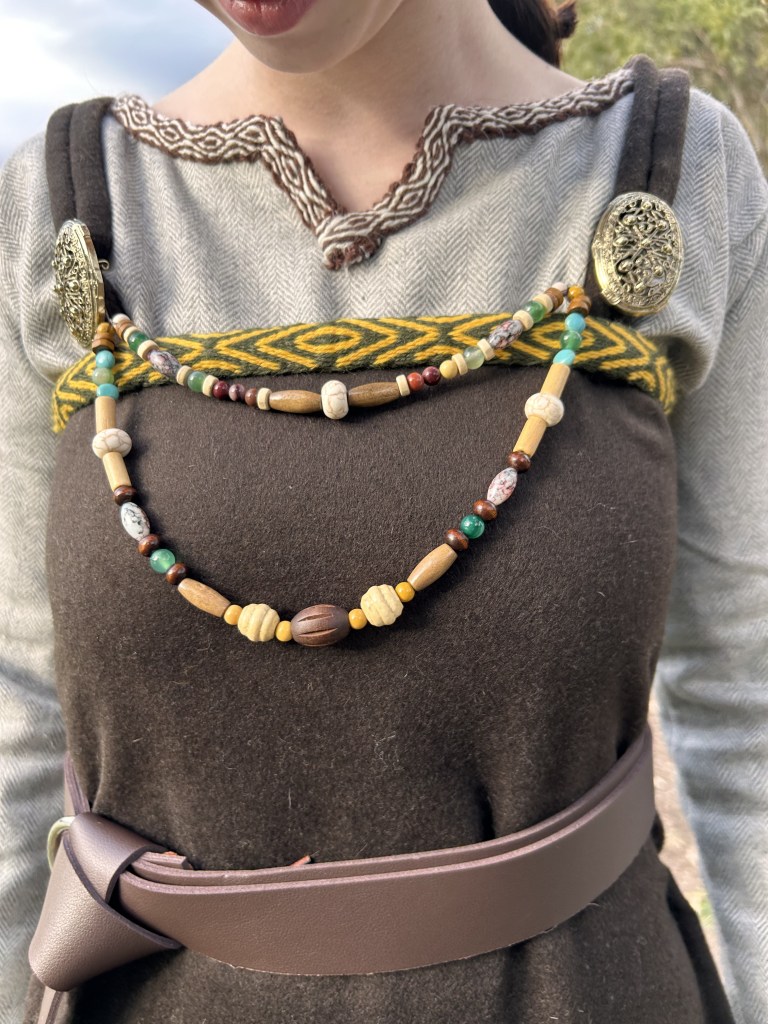
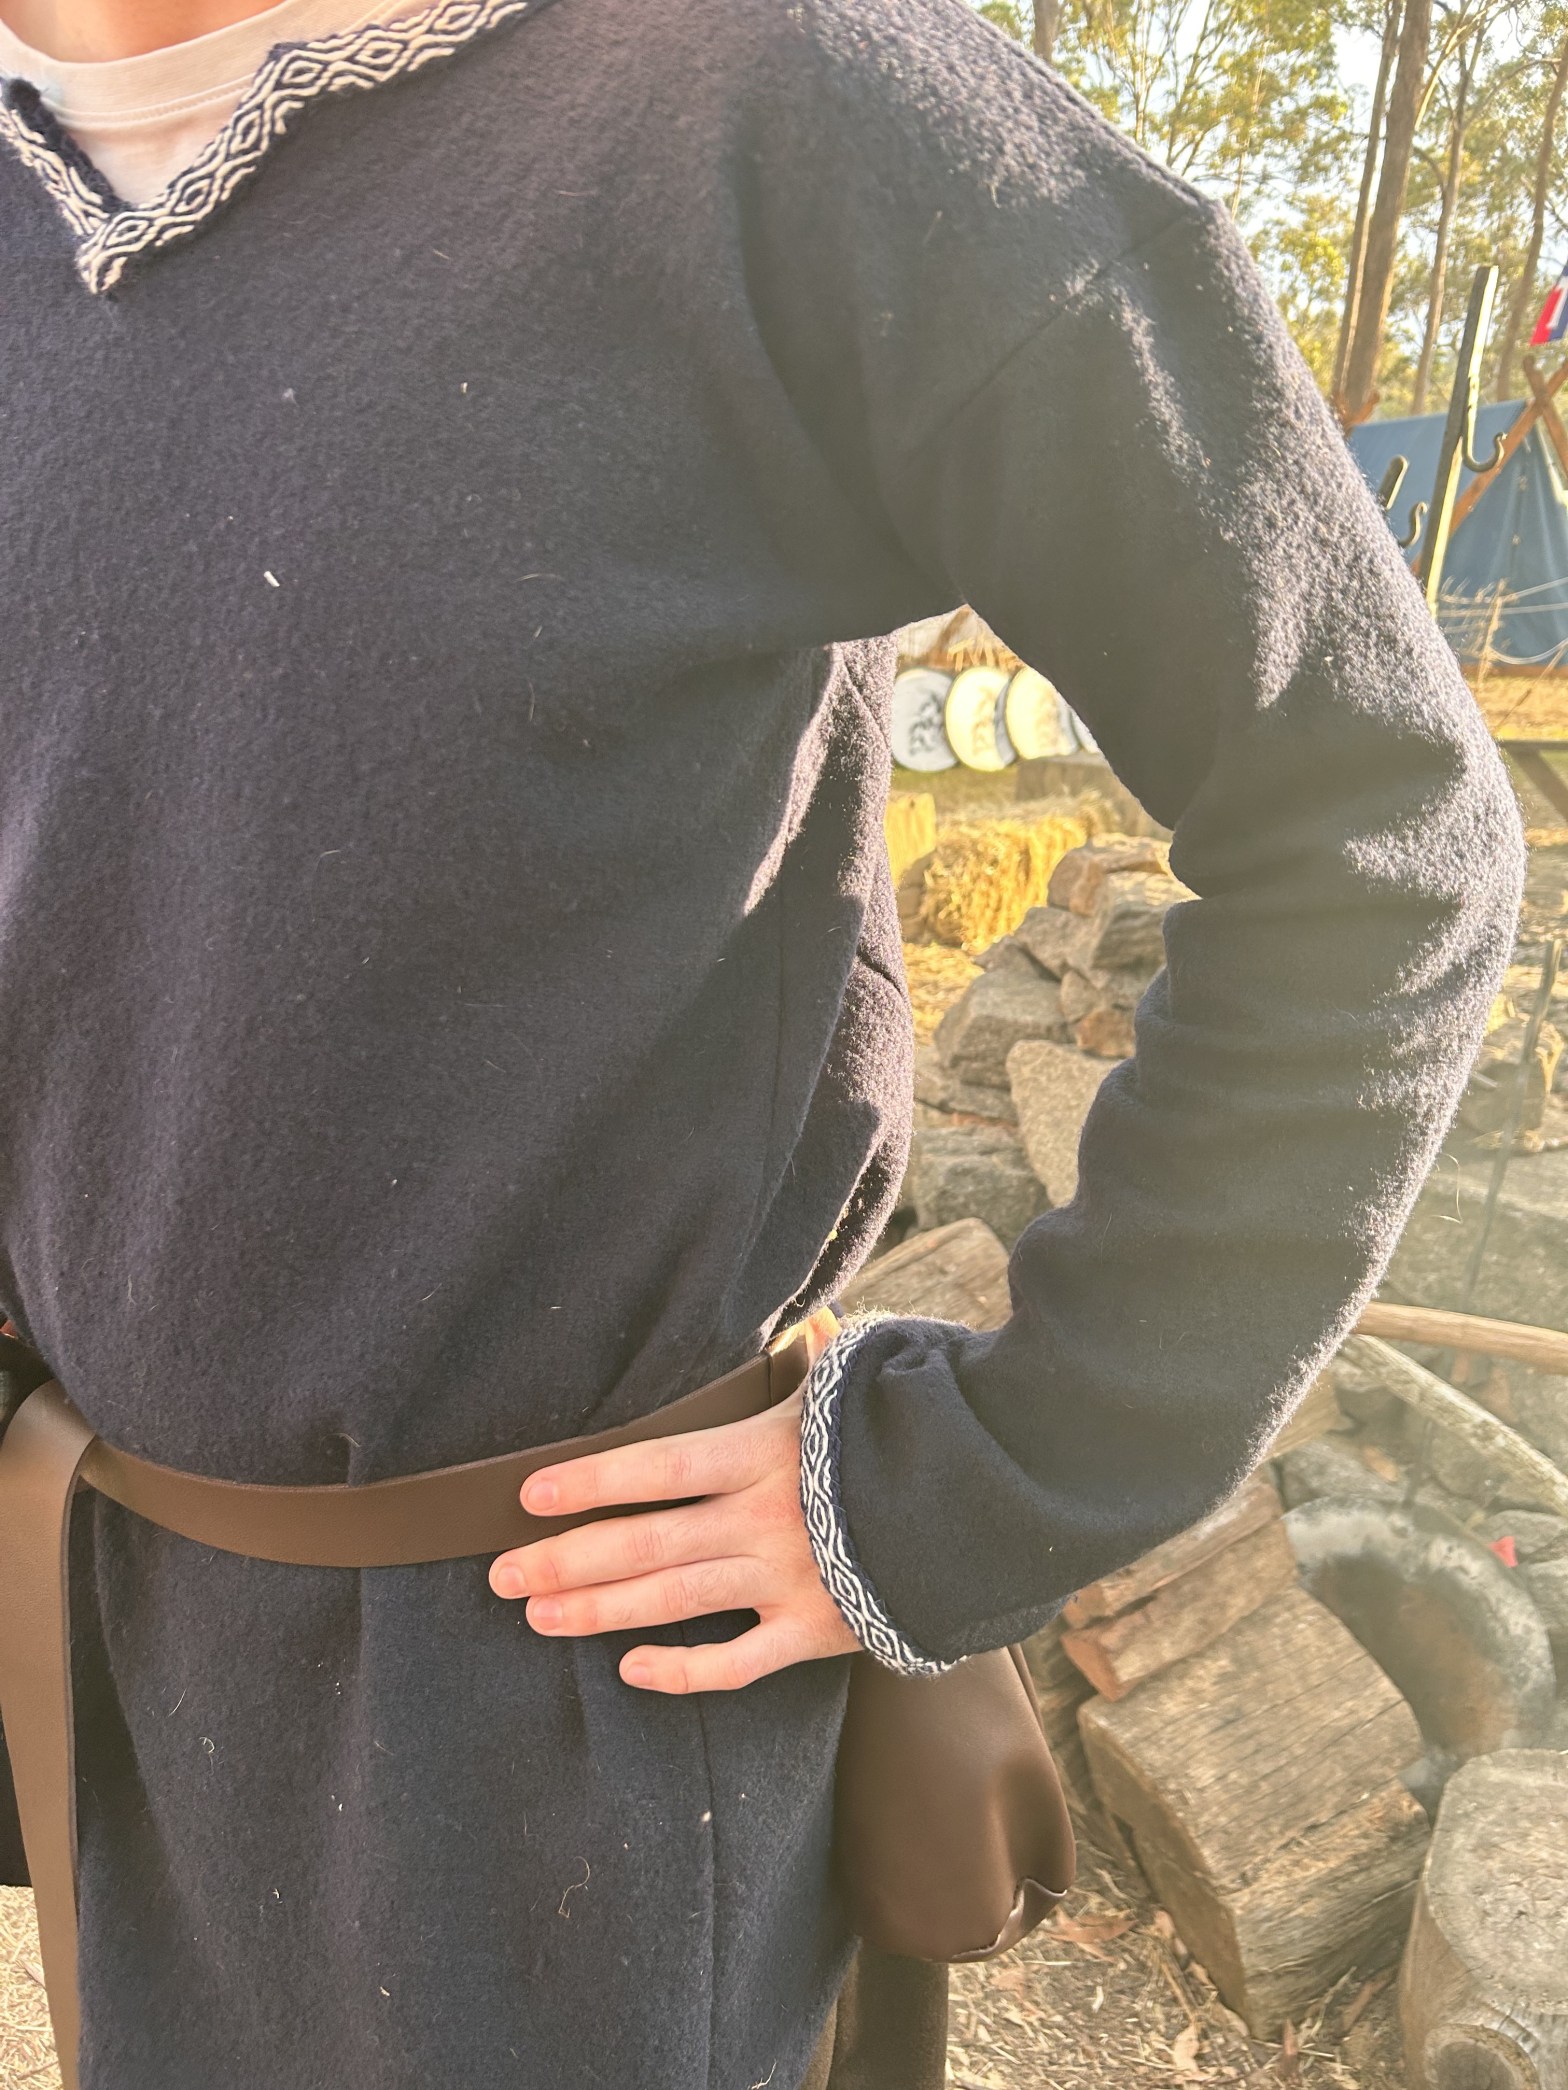
It is thought that – like many other Norse clothing items, that the coat was trimmed with either silk, or tablet woven trim.

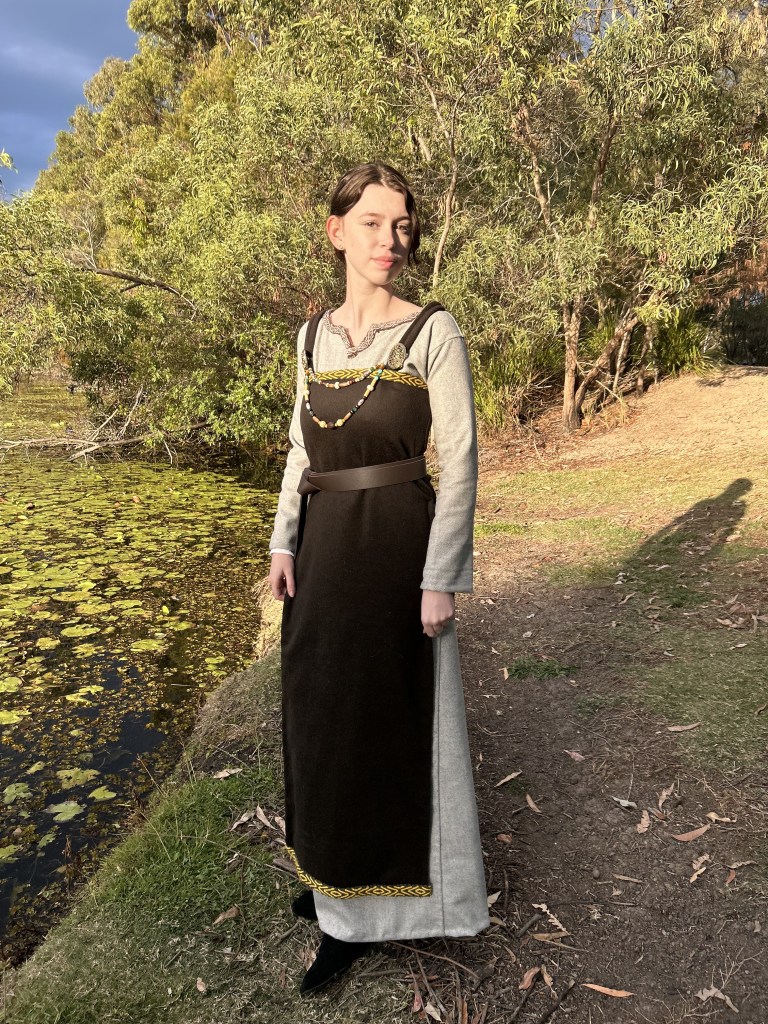
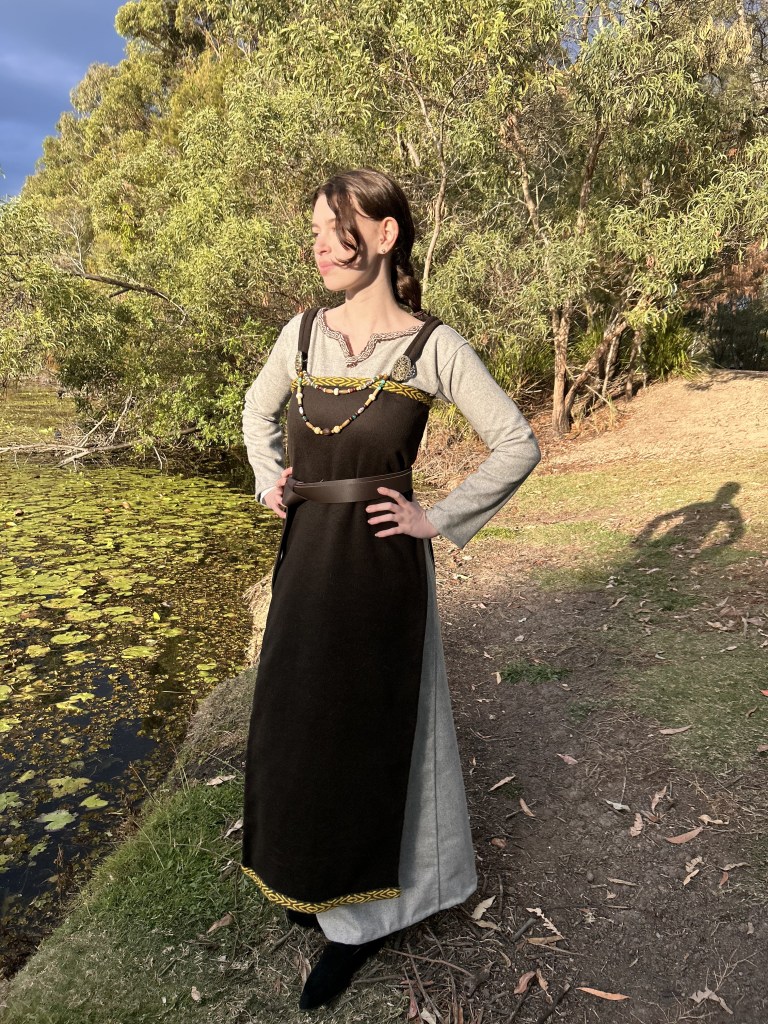
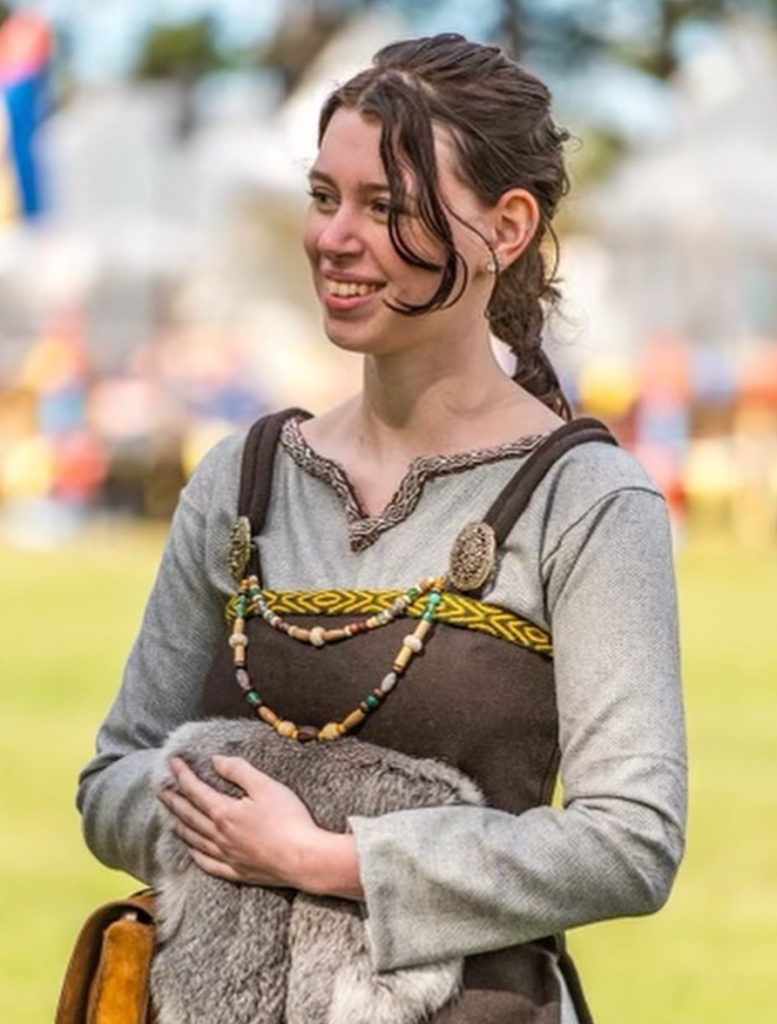
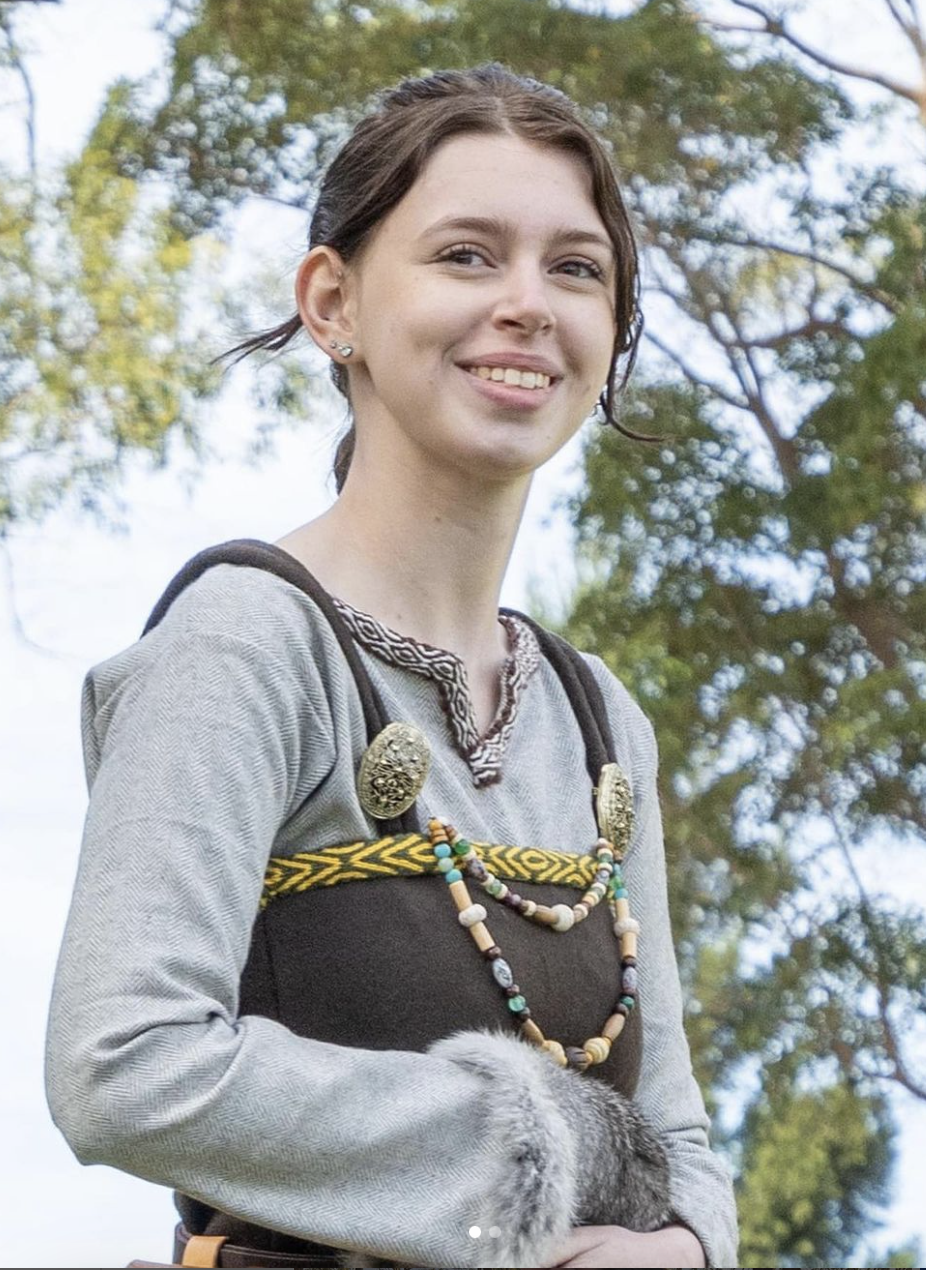
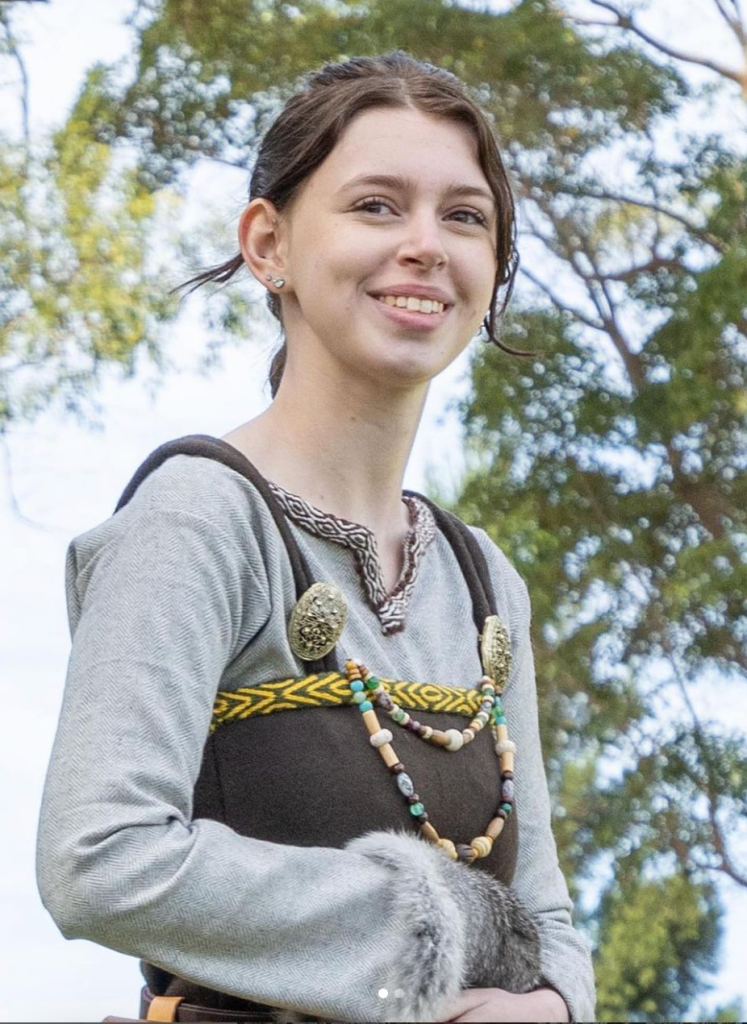
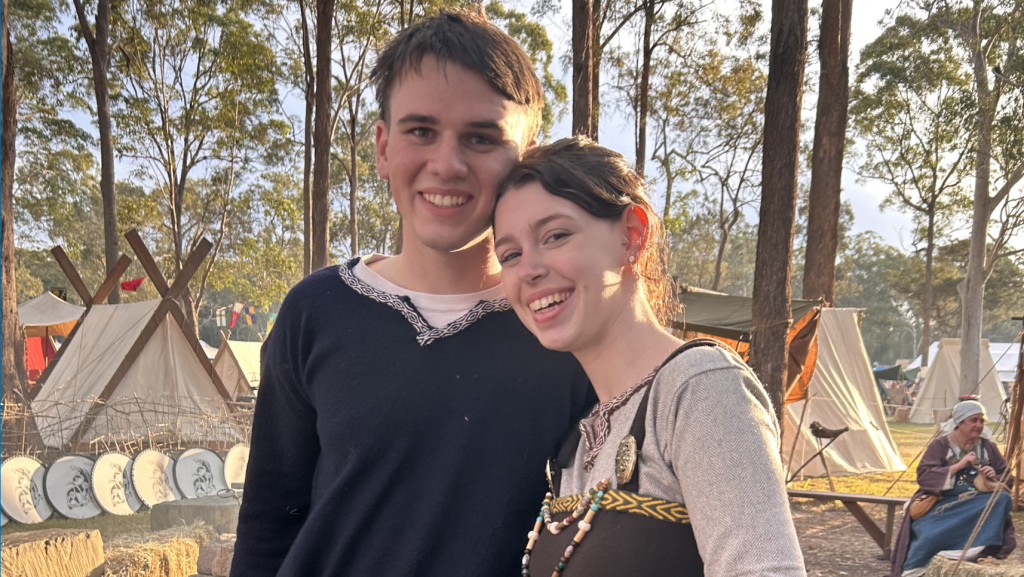
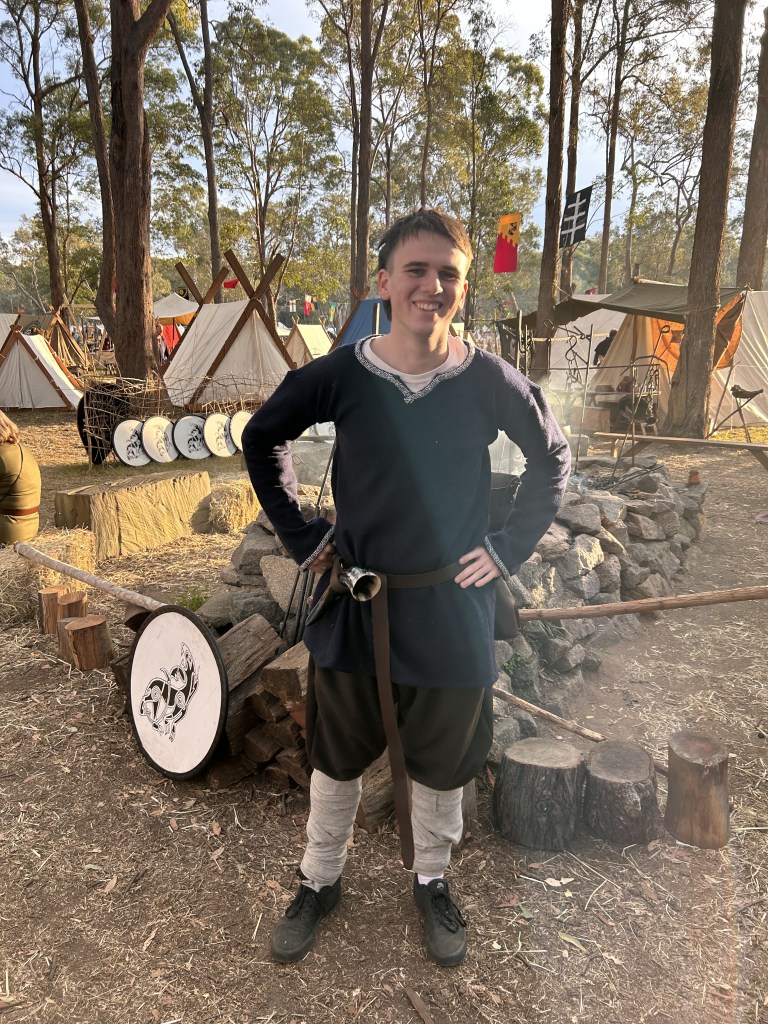
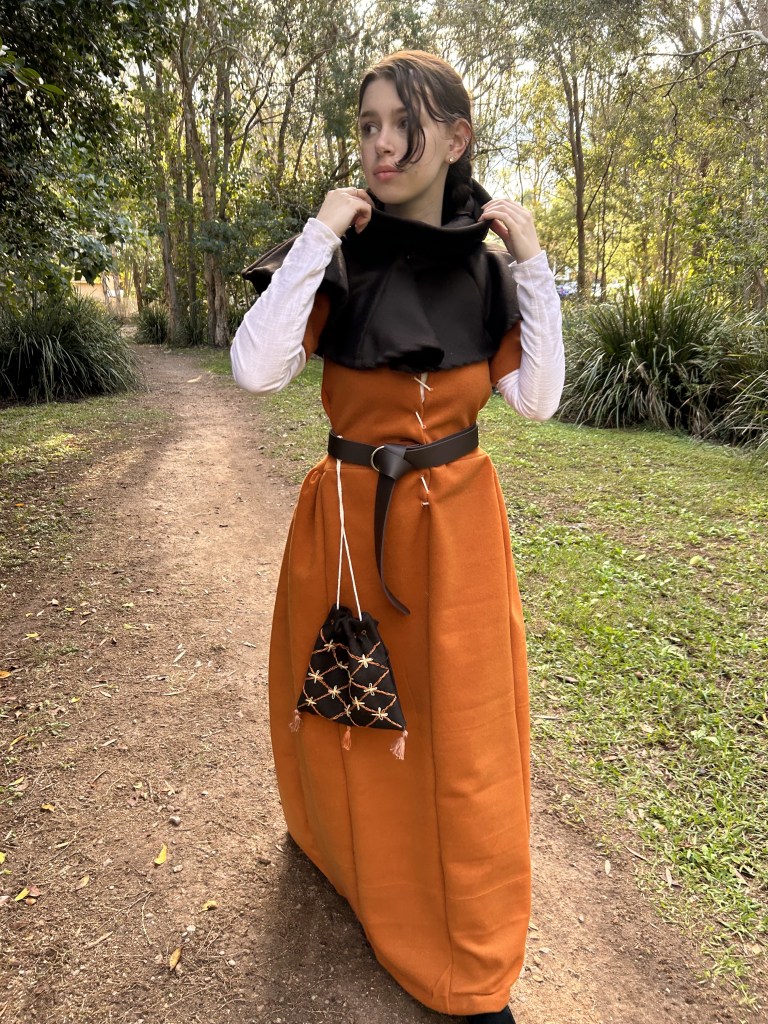
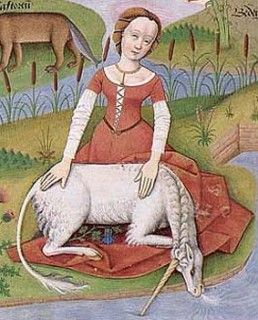
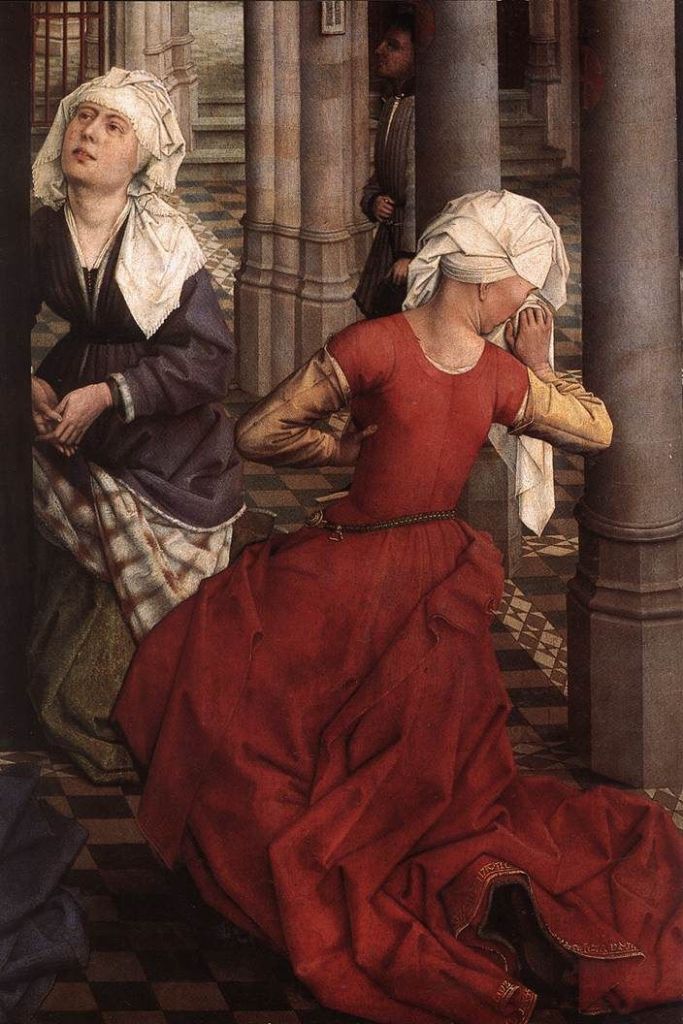
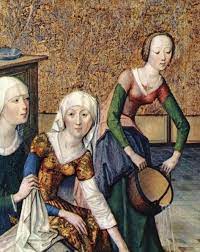
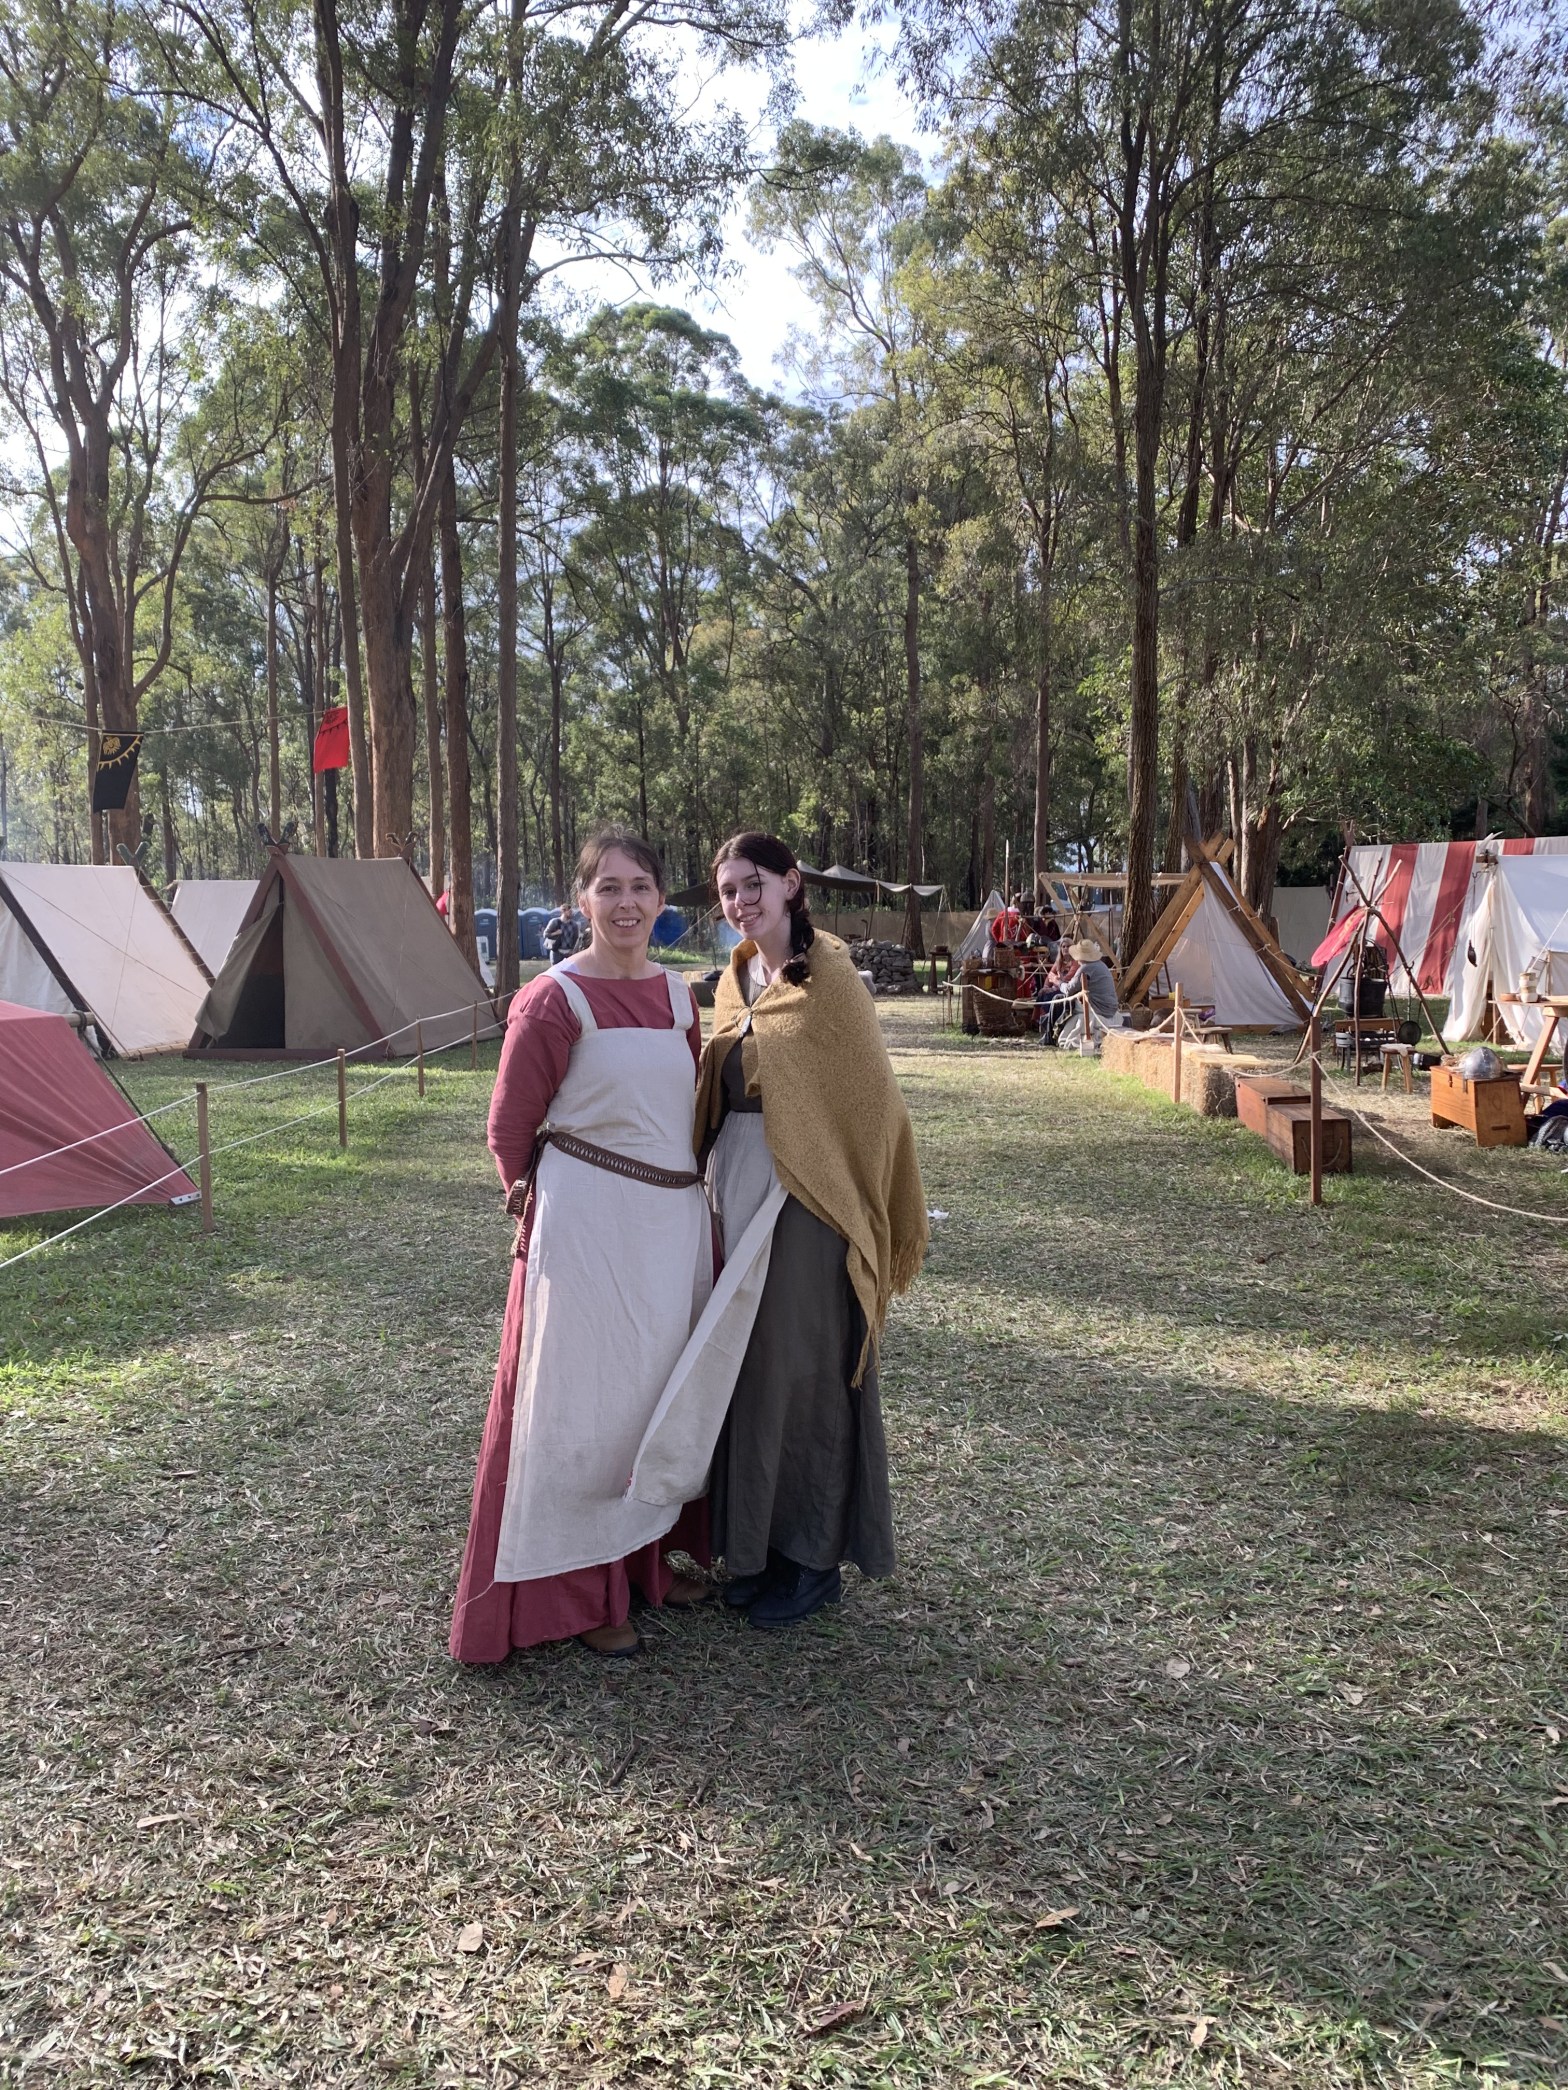
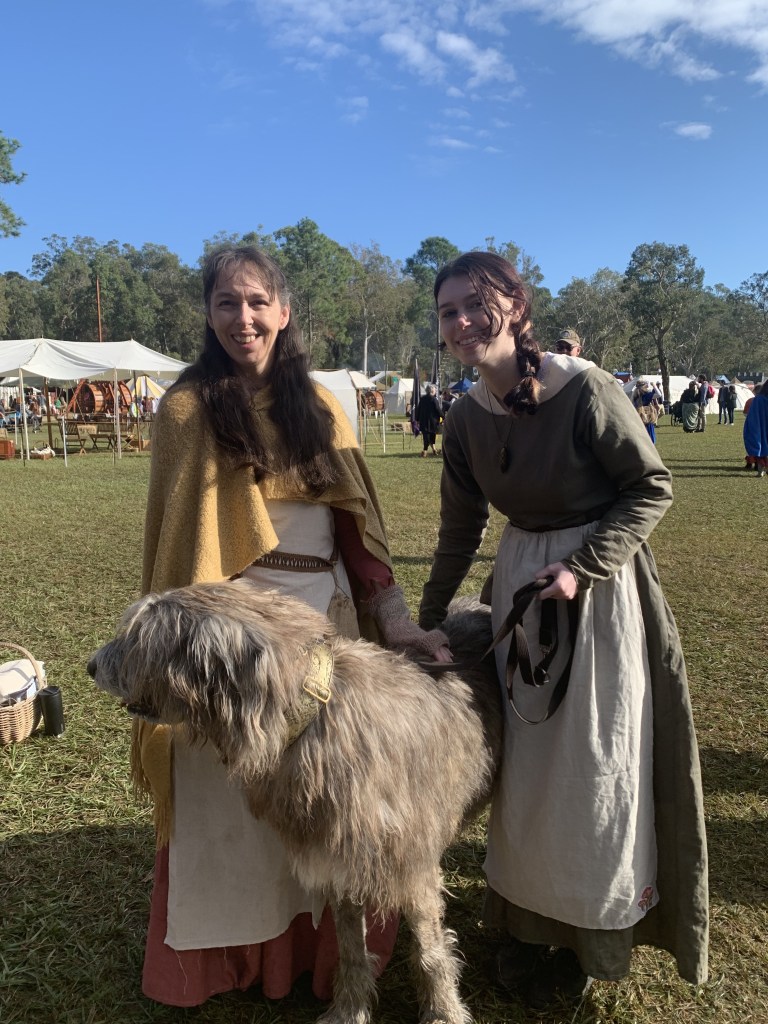
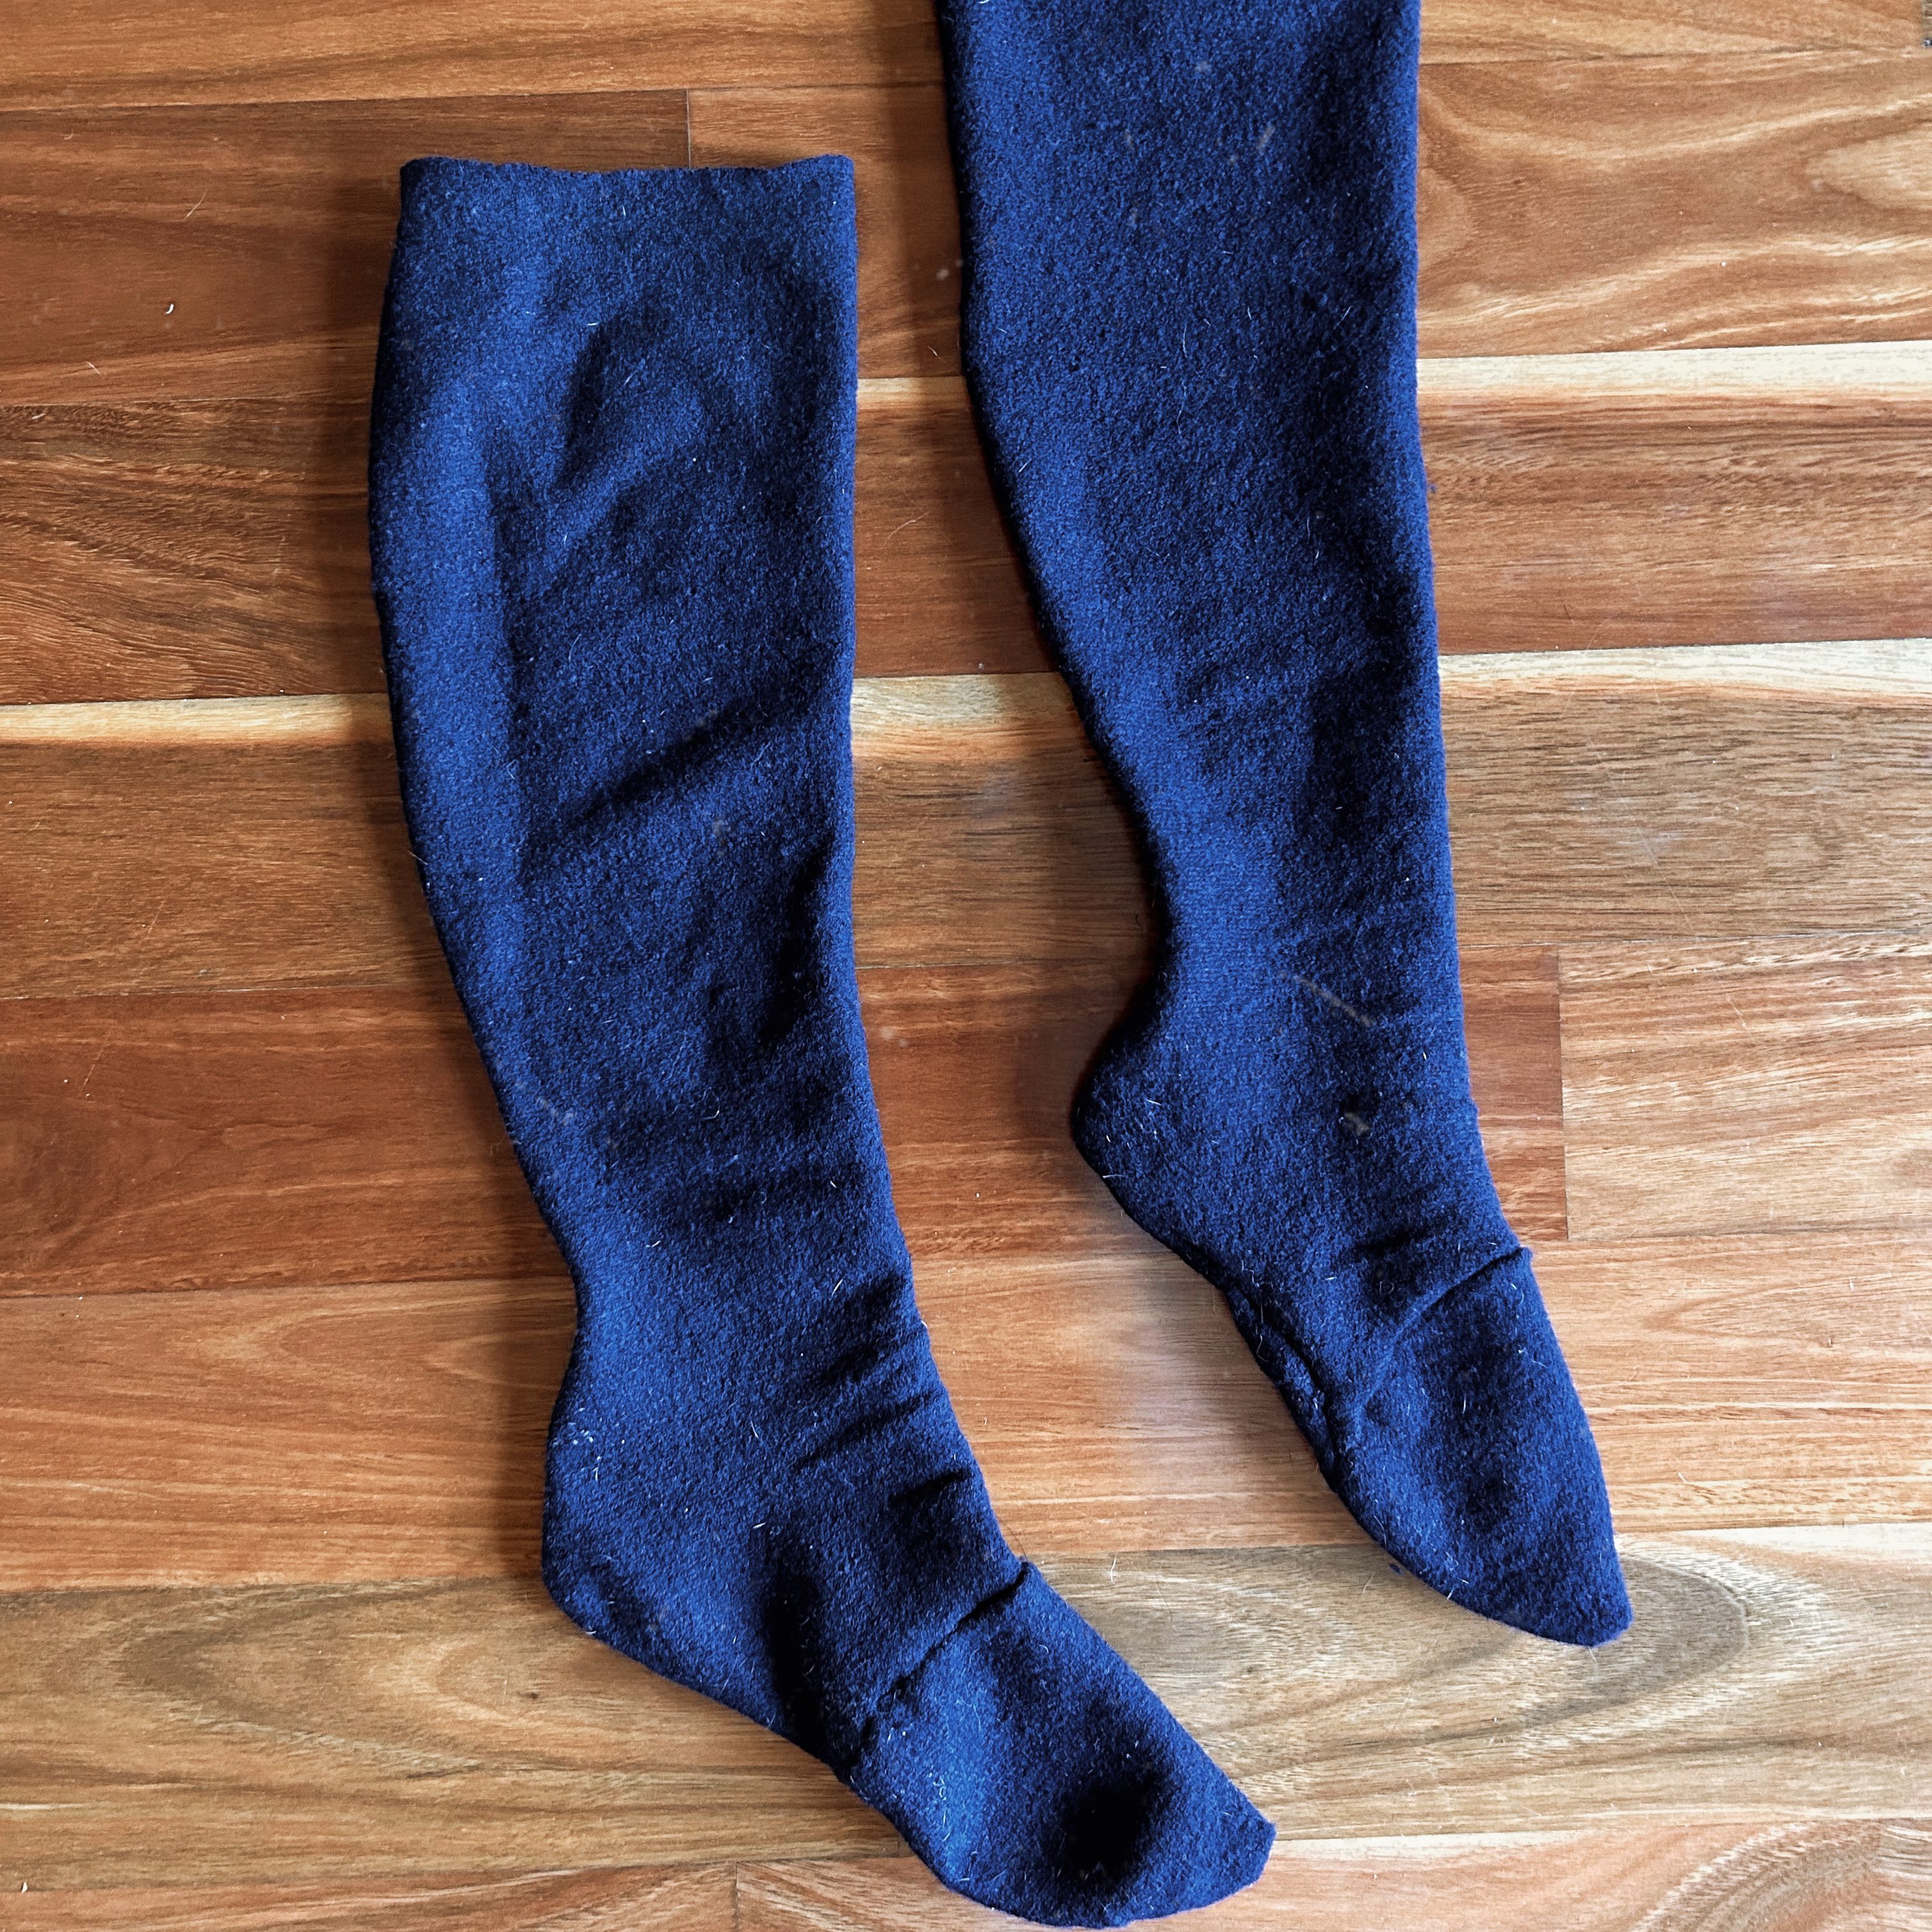
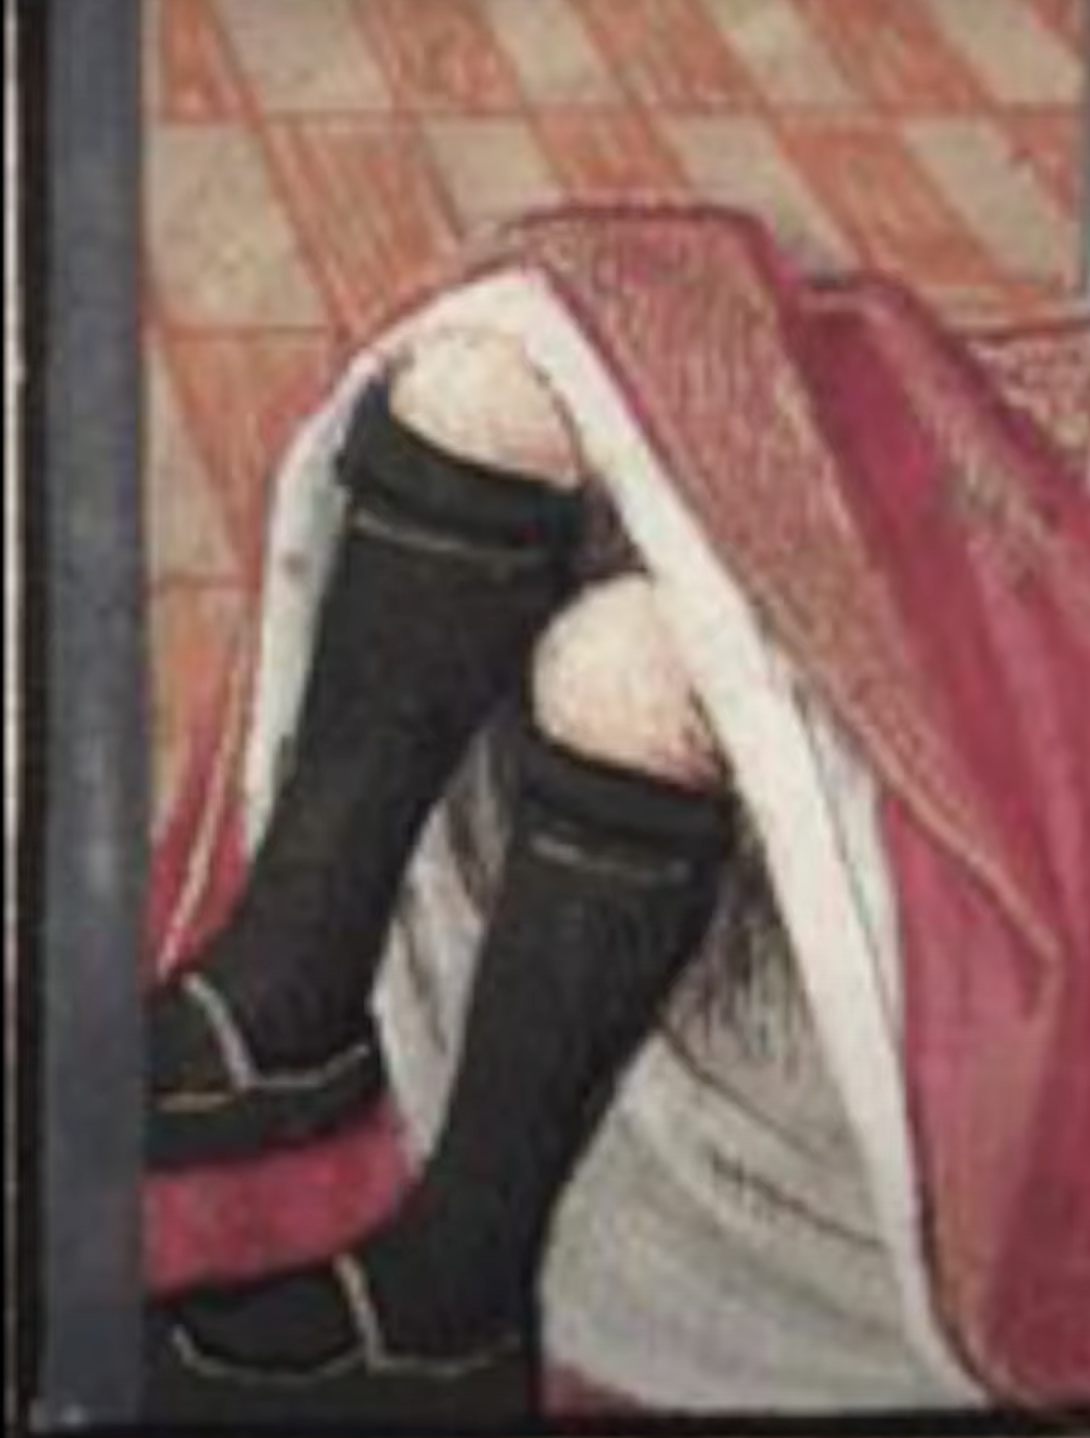
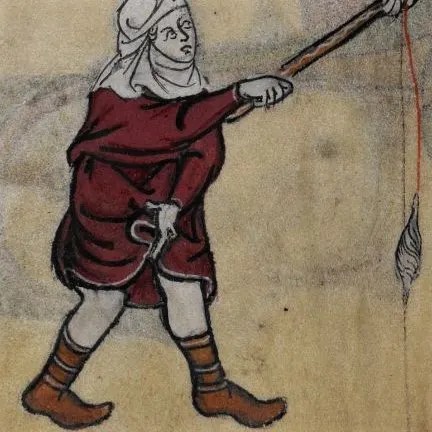
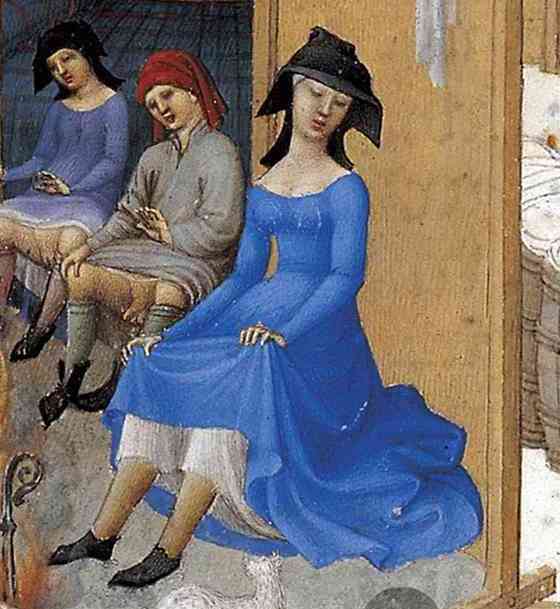
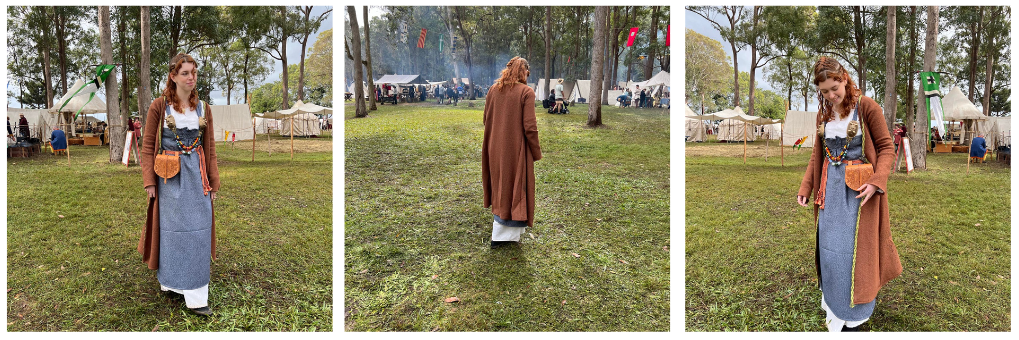
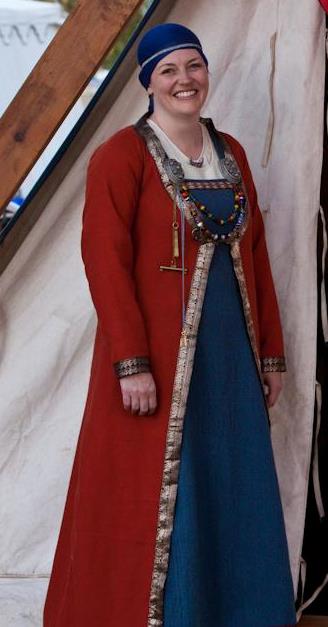
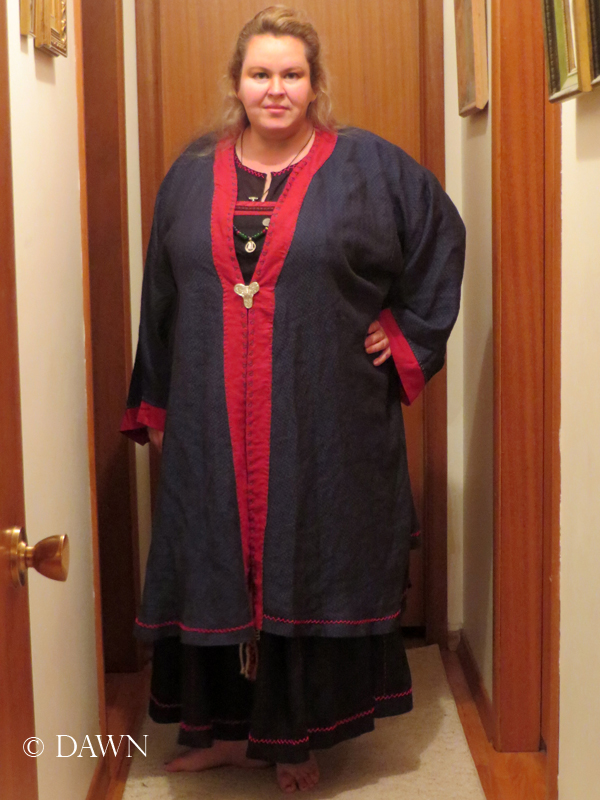
Unfortunately I couldn’t find any images from the Birka site, however I did find a bunch of gorgeous recreations made by other people in the community.

Tutorial

Measurements

For this project you will need…

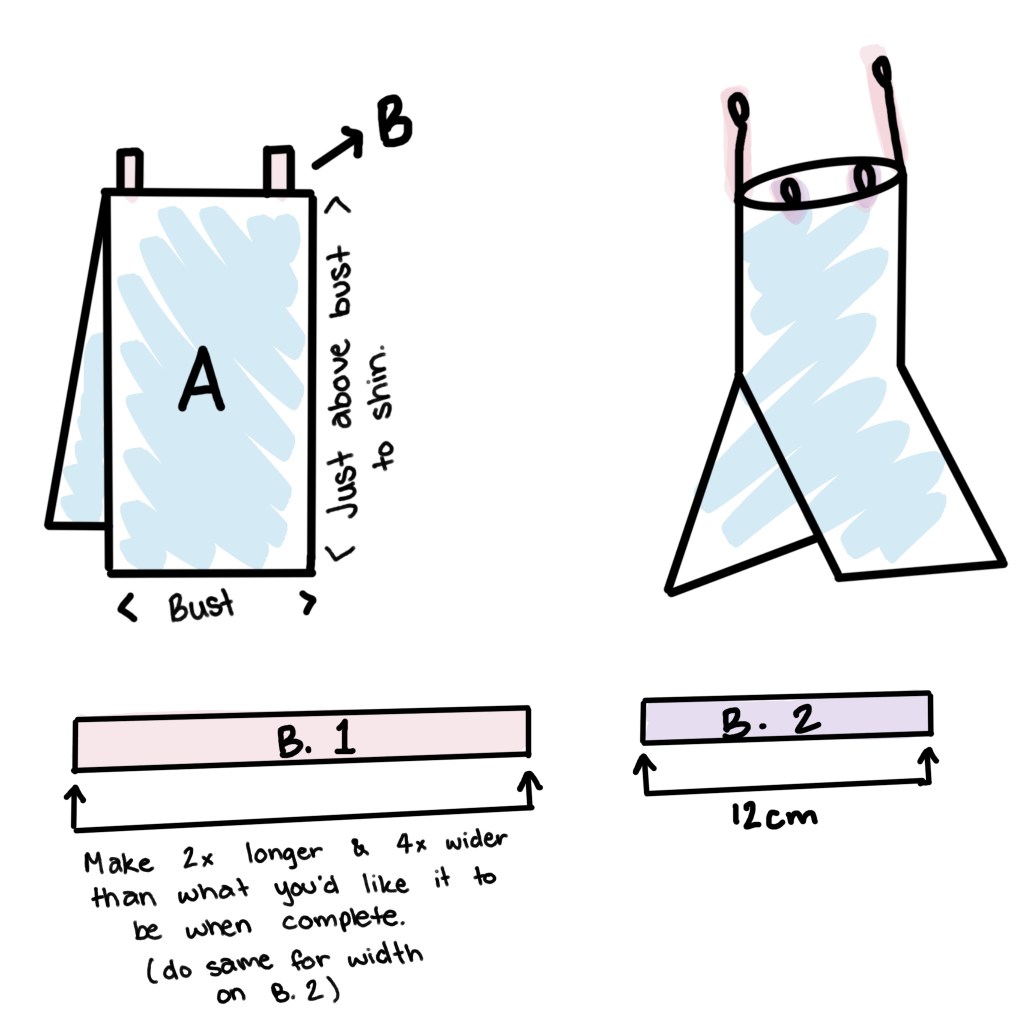
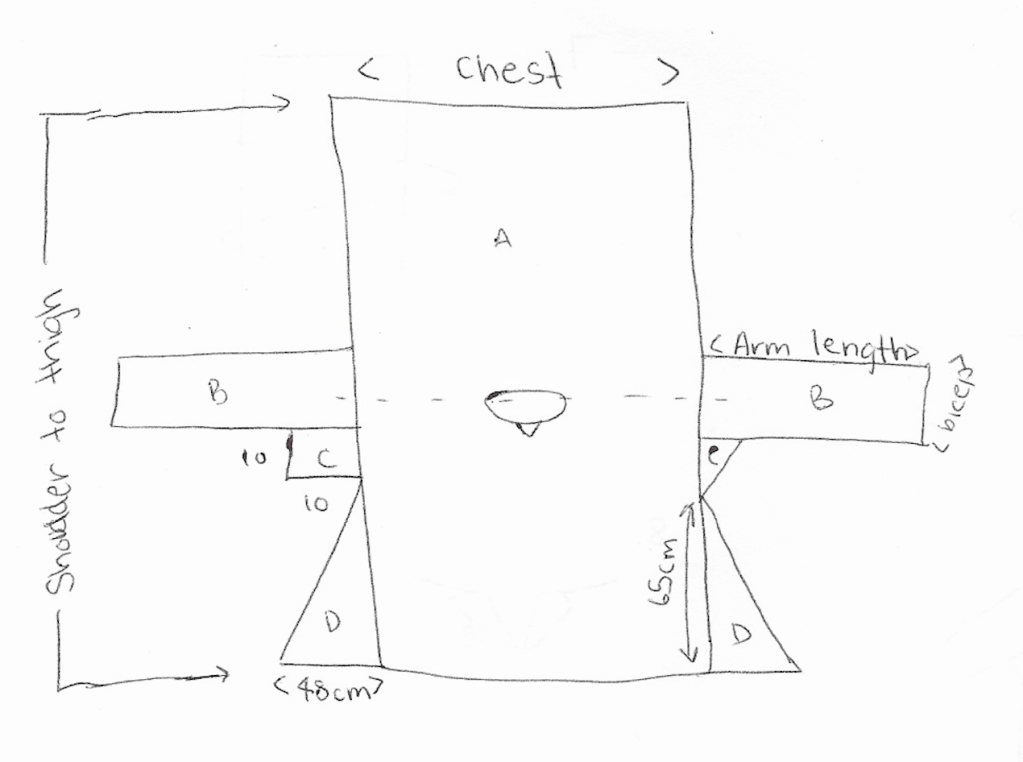
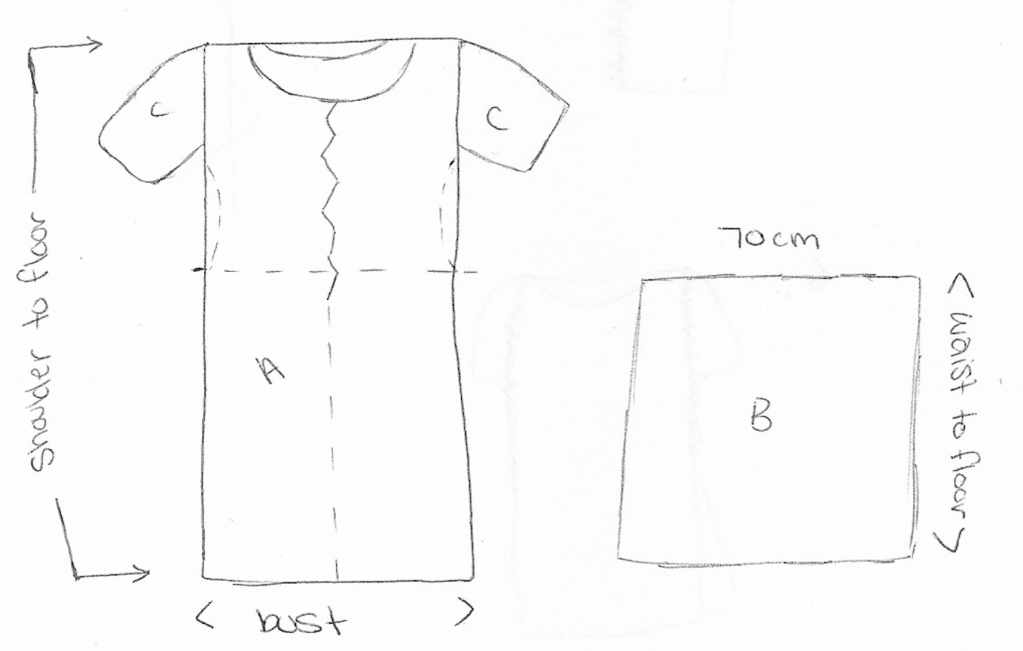
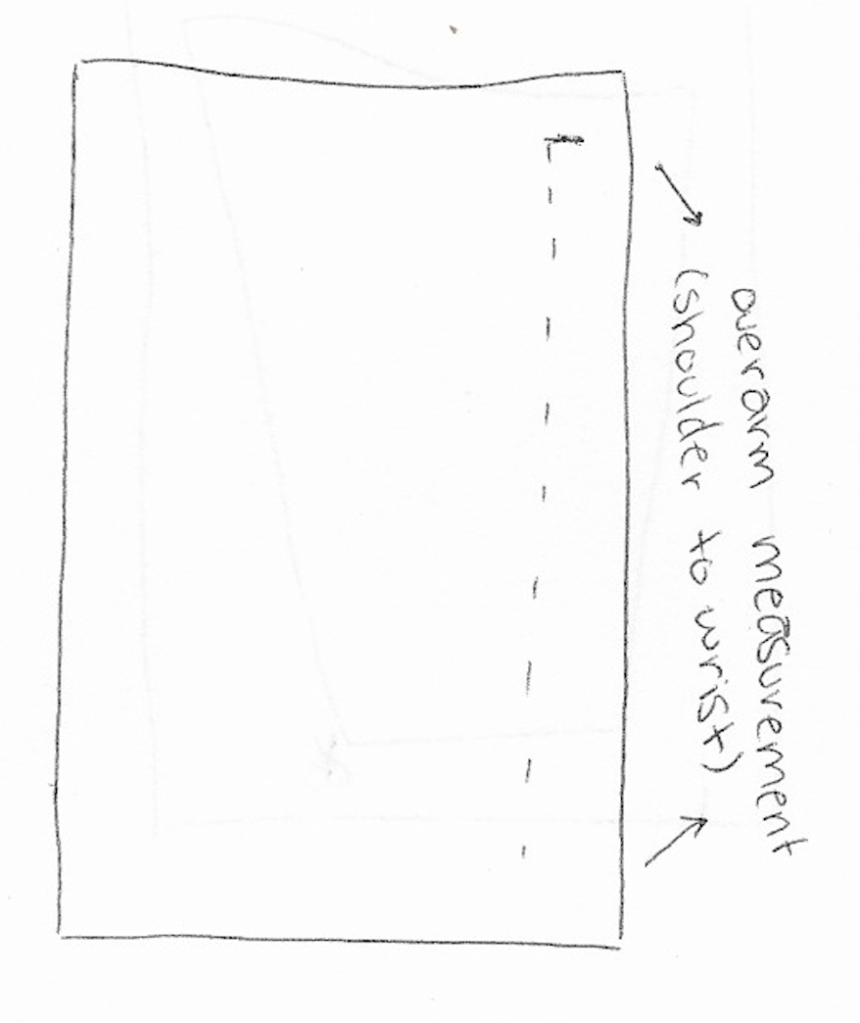
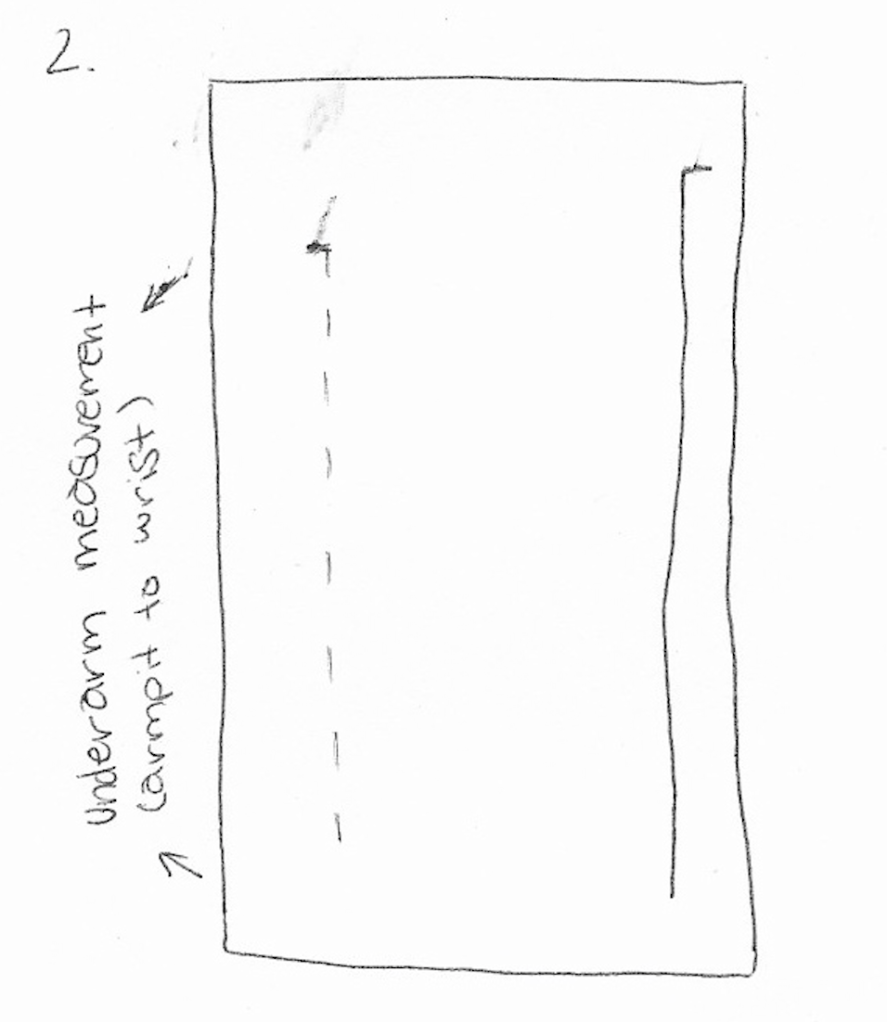
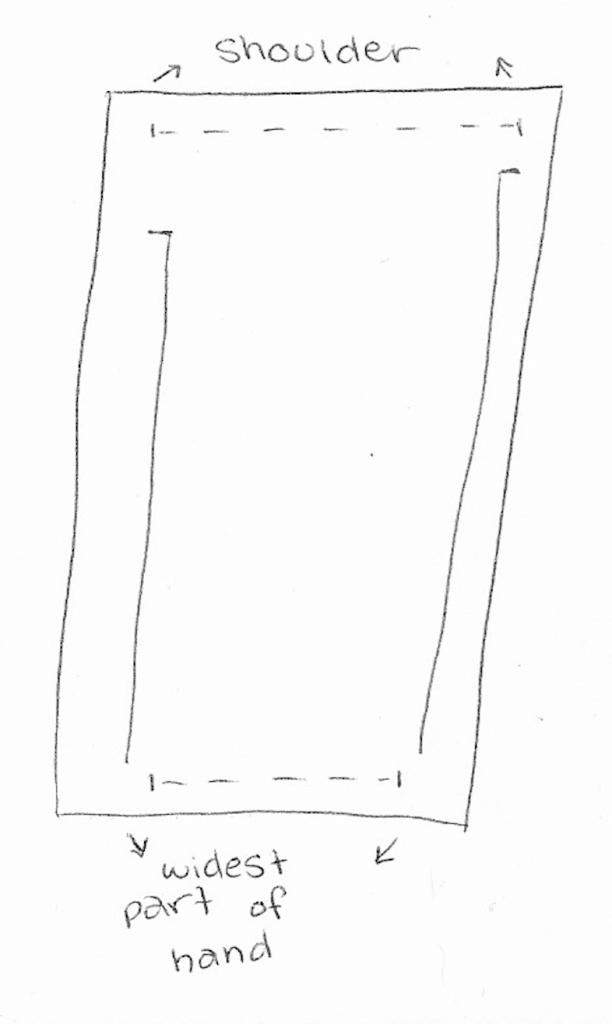
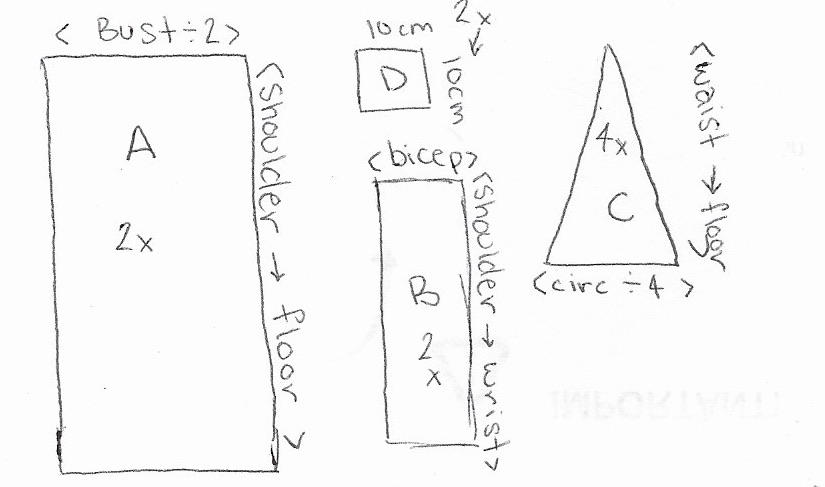
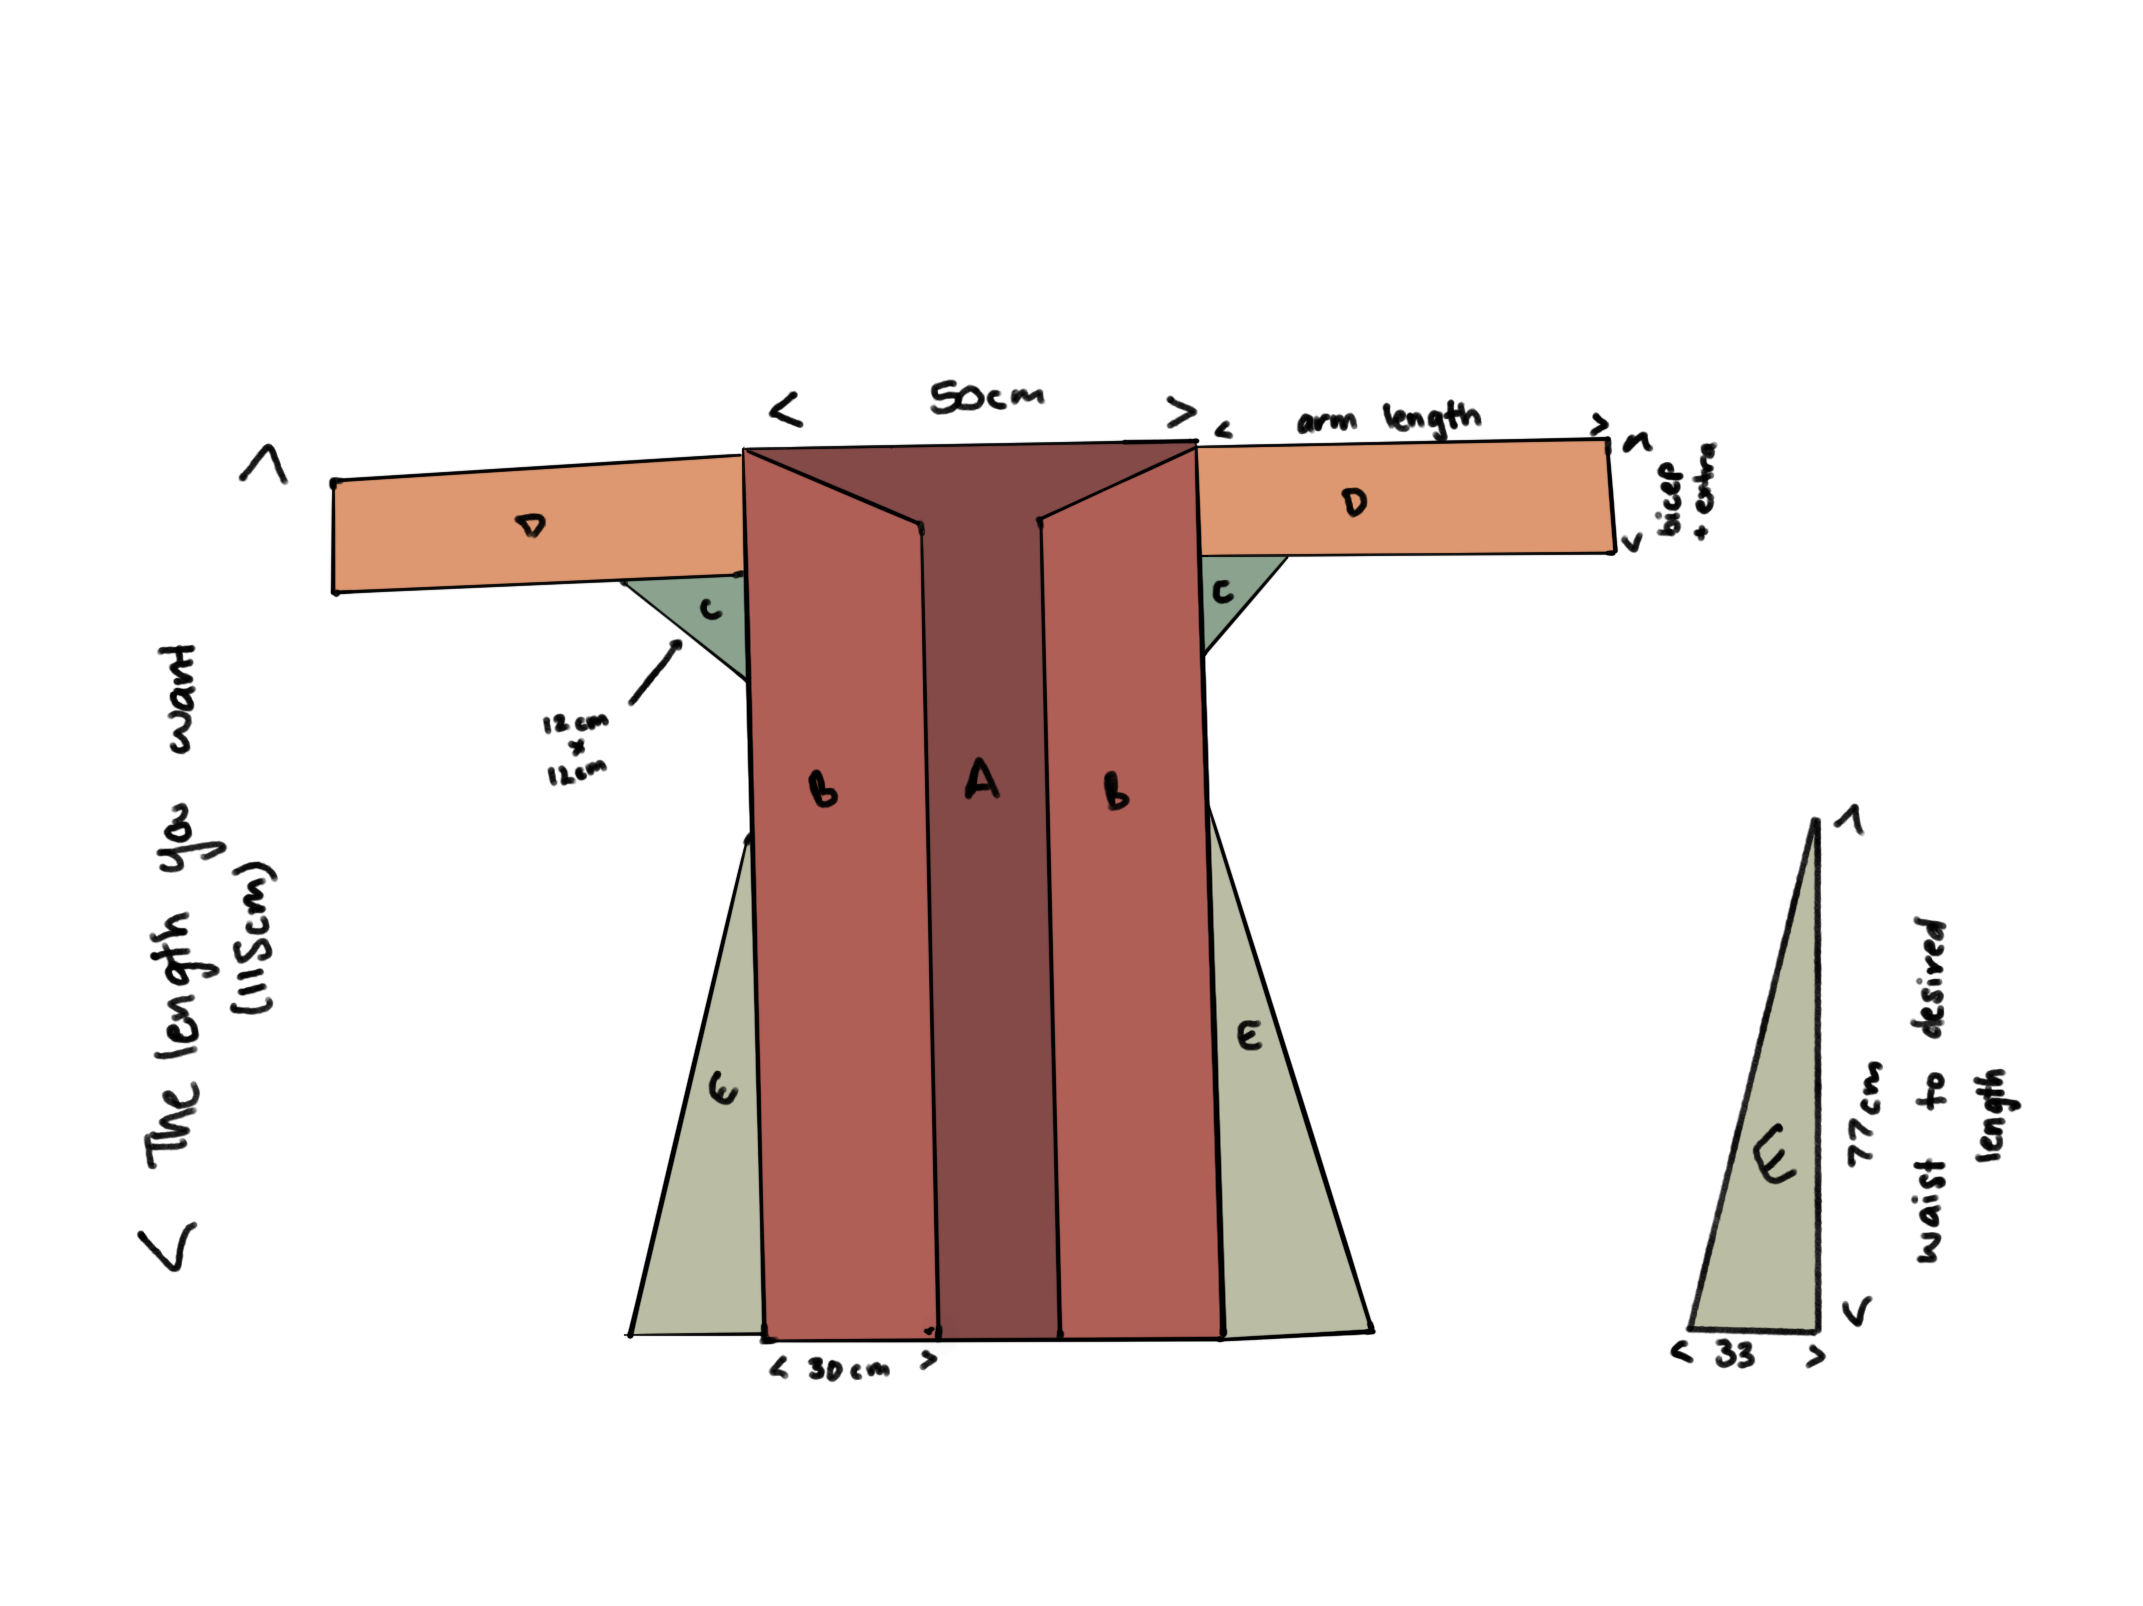
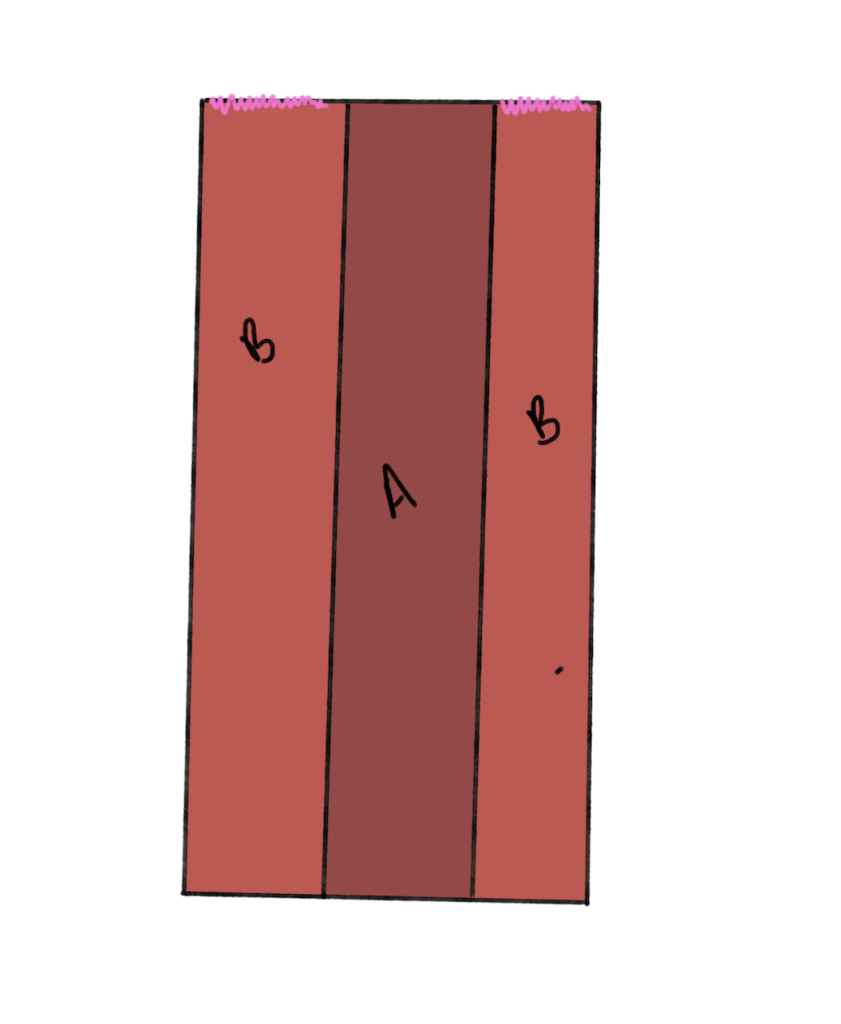
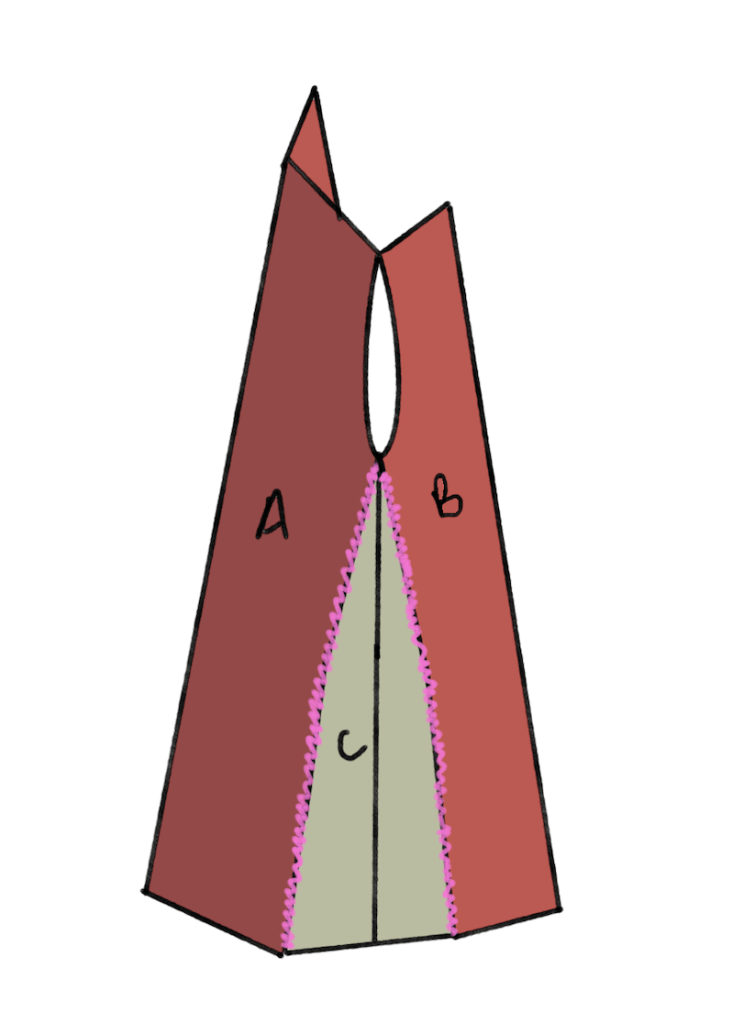
Bust: Measure your full bust divided in half, this number will be the width of your back piece (pattern piece A). Divide your half bust measurement in half again, then add a little extra – I added an extra 10cm to this number, this will be the front half of your coat (pattern piece B) you will need 2 of these rectangles

Shoulder to mid calf: (or how ever long you want your coat to be).

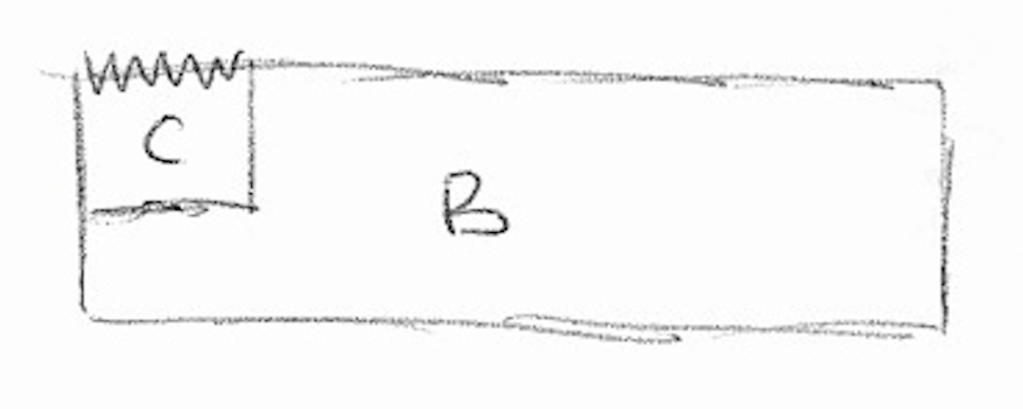
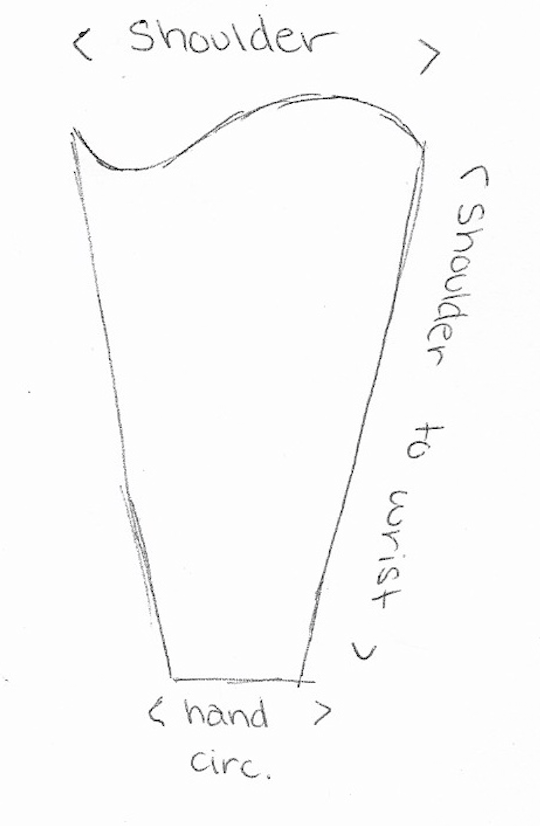
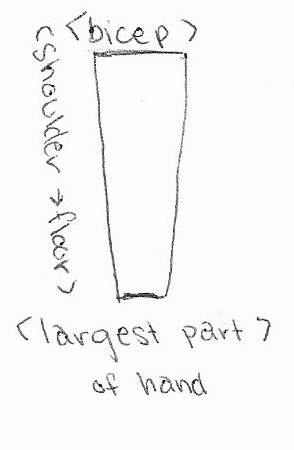
Bicep: Make sure to flex those muscles when measuring ๐Ÿ˜‰ this will be your width for the sleeve (pattern piece C), if you’re planning on wearing your coat over multiple layers, make this measurement bigger.

Shoulder to wrist: This will be the length of your sleeve (pattern piece C)

Waist to desired coat length: This will help make your gores, you can choose however wide you want them to be, I went with 35cm roughly.

*HOT TIP* don’t forget to add seam allowance to all these measurements!
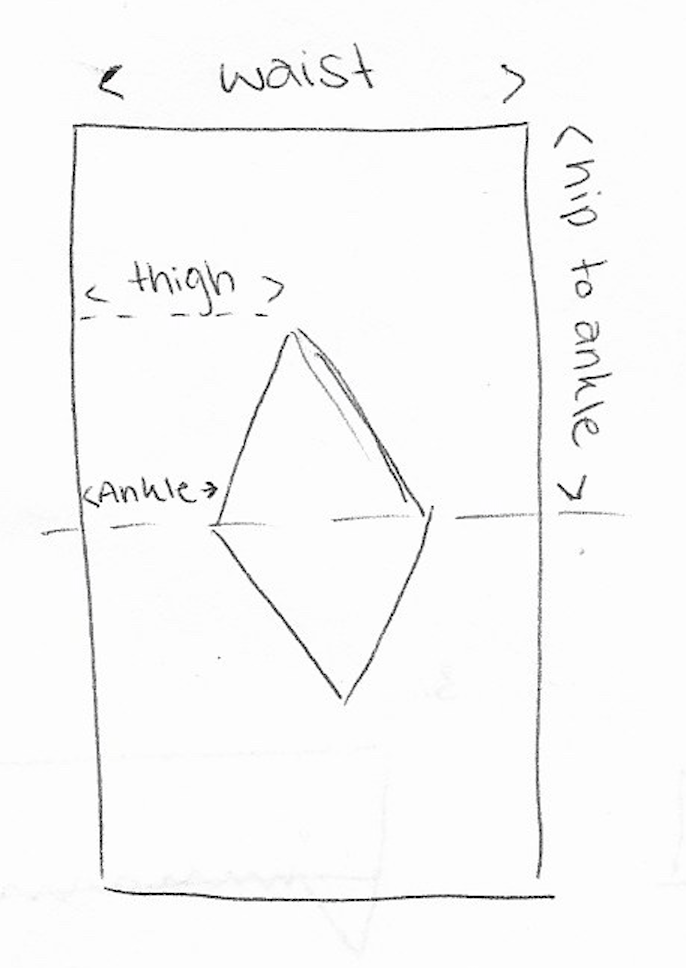
Pattern Layout

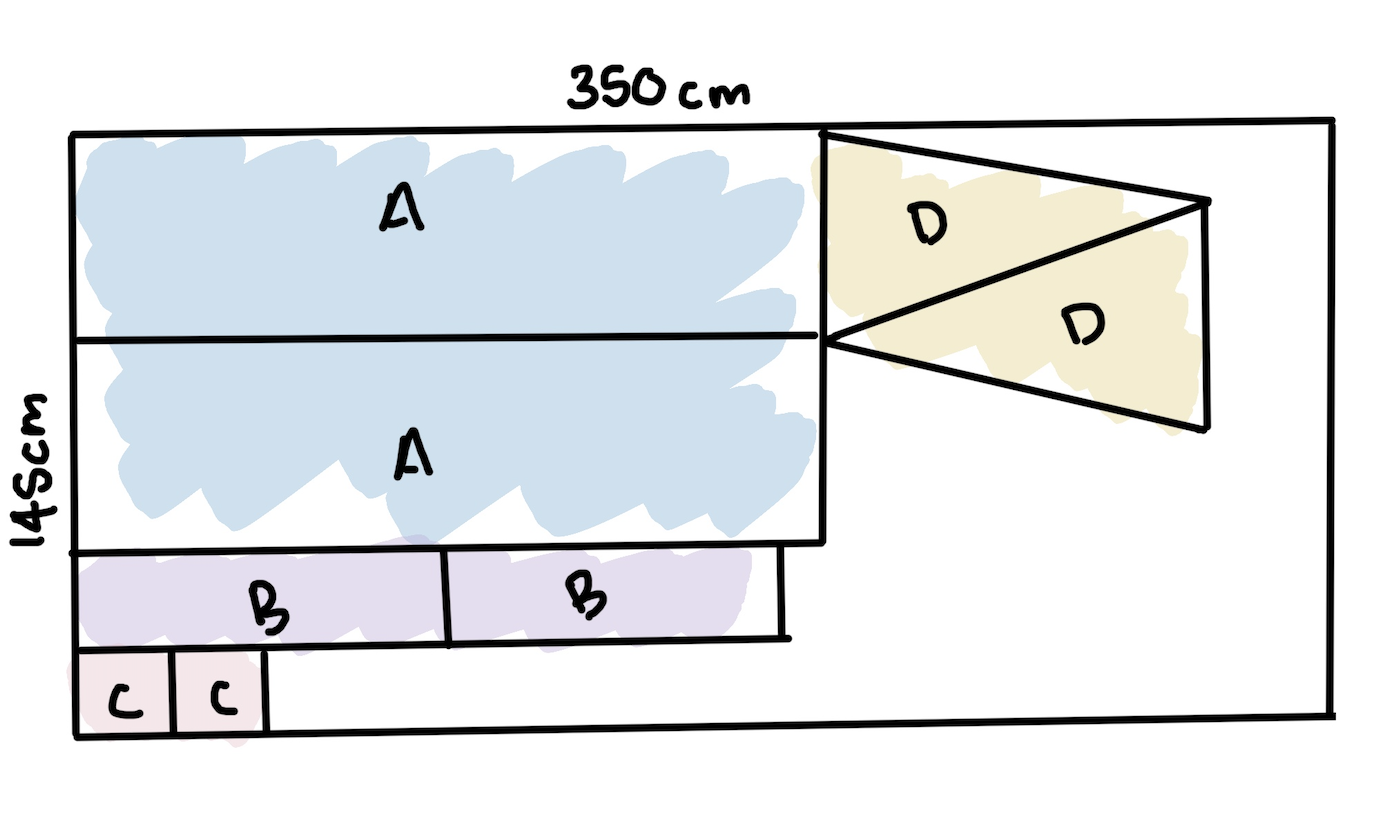
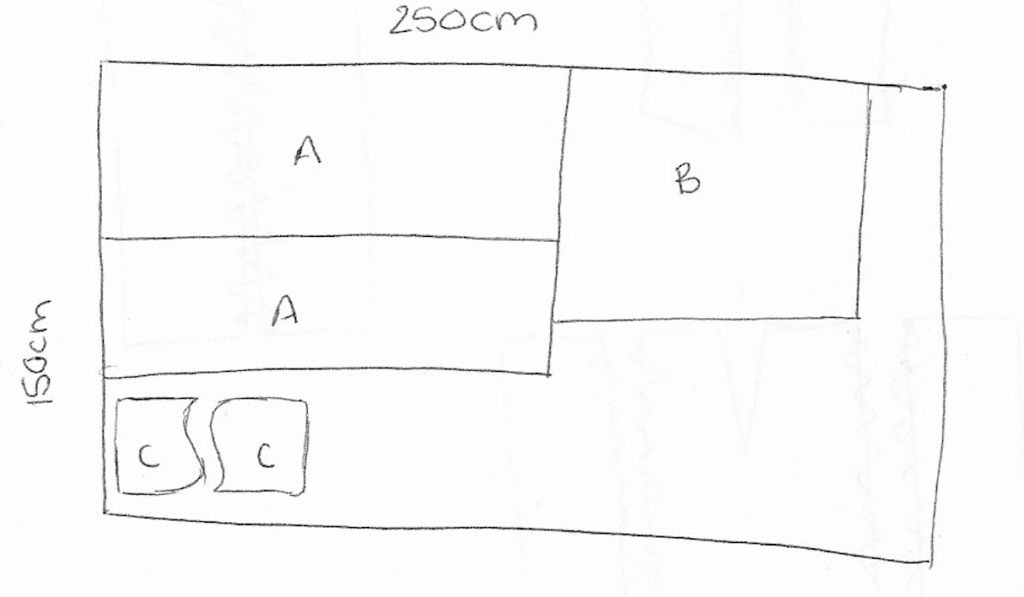
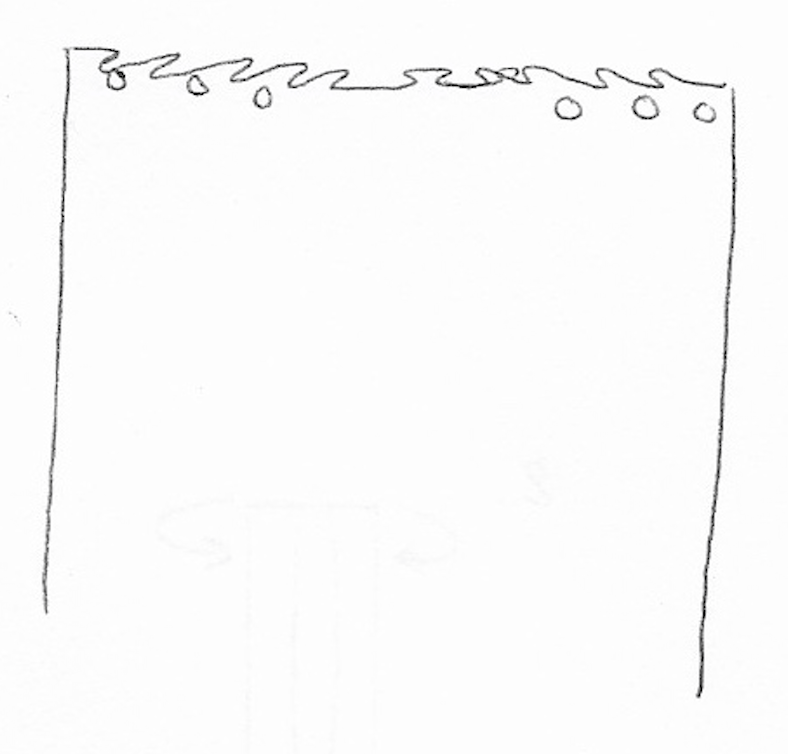
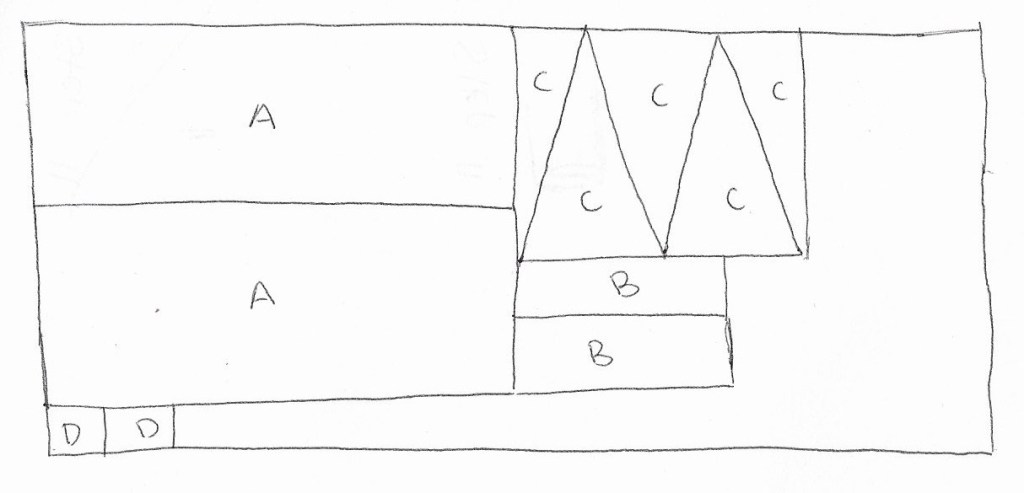
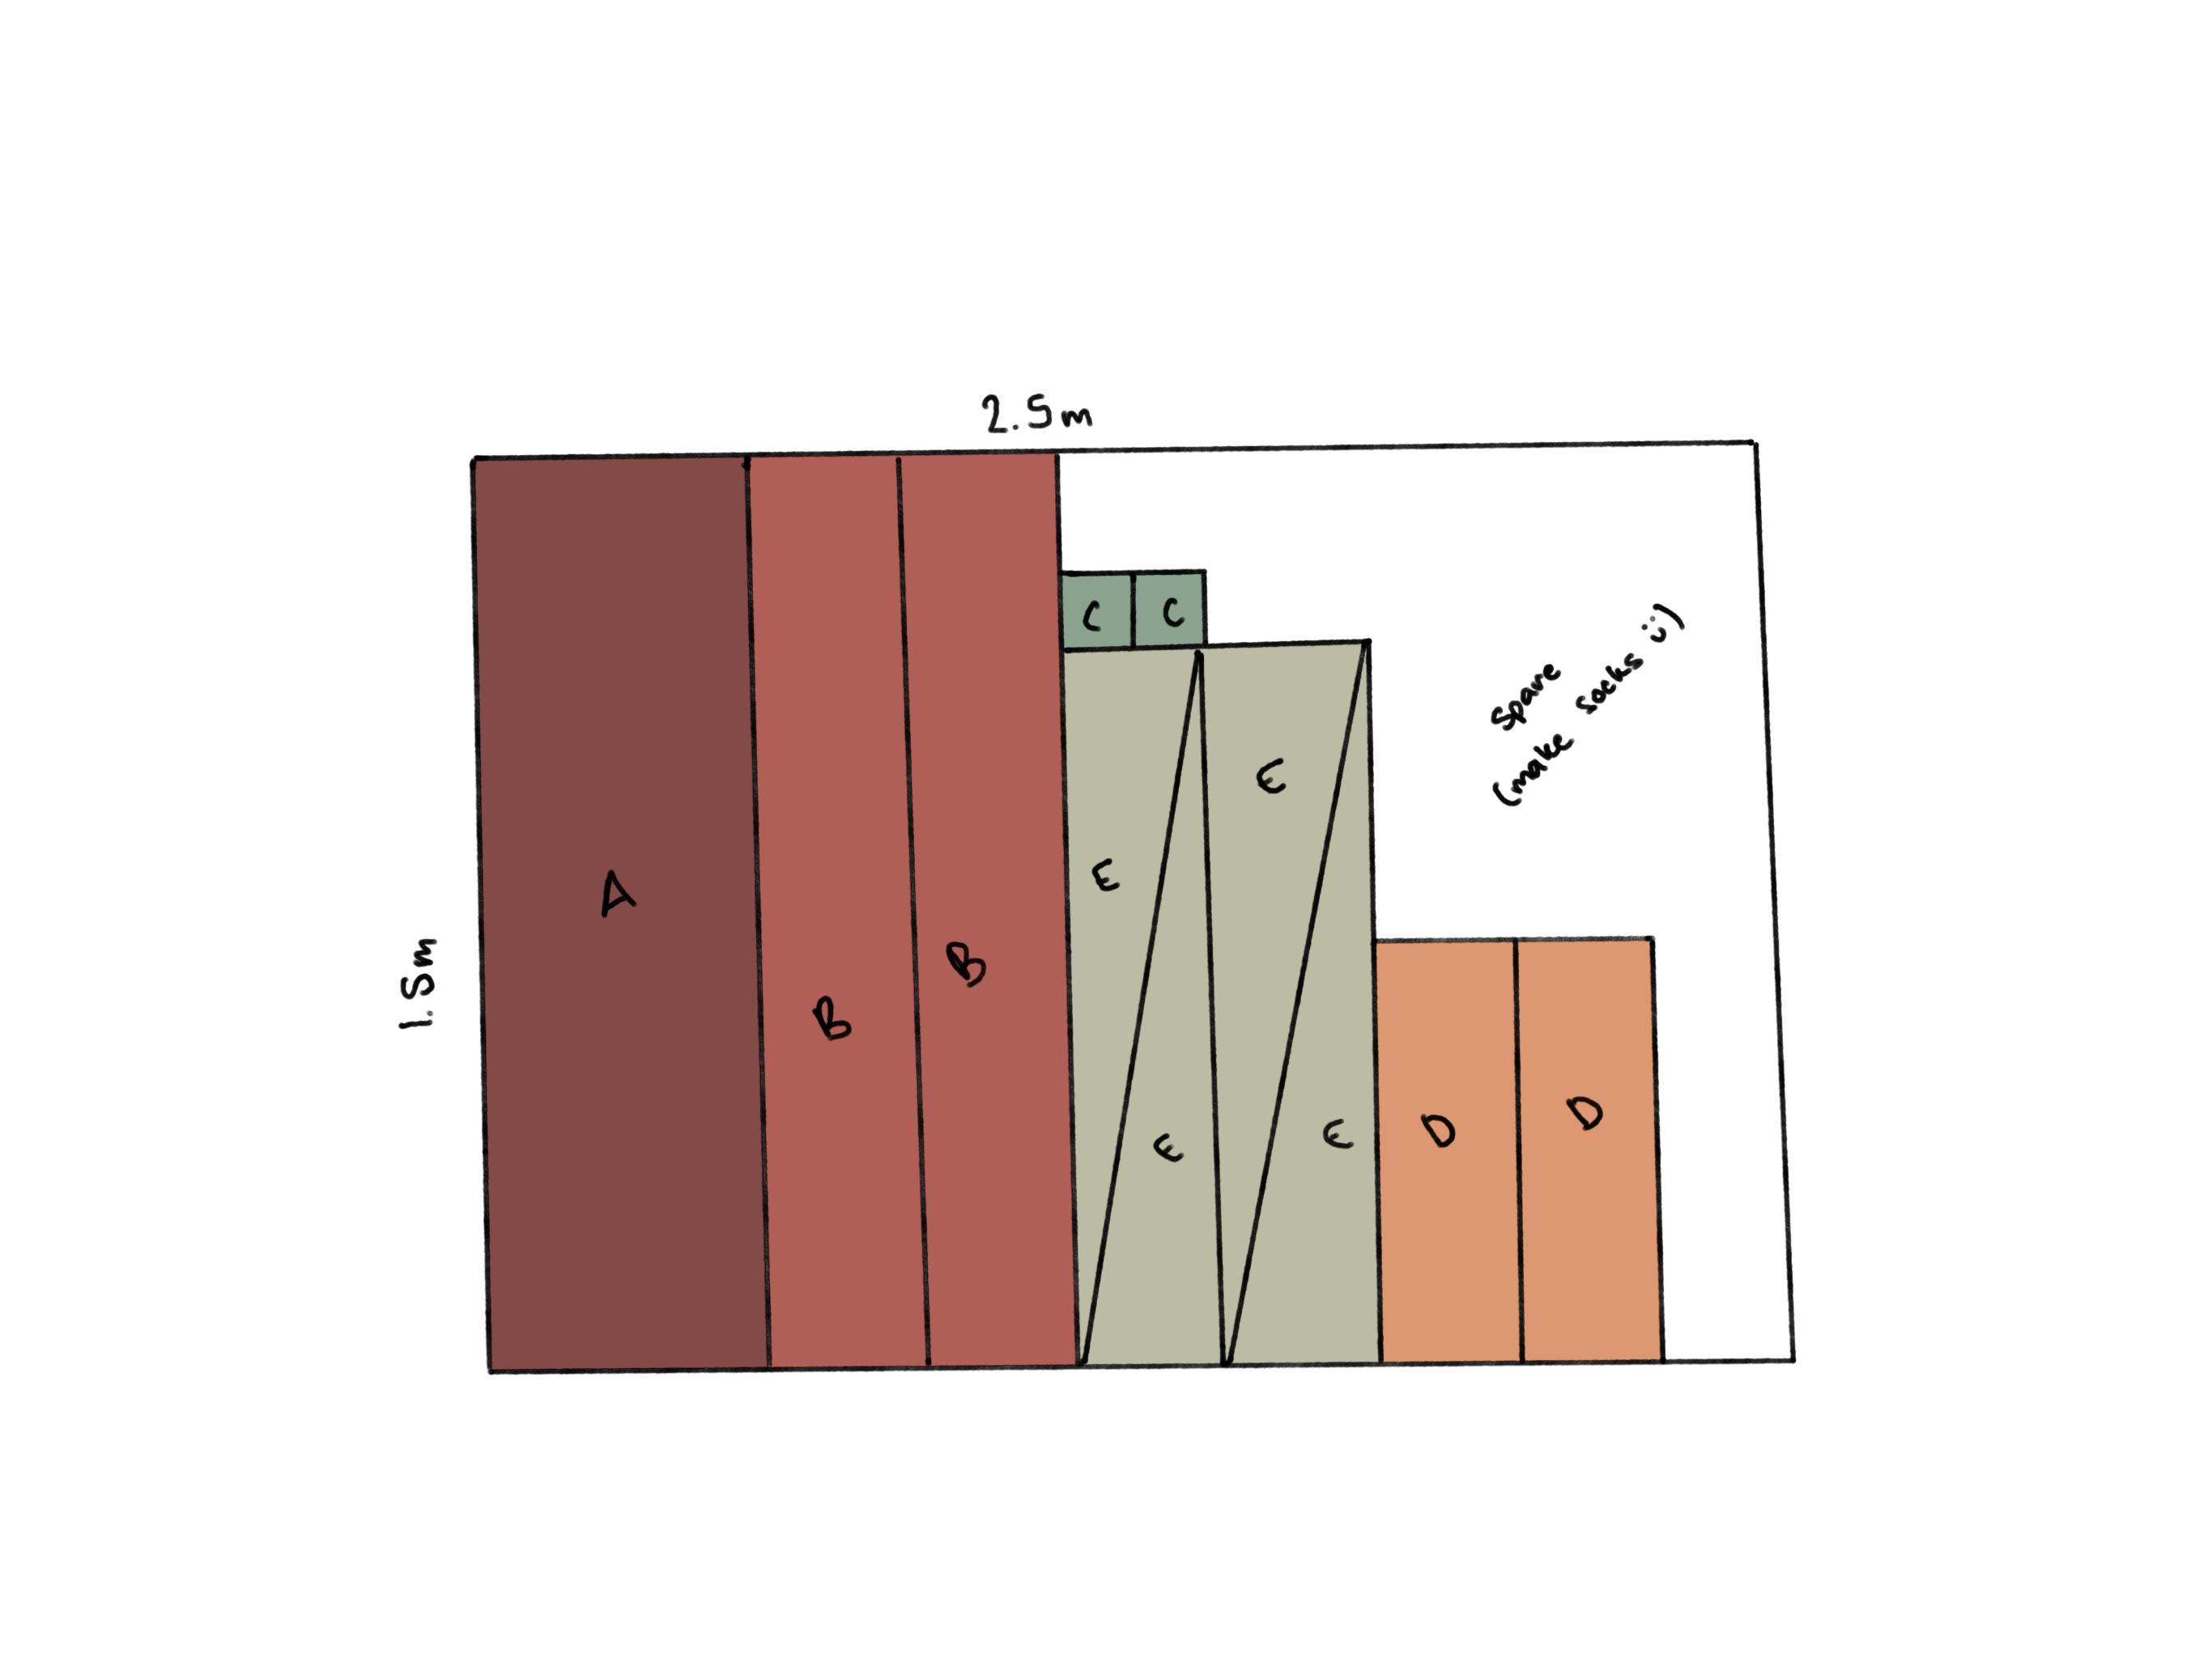
I have learnt a new trick for figuring out how to lay all your pattern pieces out for your project! And it uses Excel. Open up a spread sheet, and using your calculator divide the width of your fabric by 5. Whatever the answer is, is how many columns you will turn to squares, each square represents 5cm. Now do the same for your length. Then you can add the pieces of your pattern with your measurements in mind.

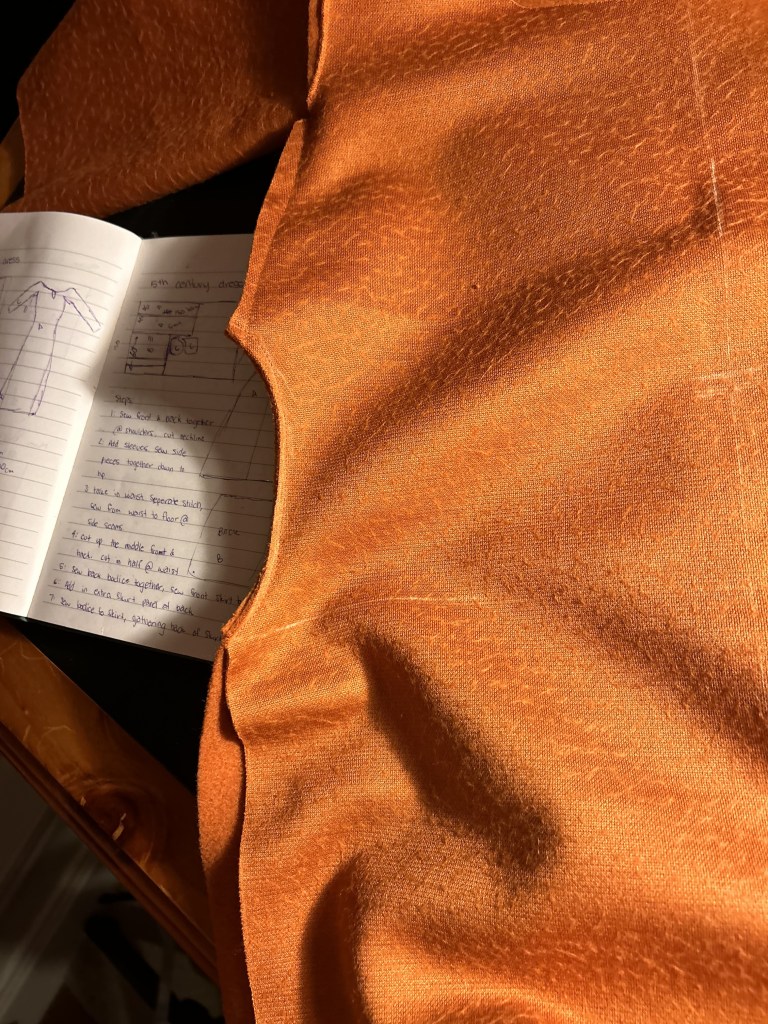
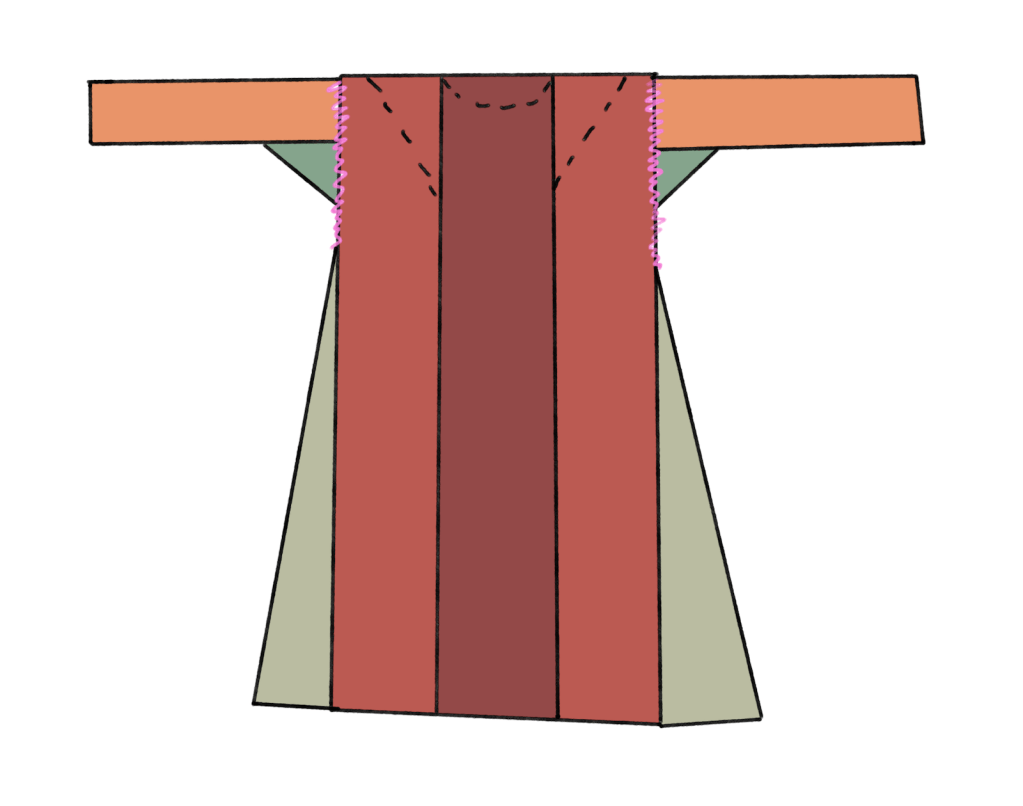
I have added both an illustration of the pattern layout and a screenshot of my excel sheet for reference. For this project I used wool that was 150cm wide and ordered myself 2.5m, although 2m would’ve been just fine for me!

Sewing

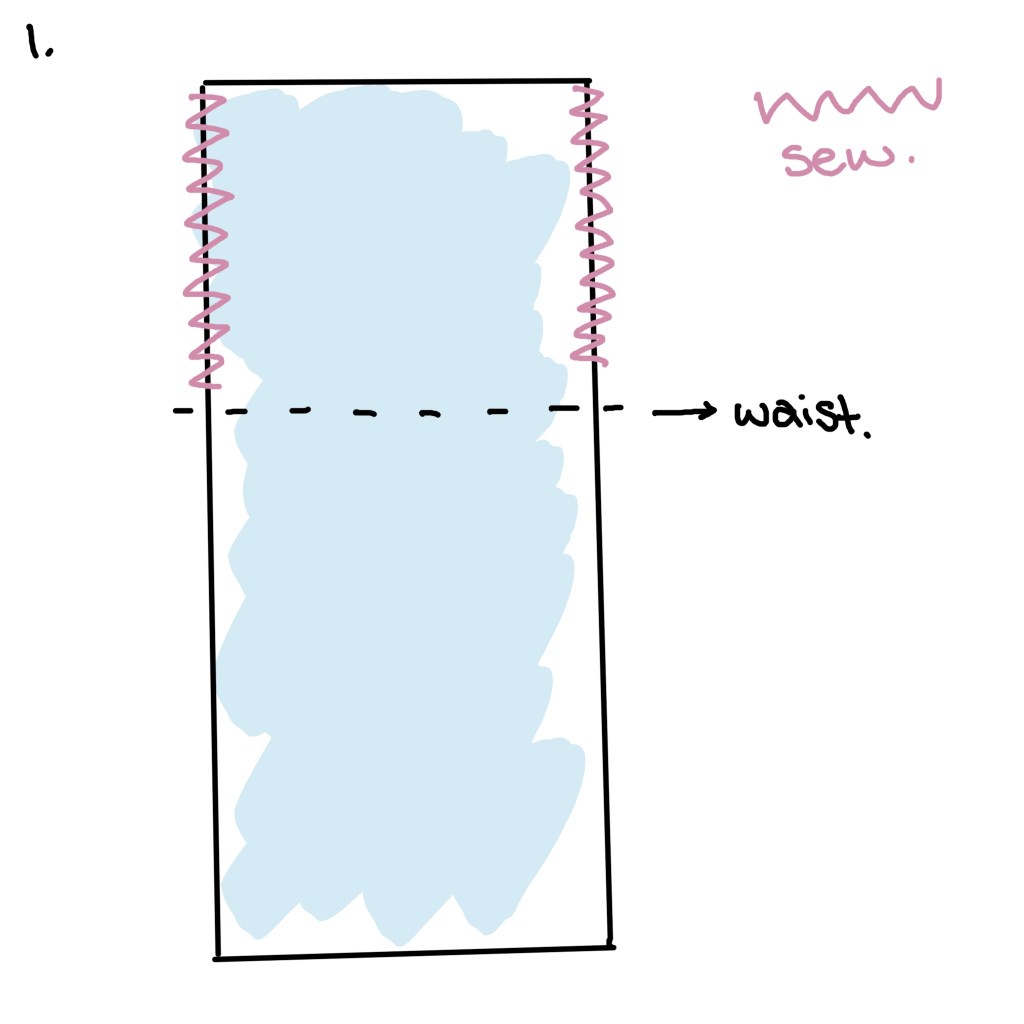
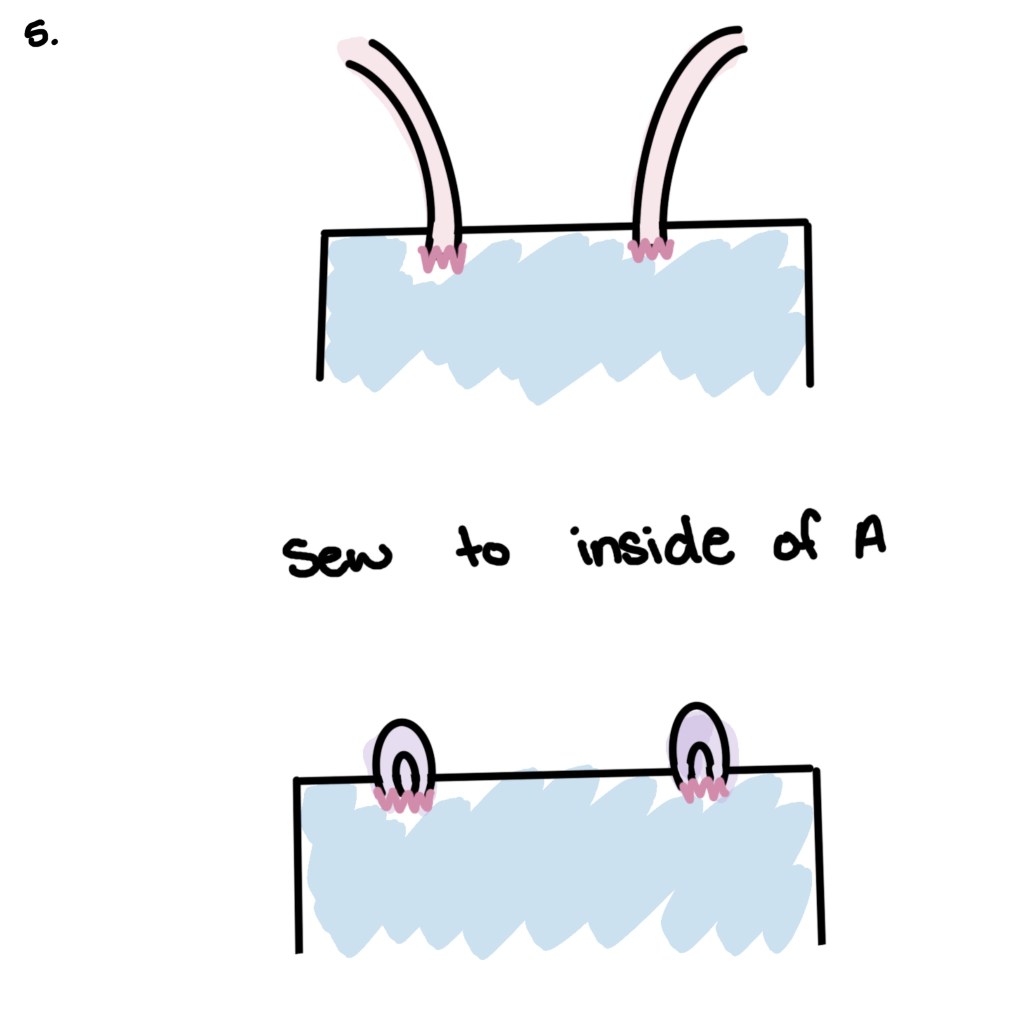
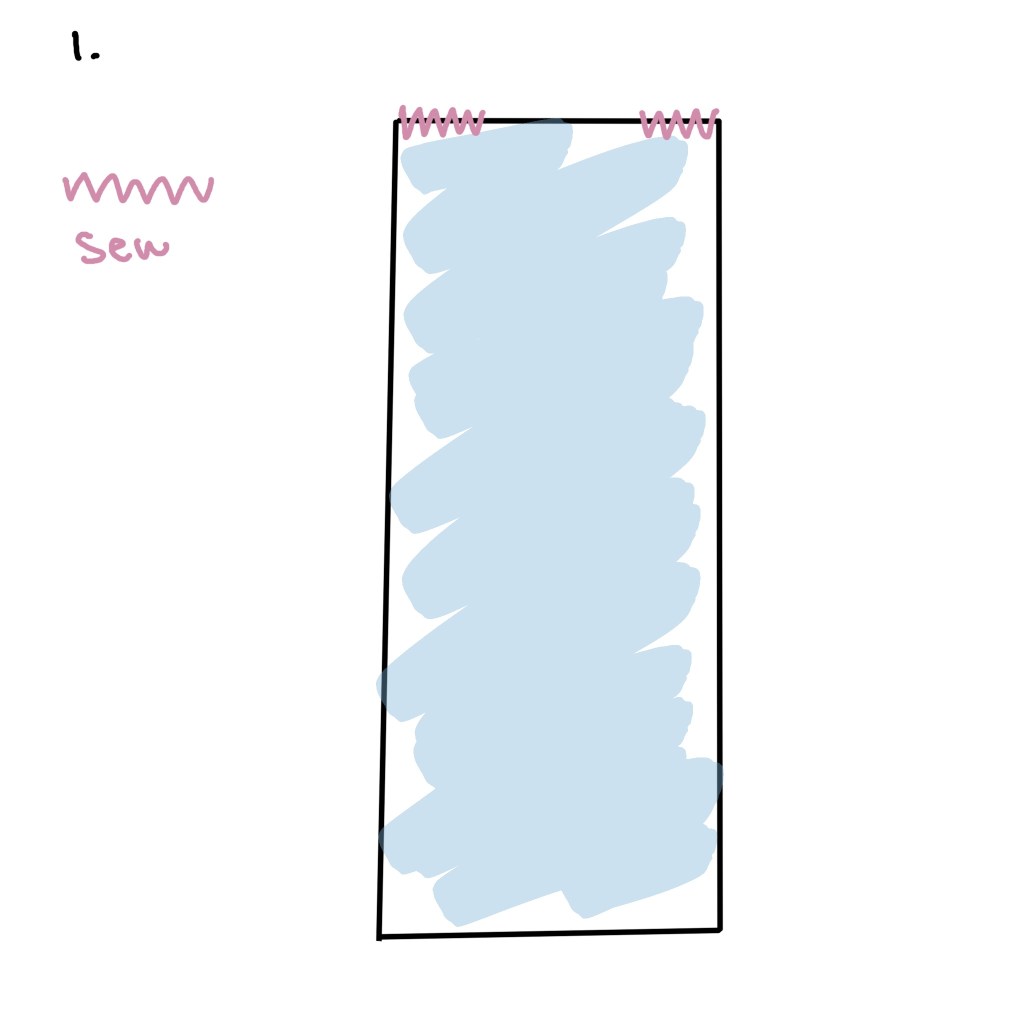
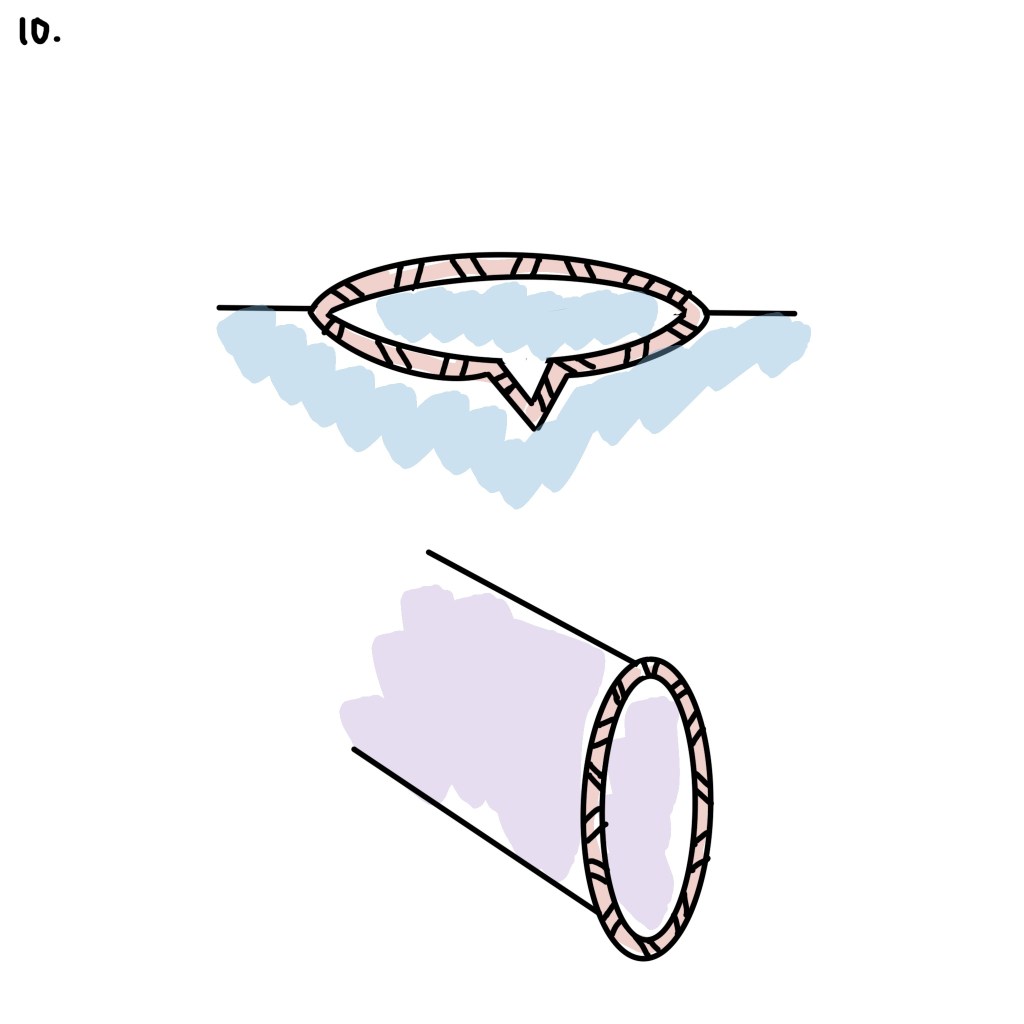
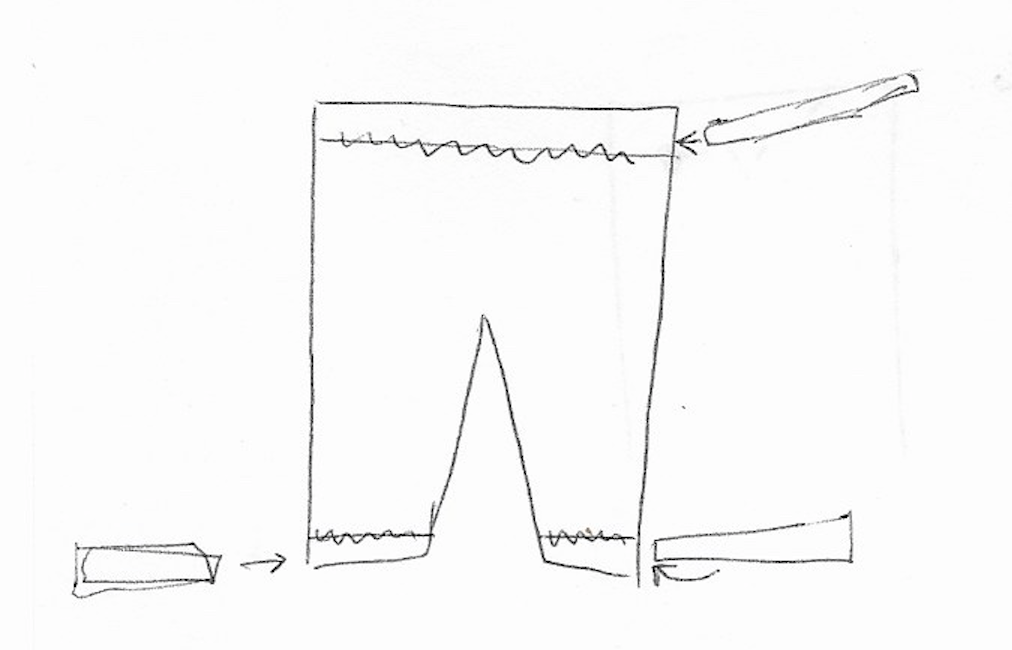
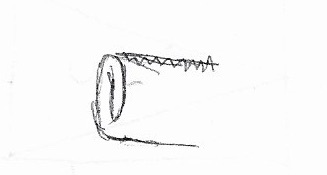
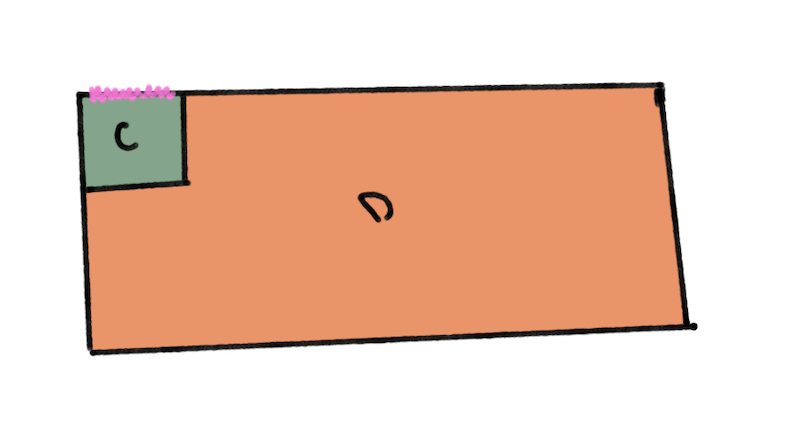
Step 1. To begin this project, we will be sewing the sleeves together. This will be done the exact same way as the Viking Dress. Begin by sewing one of your armpit gussets (I recommend between 12cmx12cm or 14x14cm for this) to one of the long sides of your sleeve.

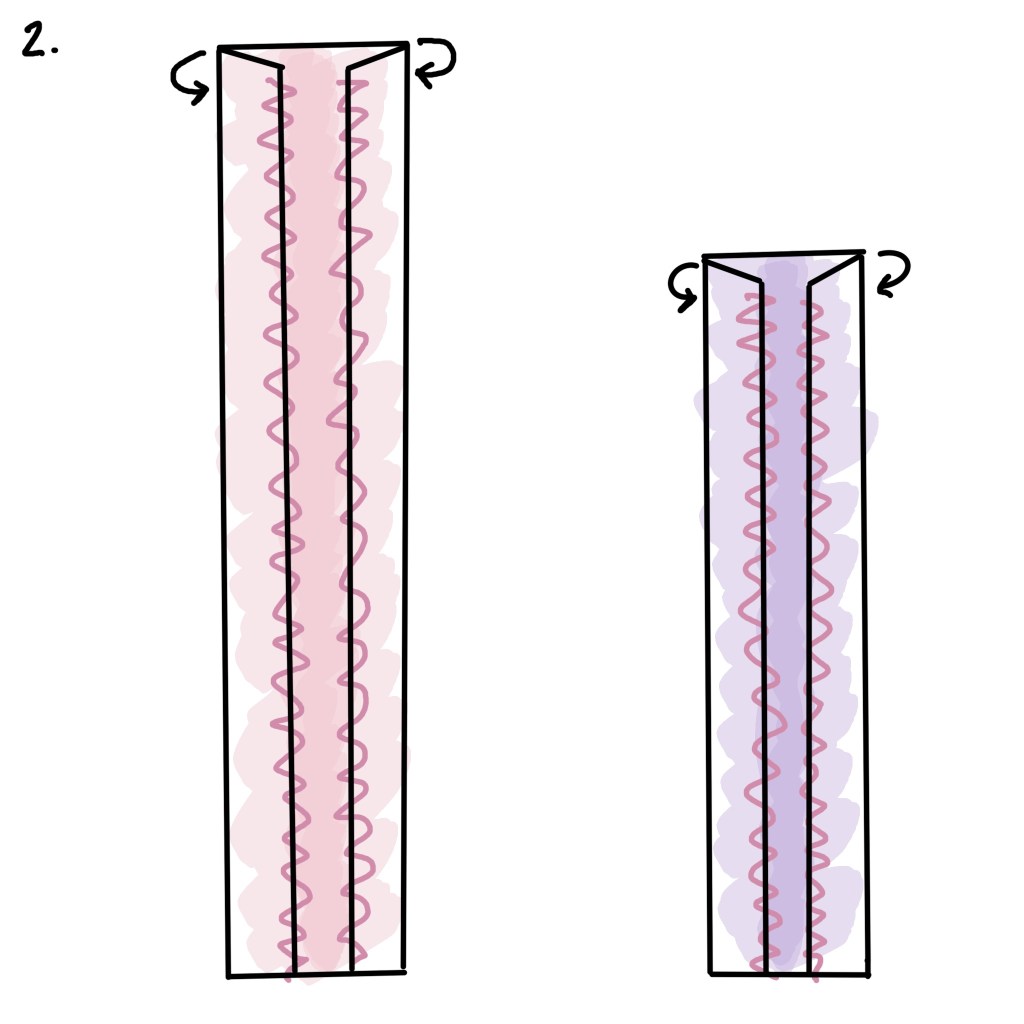
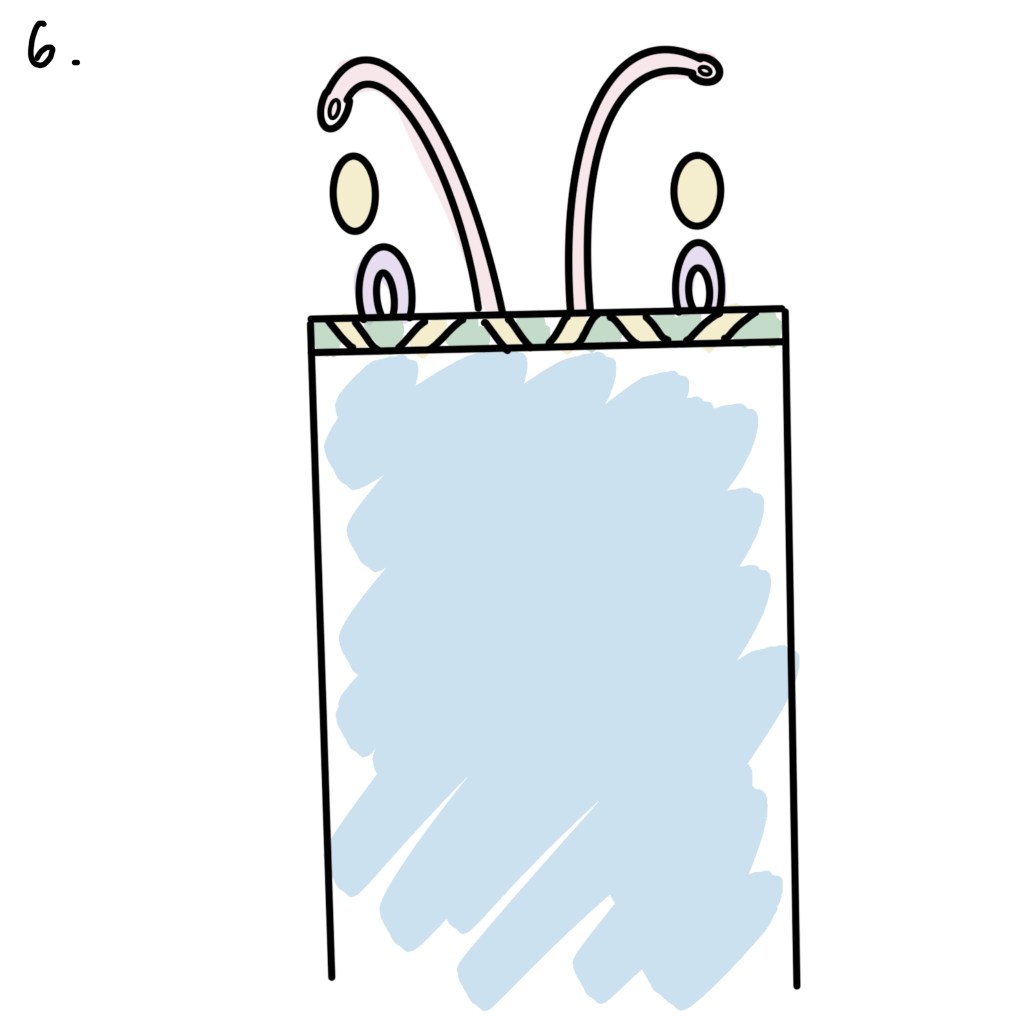
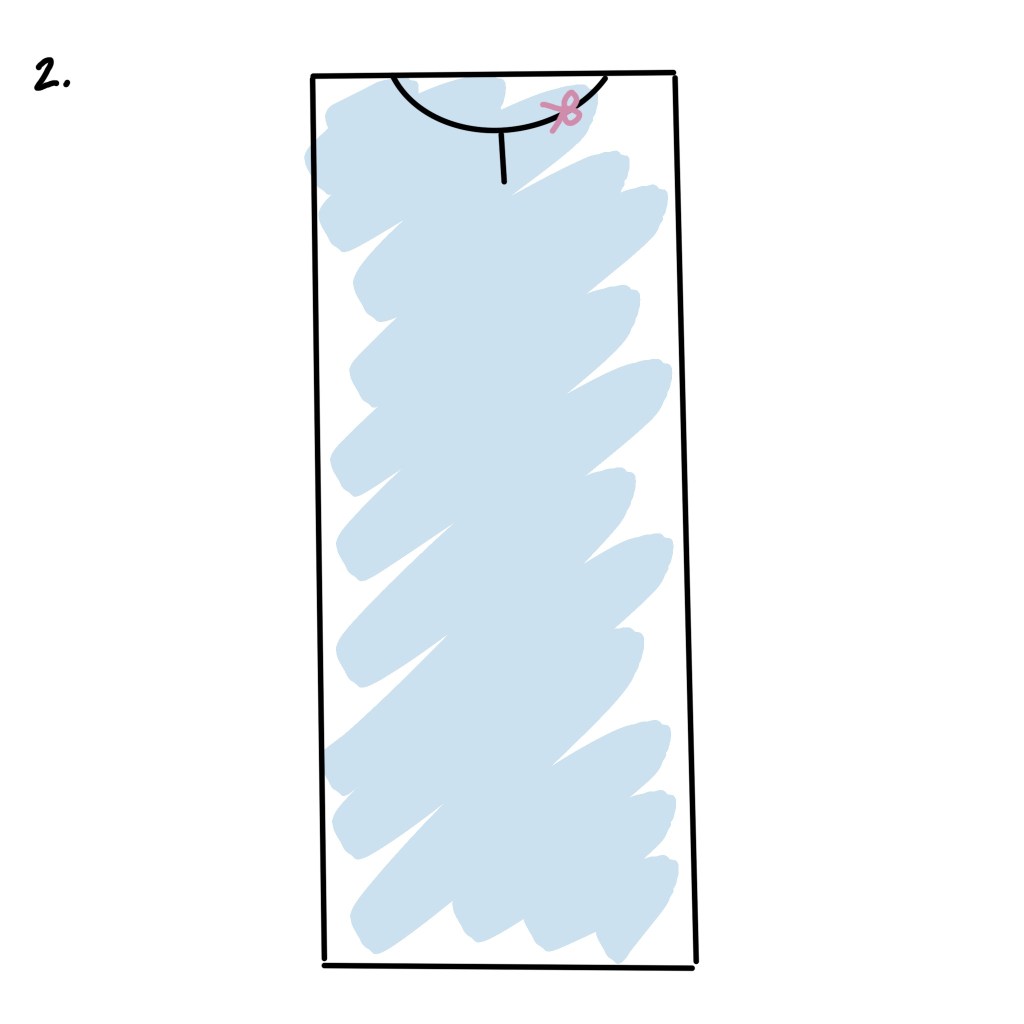
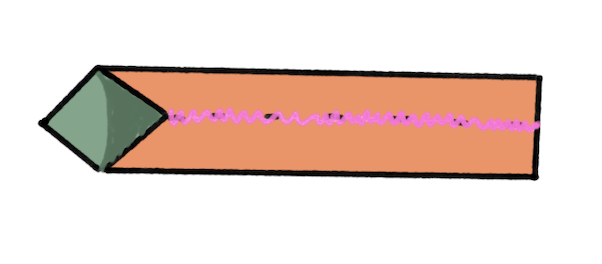
Step 2: This is a little tricky to explain… but sew the adjacent side of the gusset – the one right next to the one you sewed – to the other long side of your sleeve… there is a video for this on the viking dress tutorial. Once sewn, continue your stitch so it sews both long sides of the sleeve together

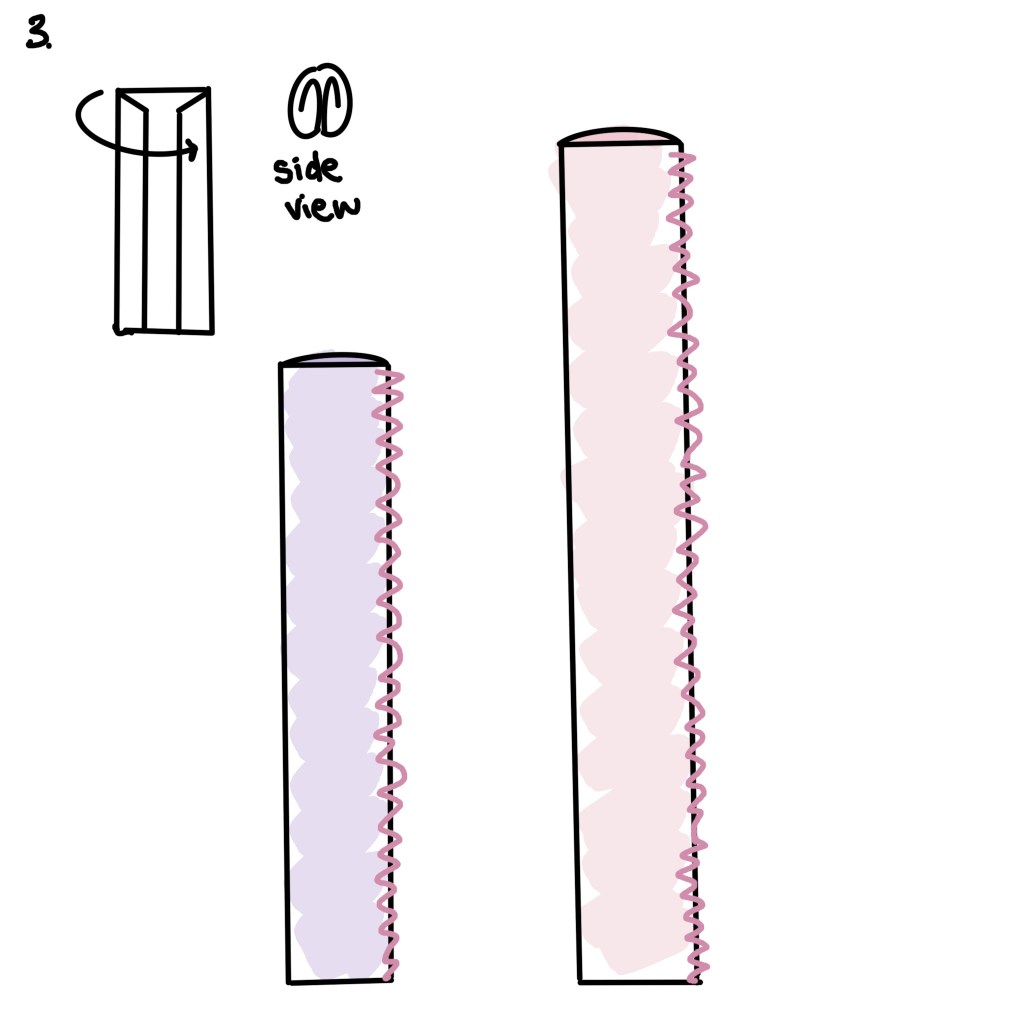
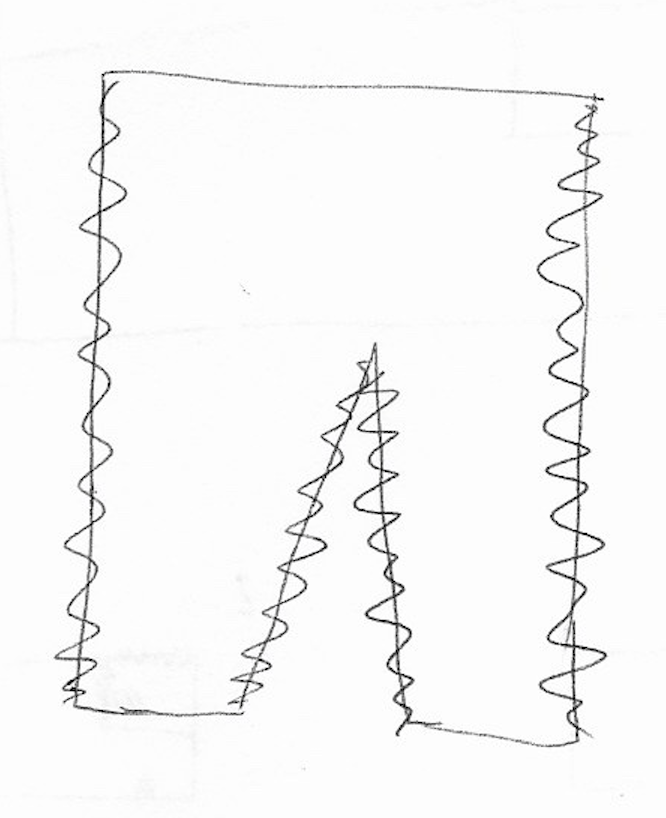
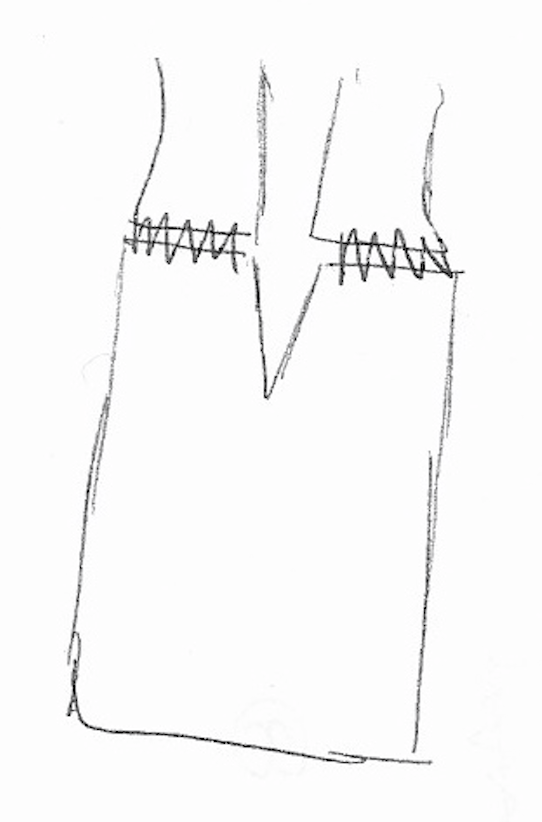
It should look like this when it’s laid flat.

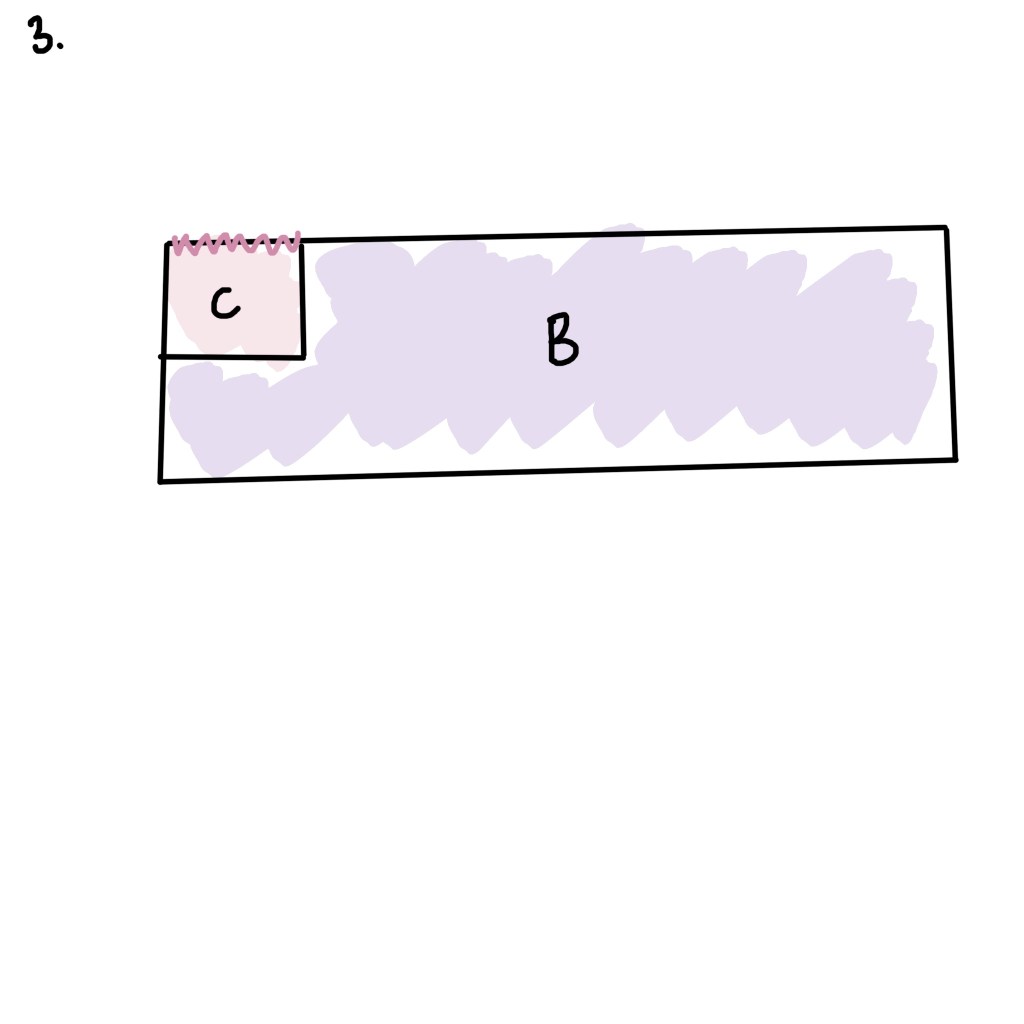
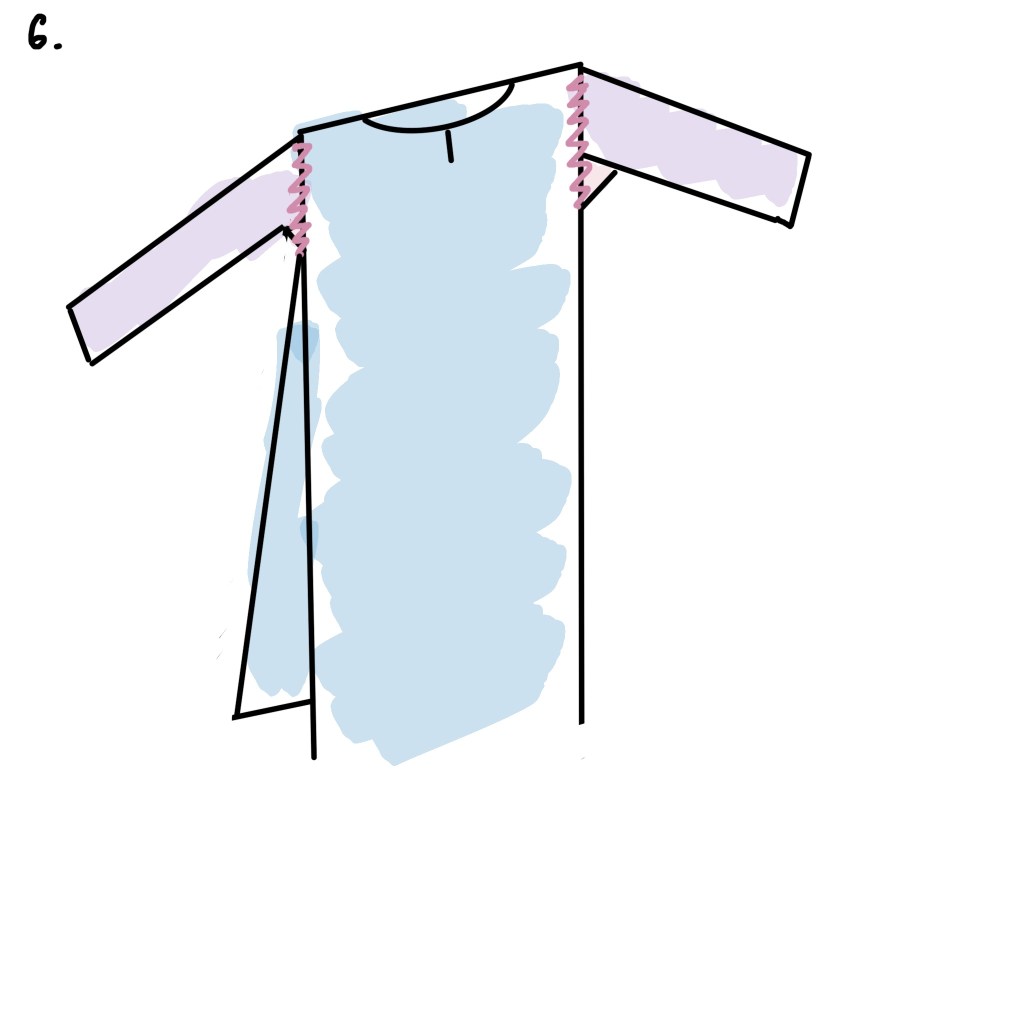
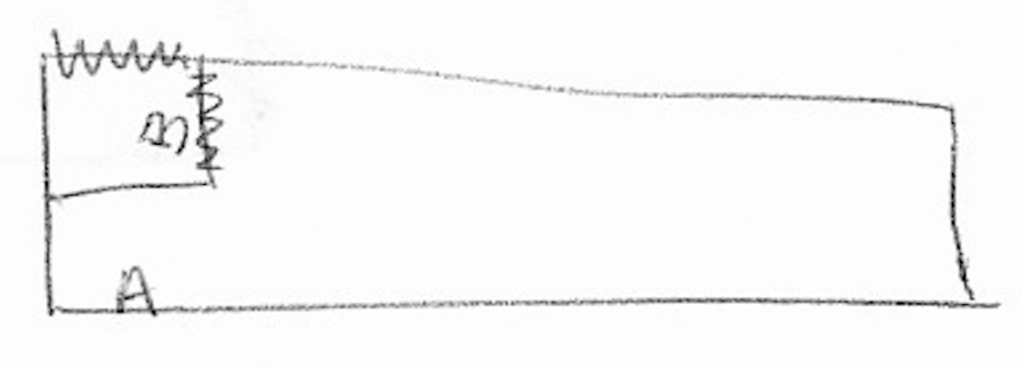
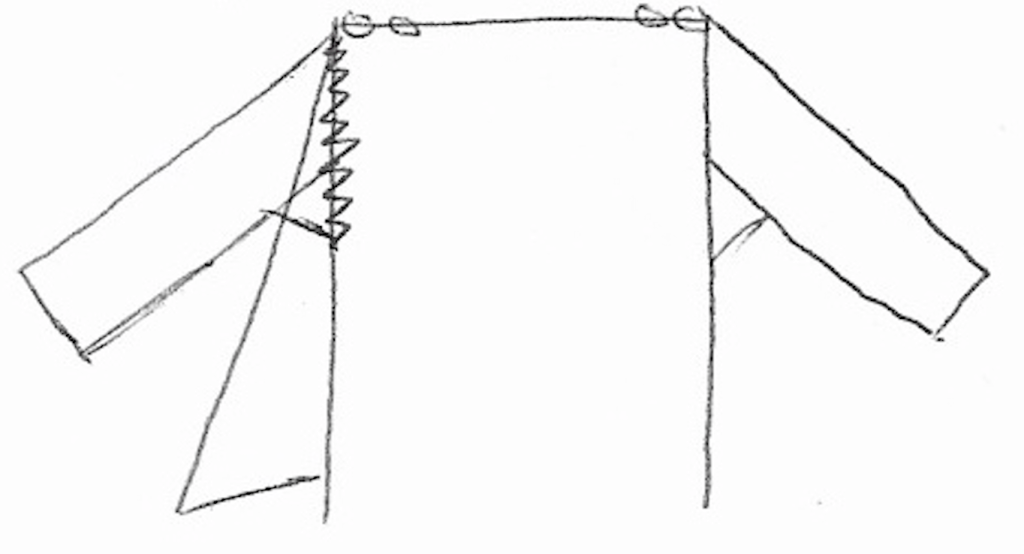
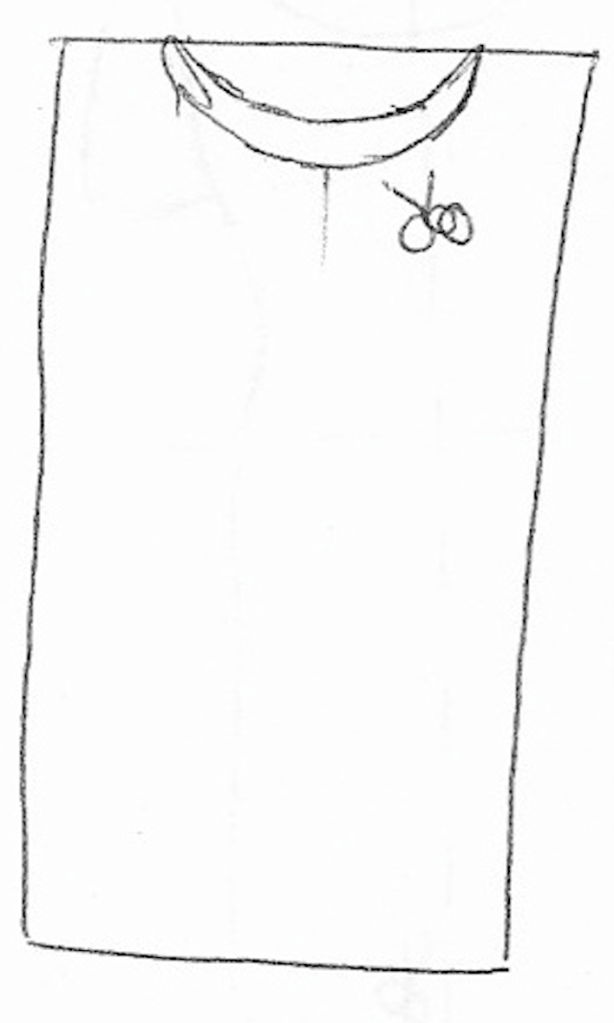
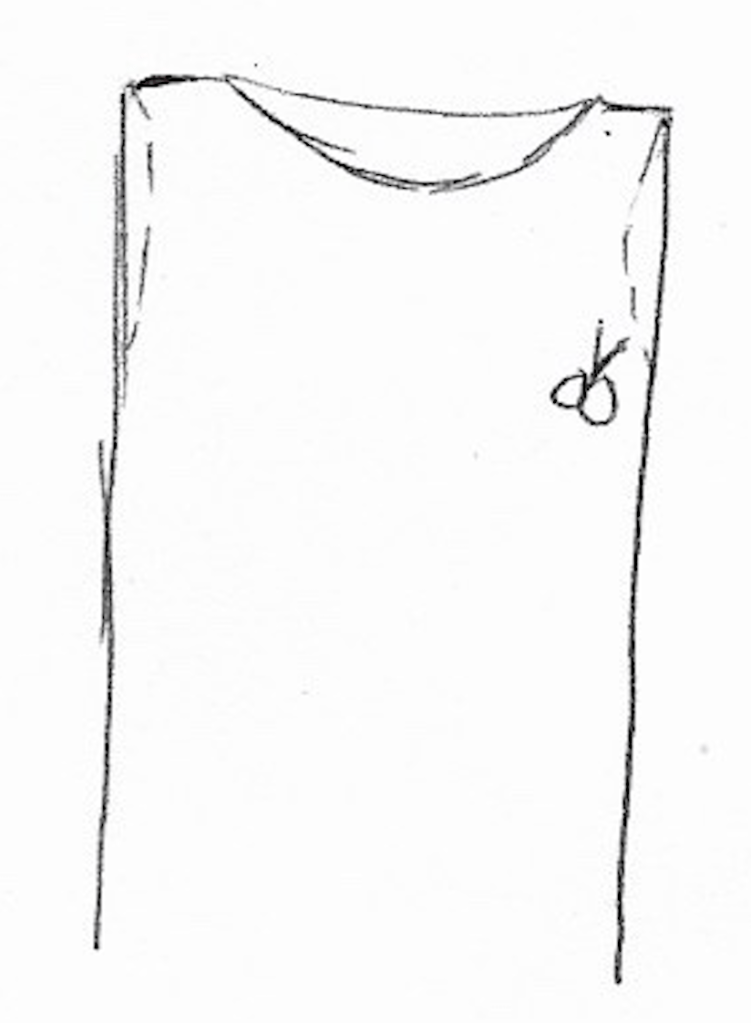
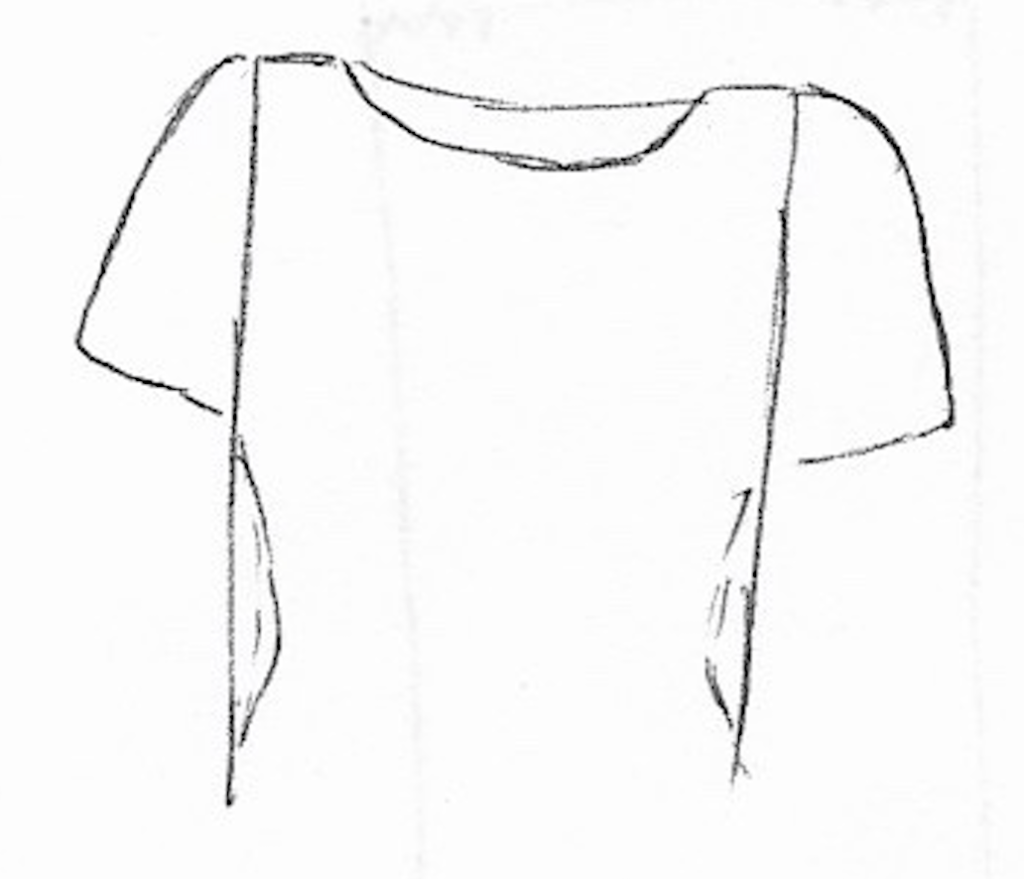
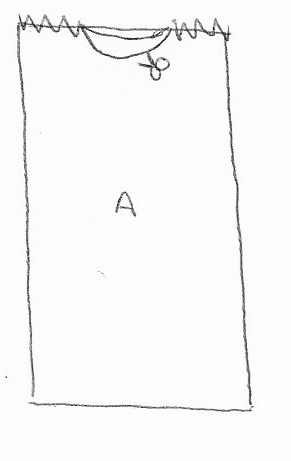
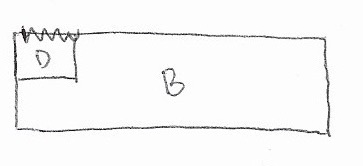
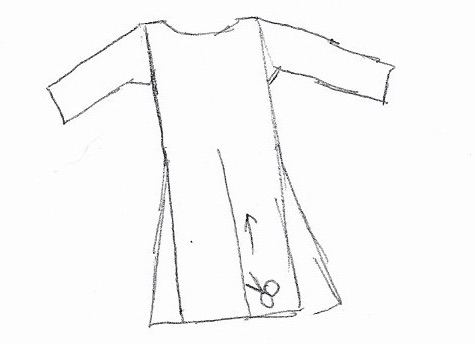
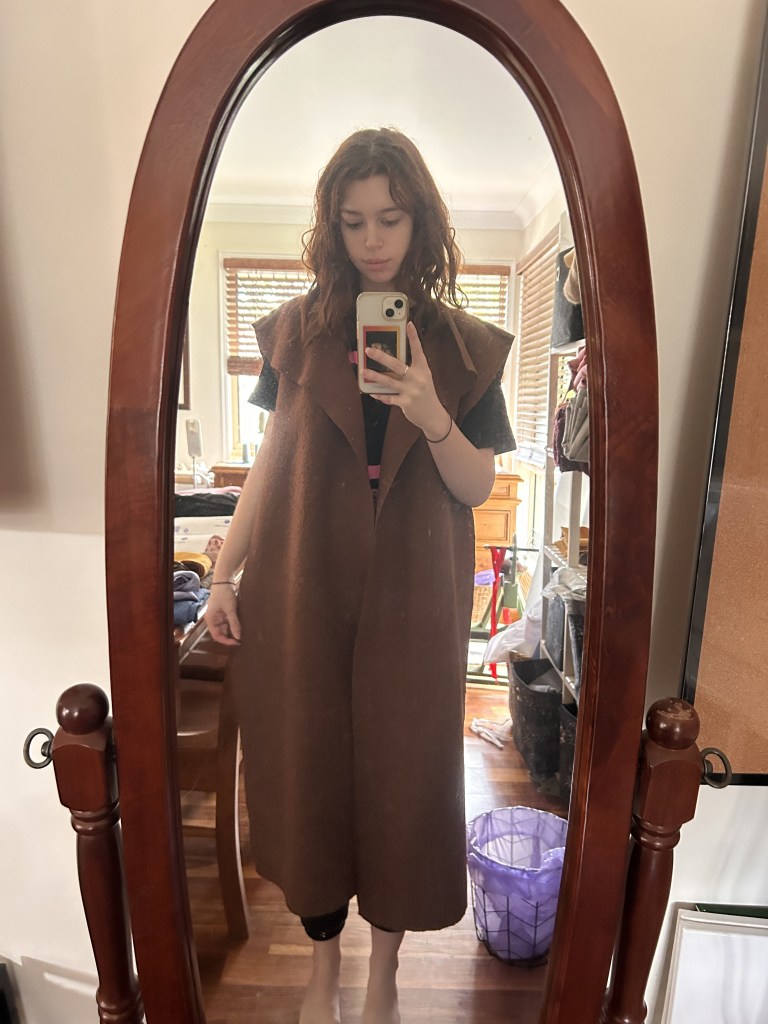
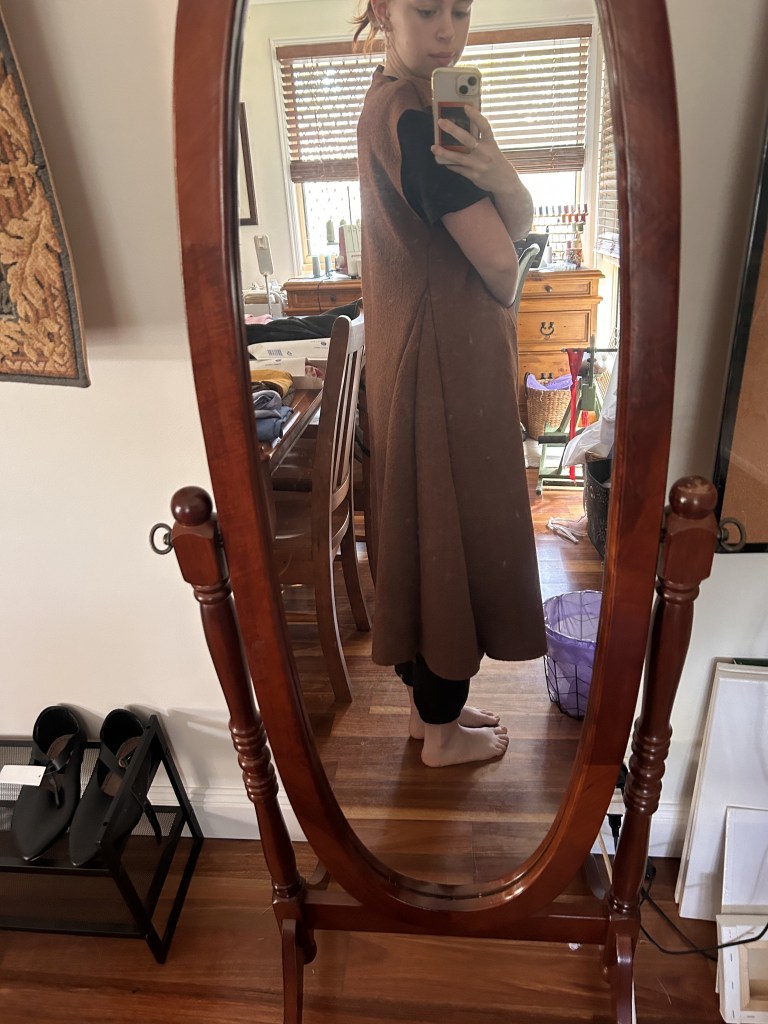
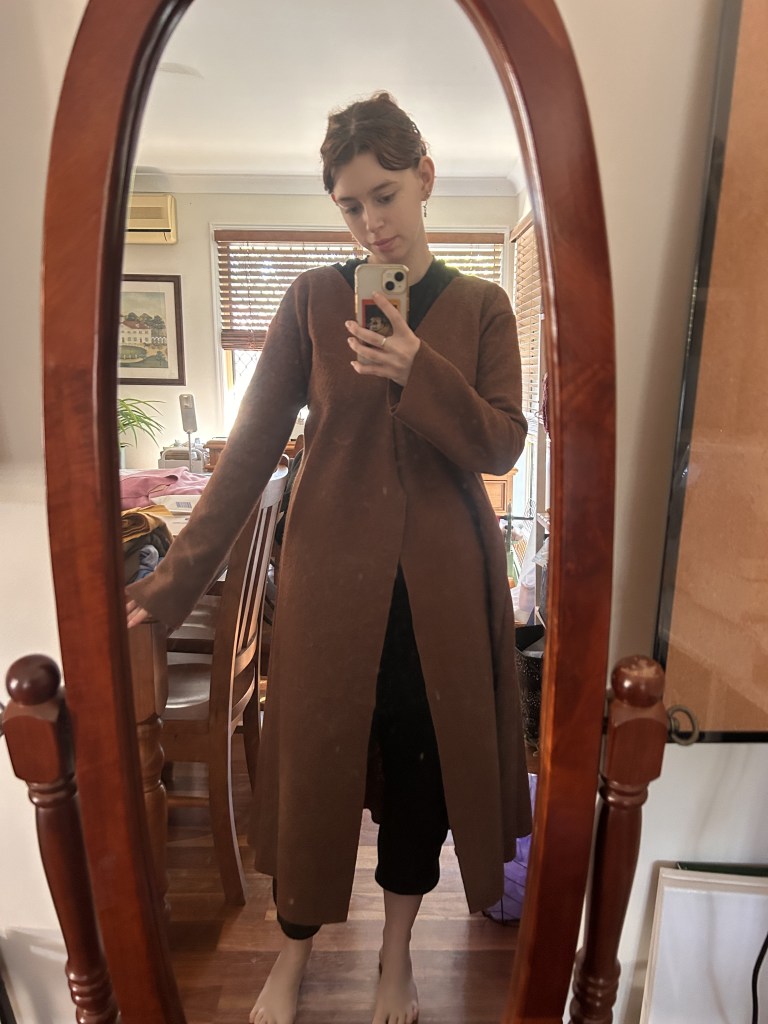
Step 3: Sew your shoulder seams by attaching both of pieces B to piece A. It should look like this if you’re trying it on:

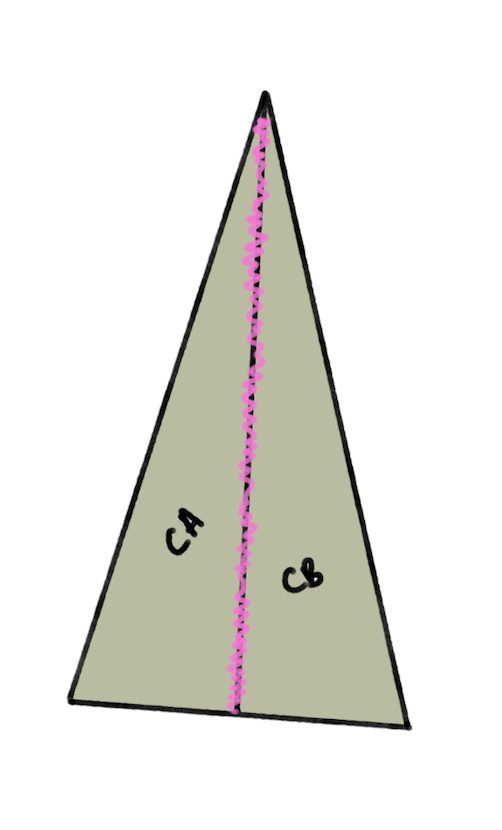
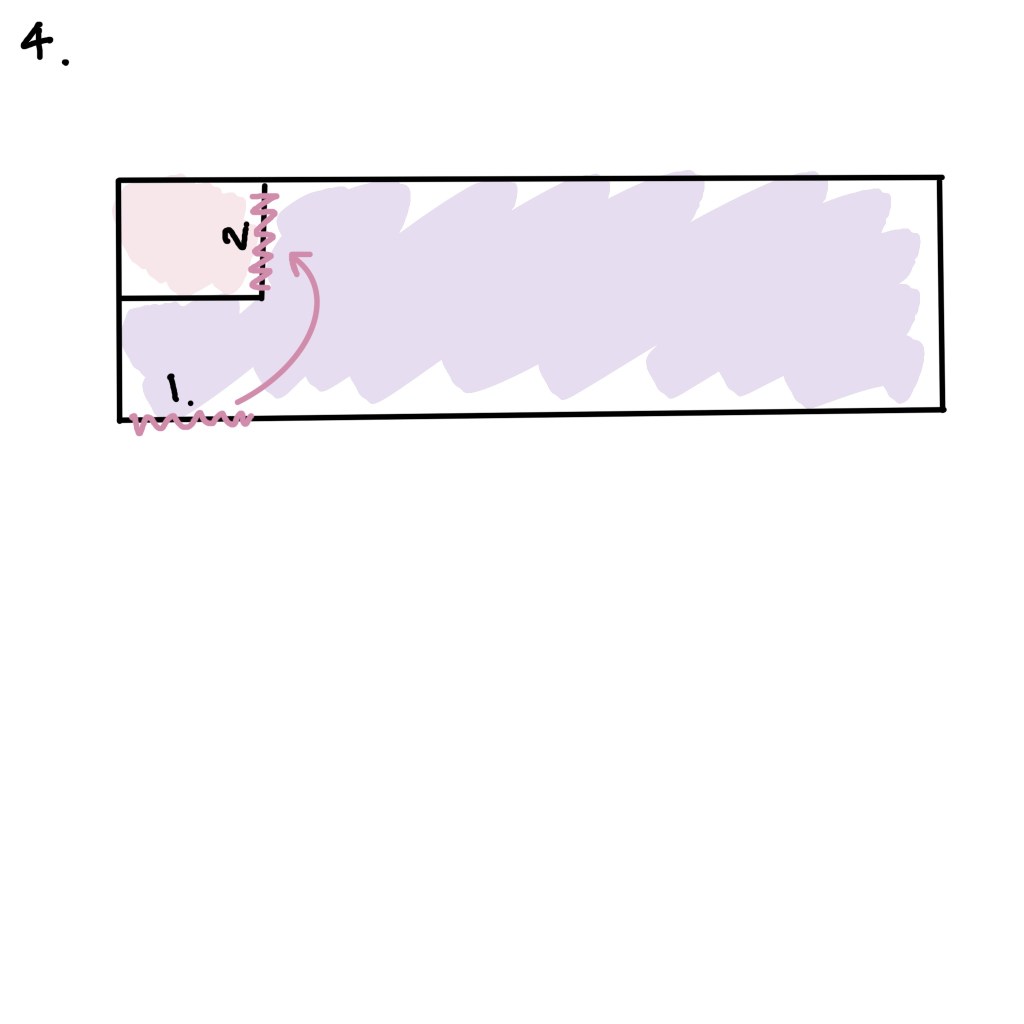
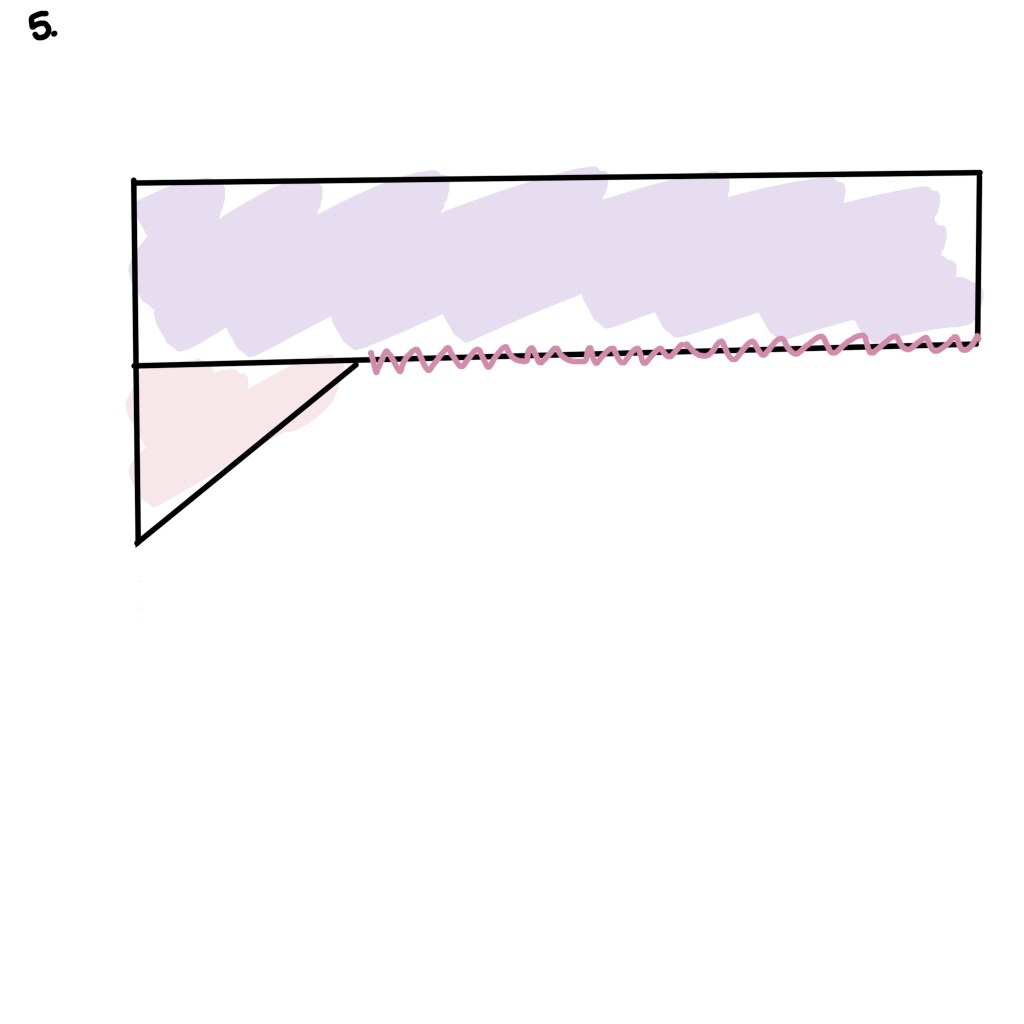
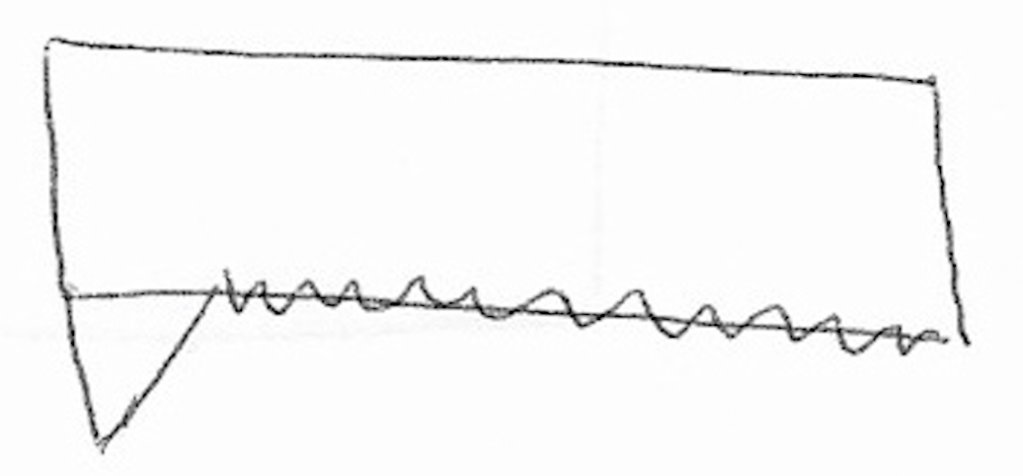
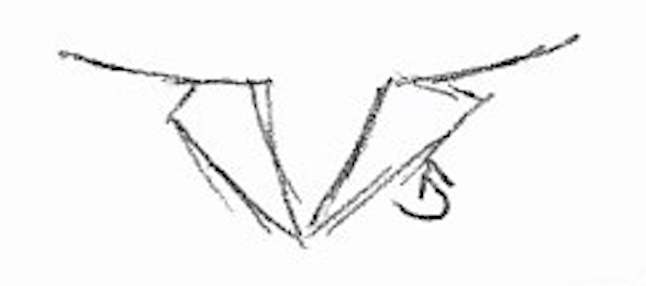
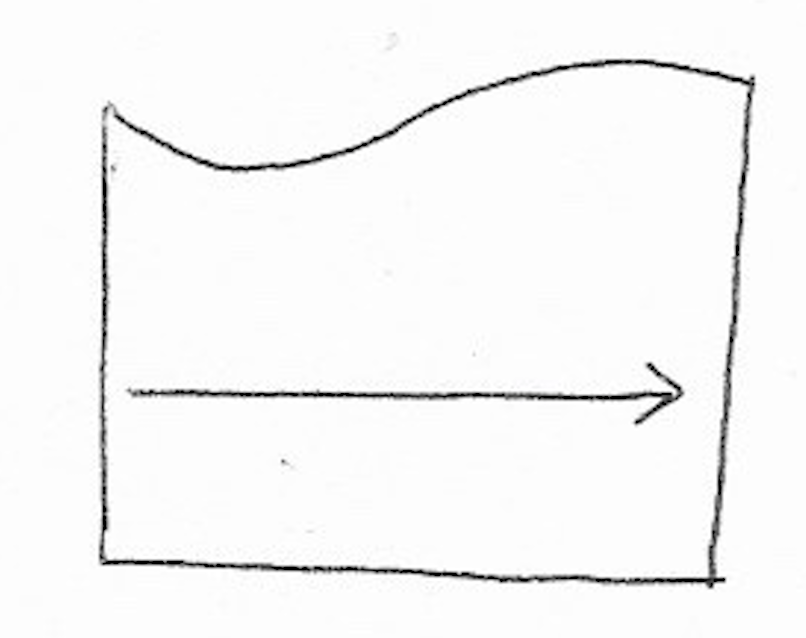
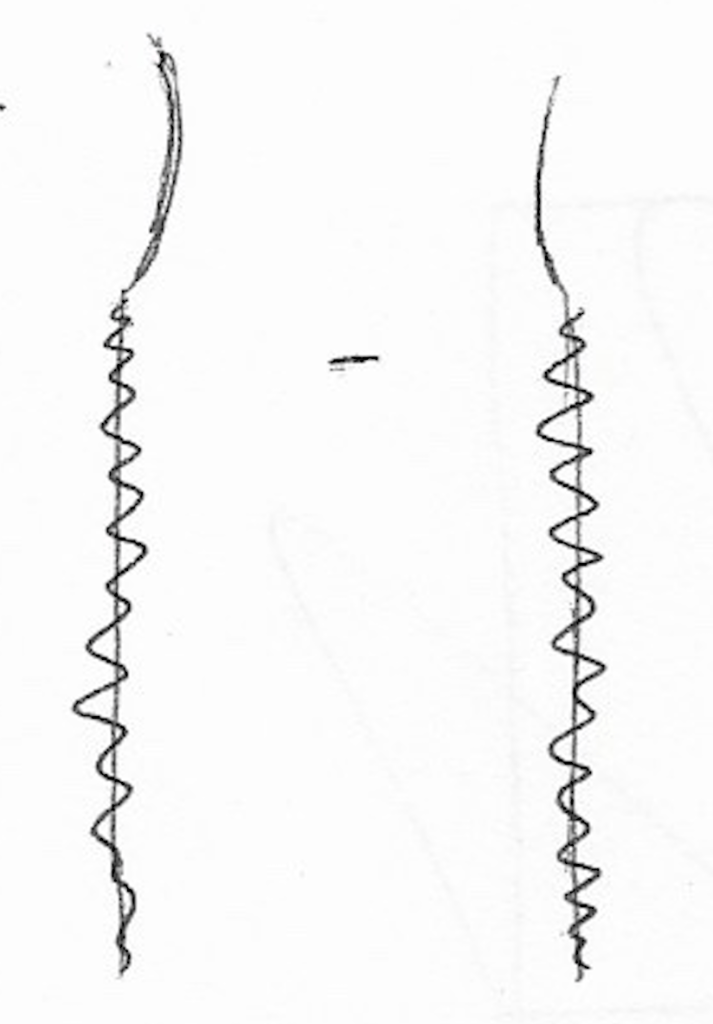
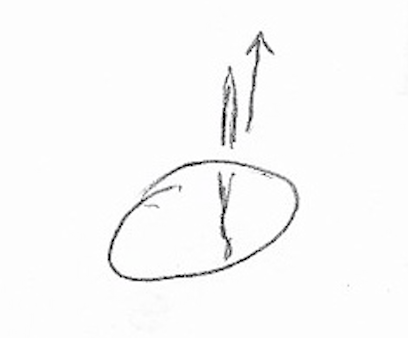
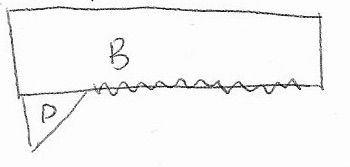
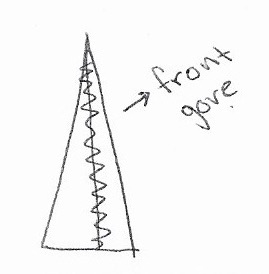
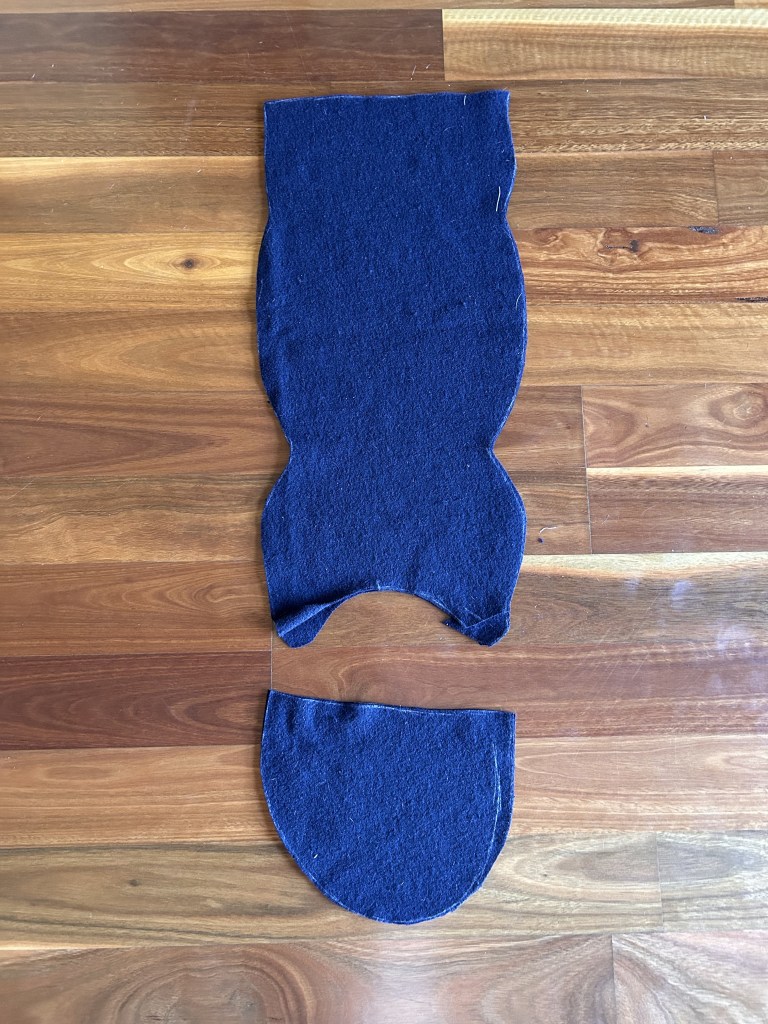
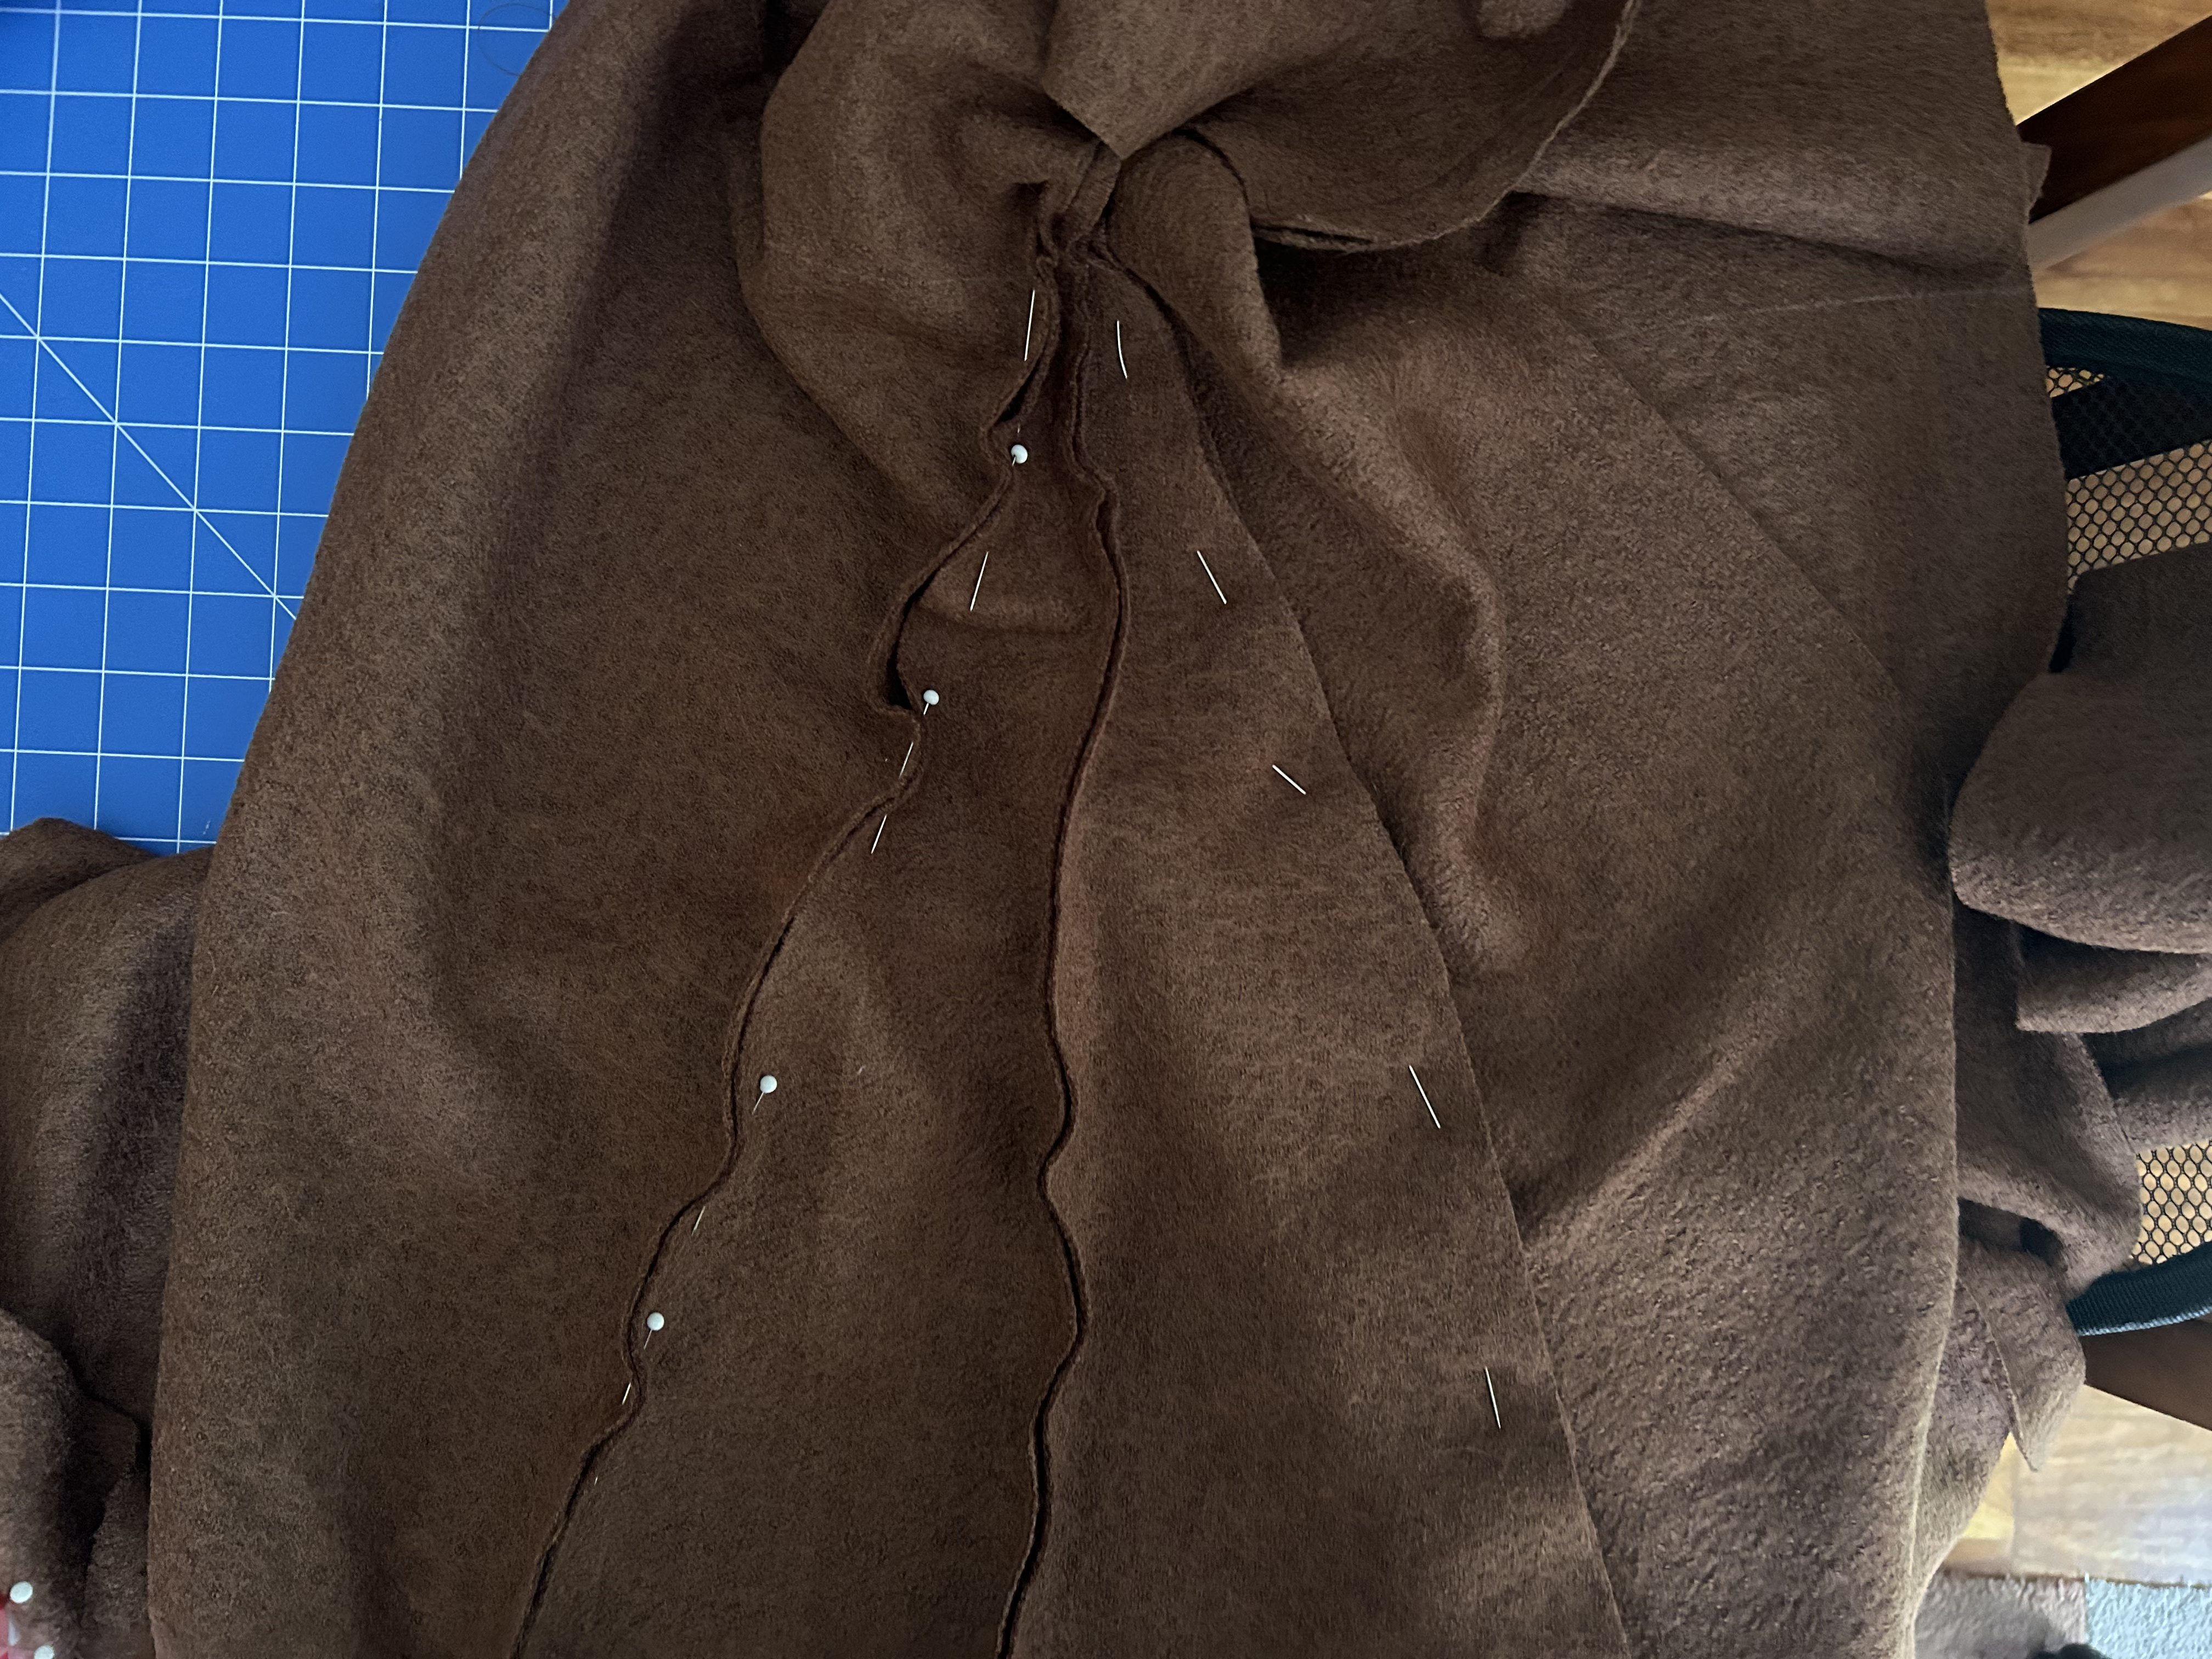
Step 4: grabbing your half gores, sew them together along the straight edge, so you have two full triangles.

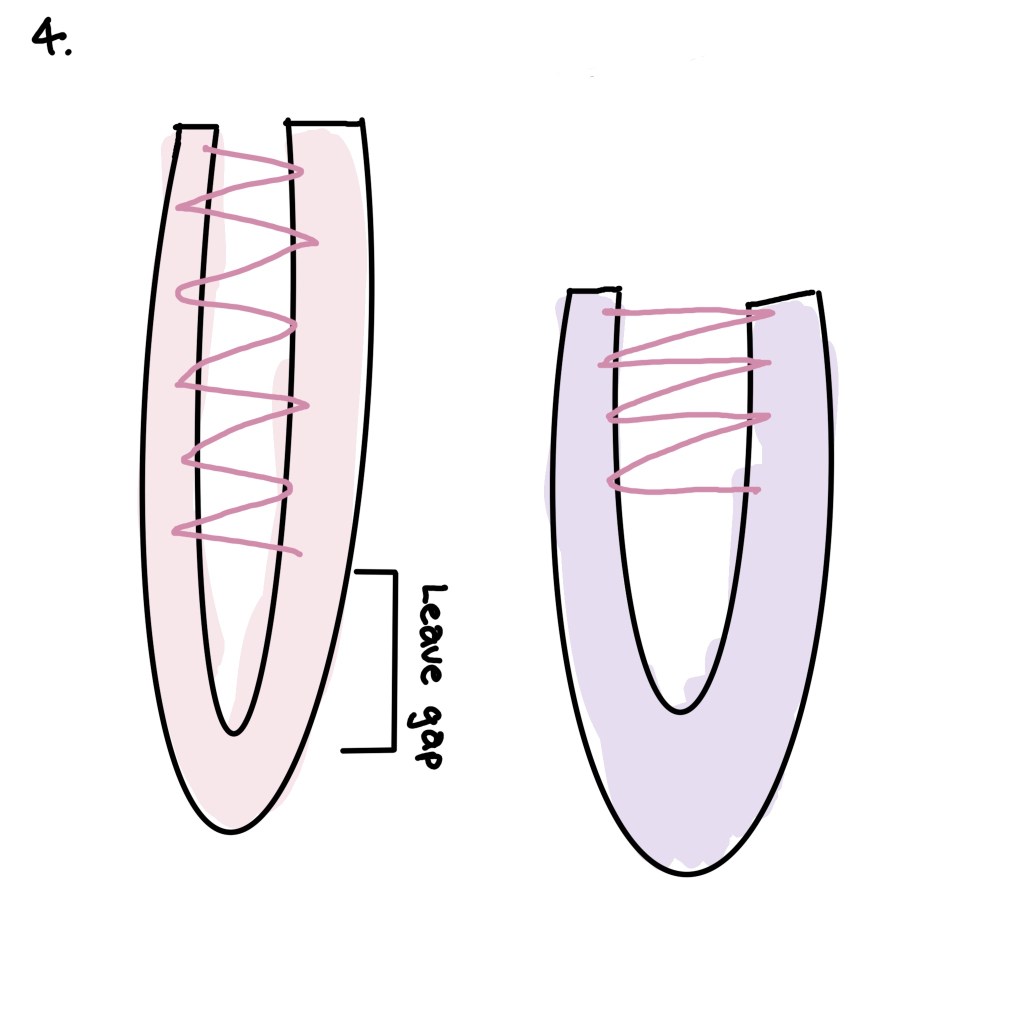
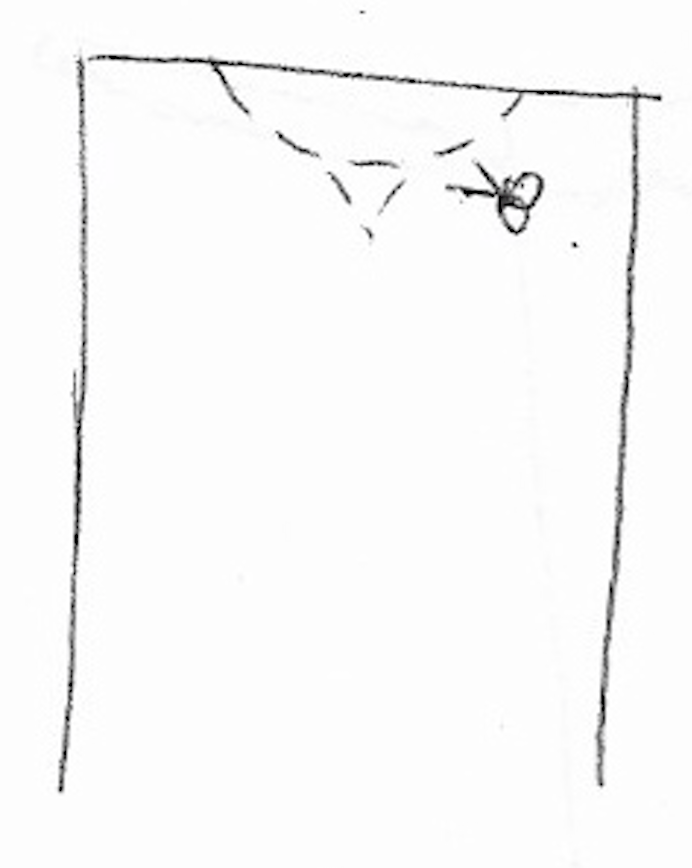
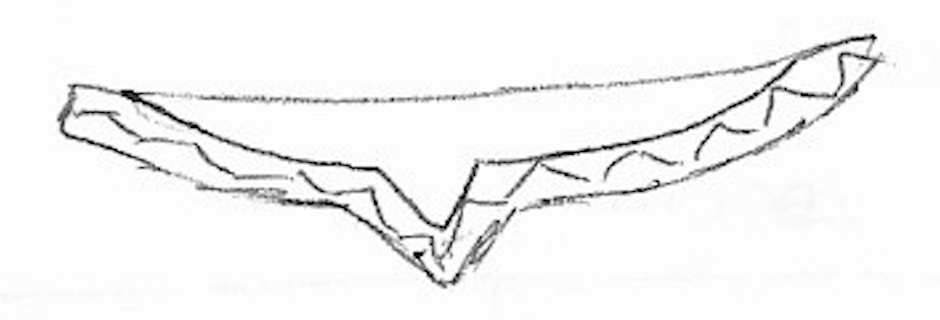
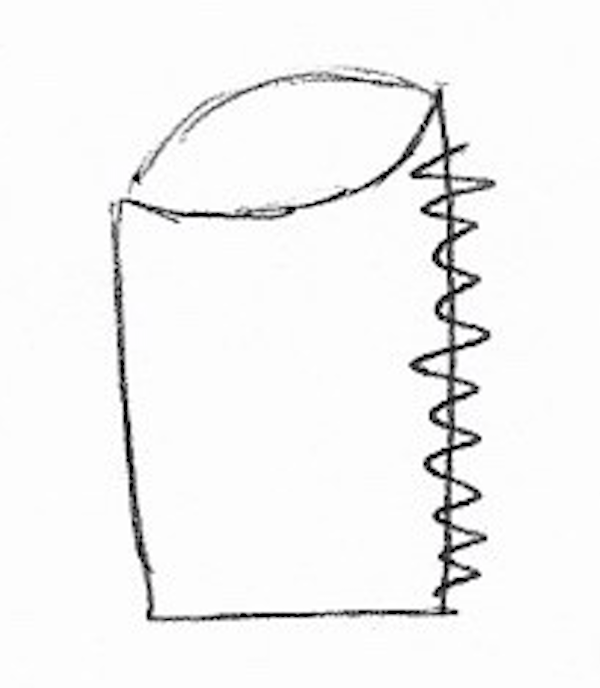
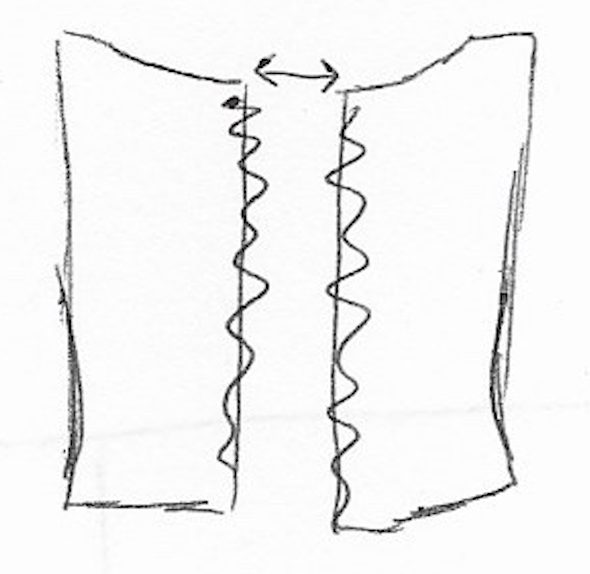
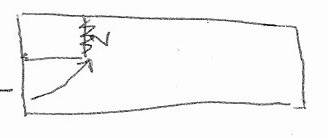
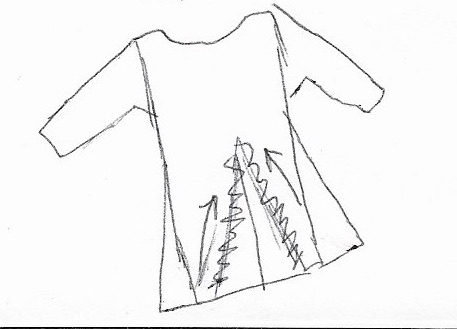
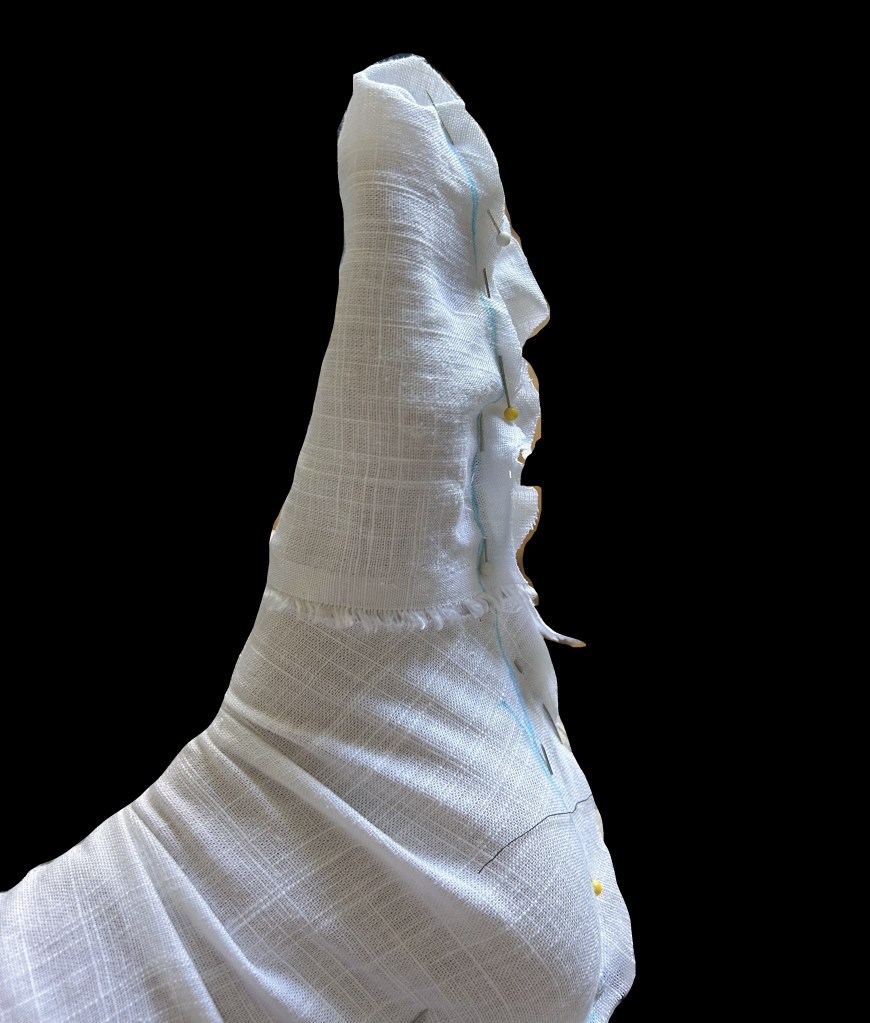
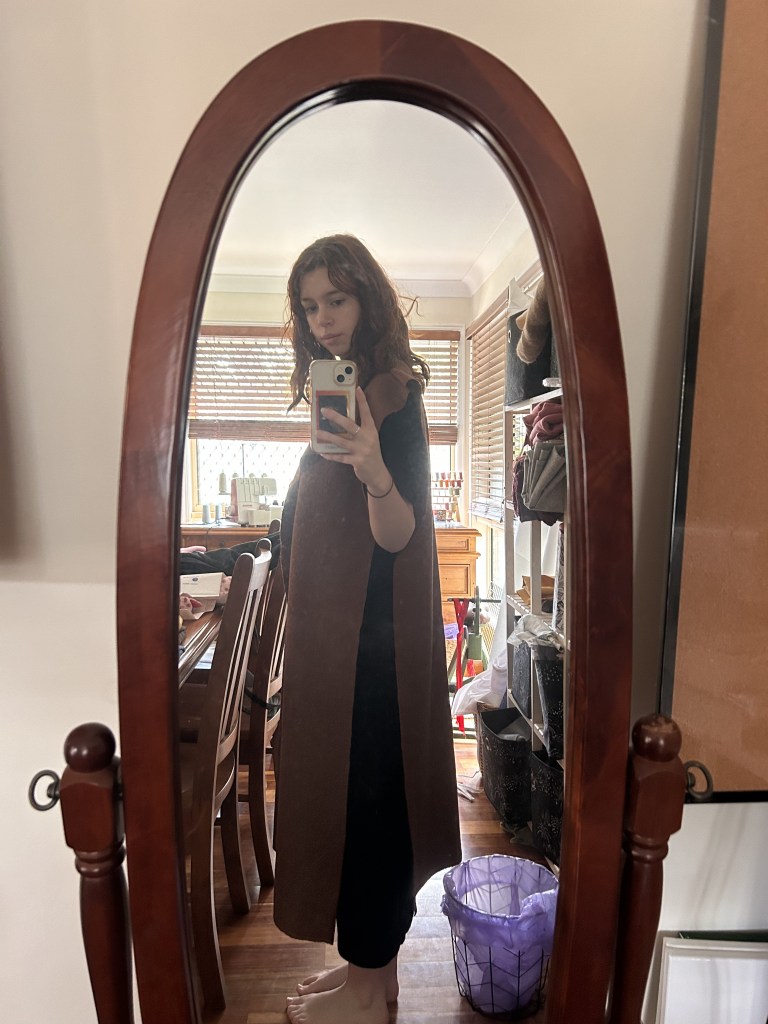
Step 5: we will now attach this gore to pieces A and B. Sewing up the side a little bit, but not too much. It should look like this:

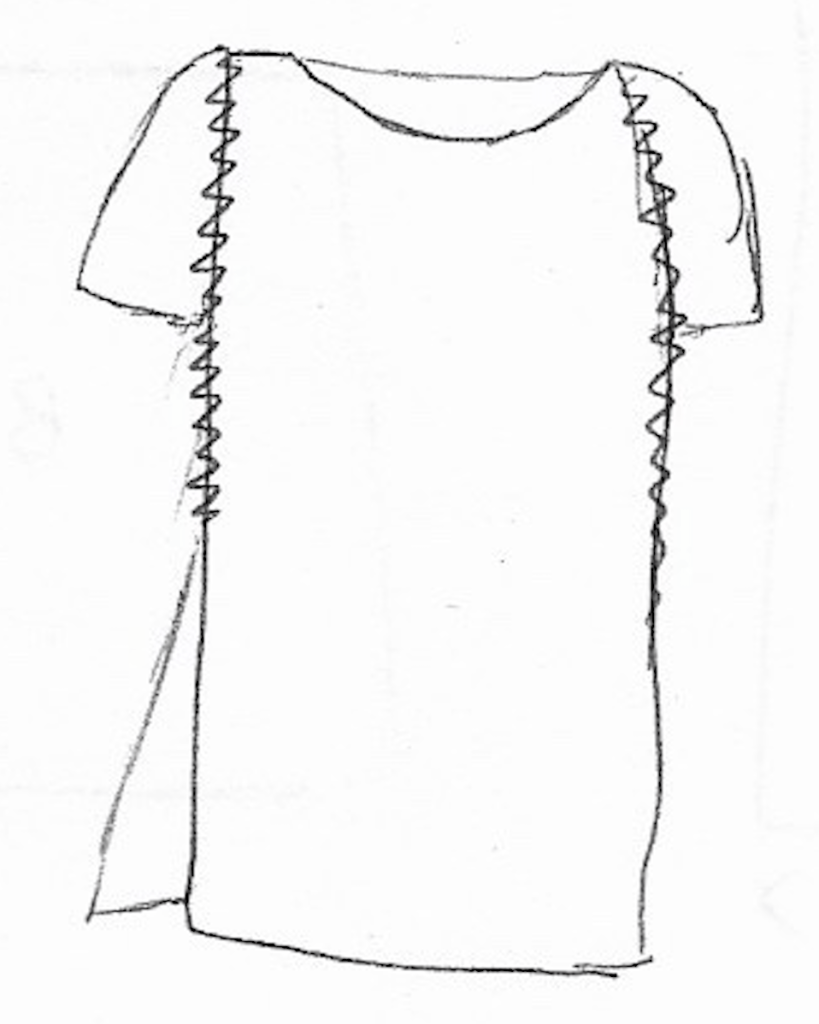
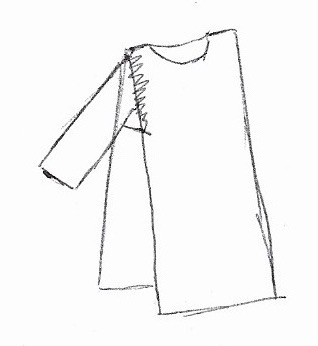
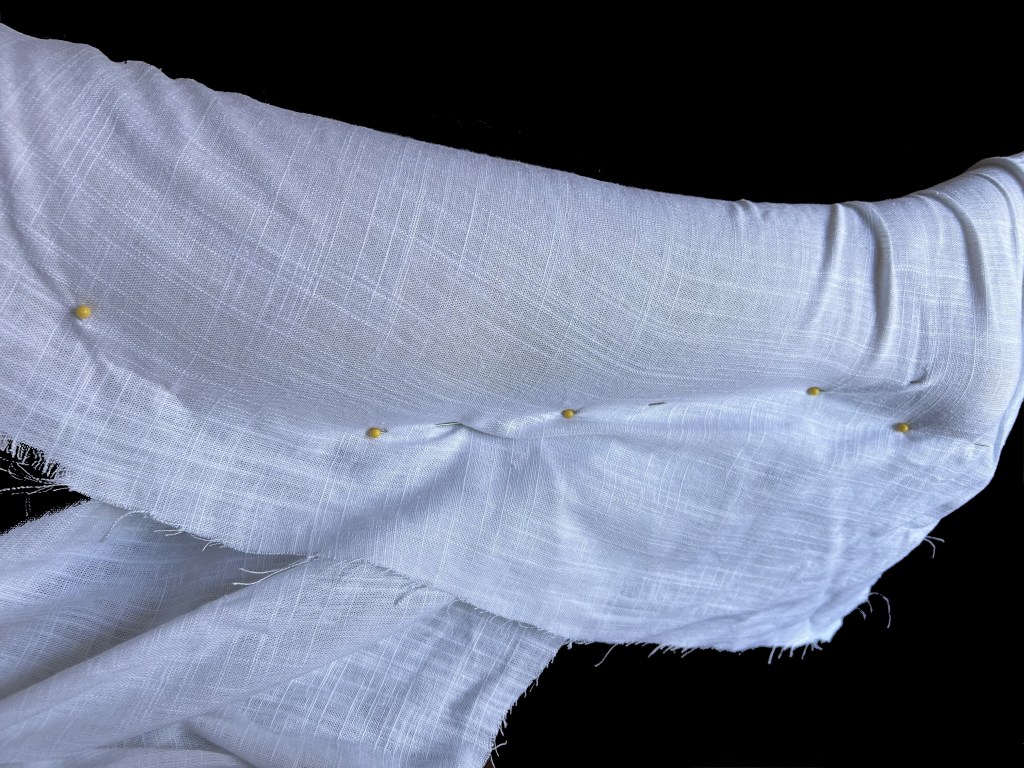
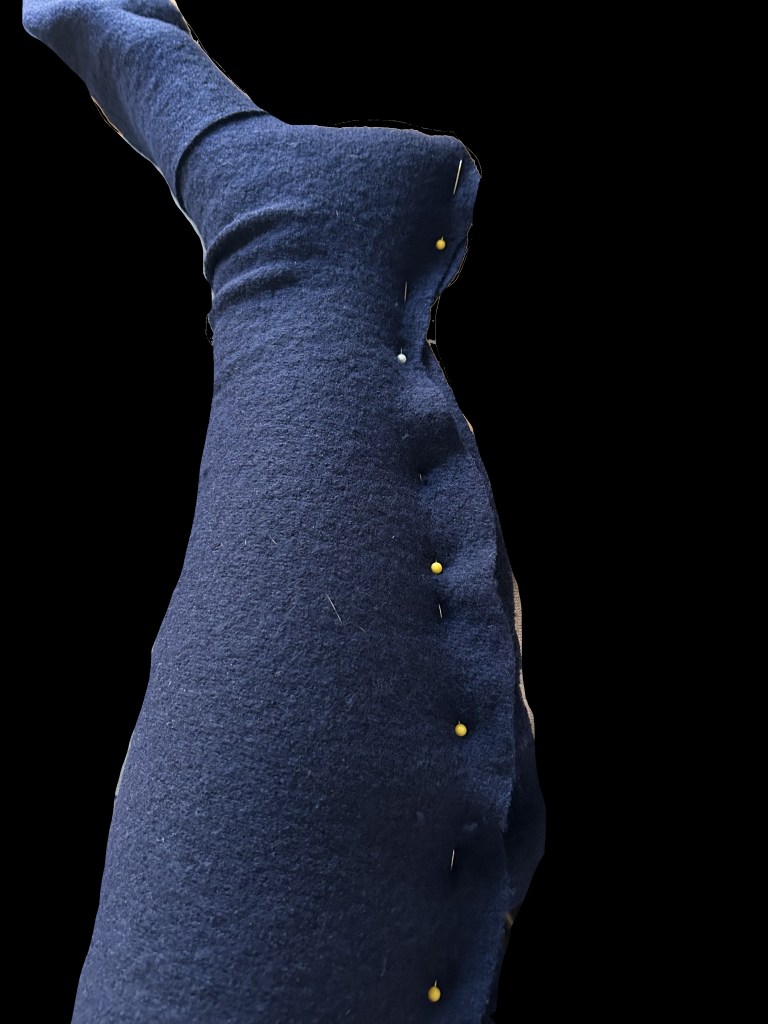
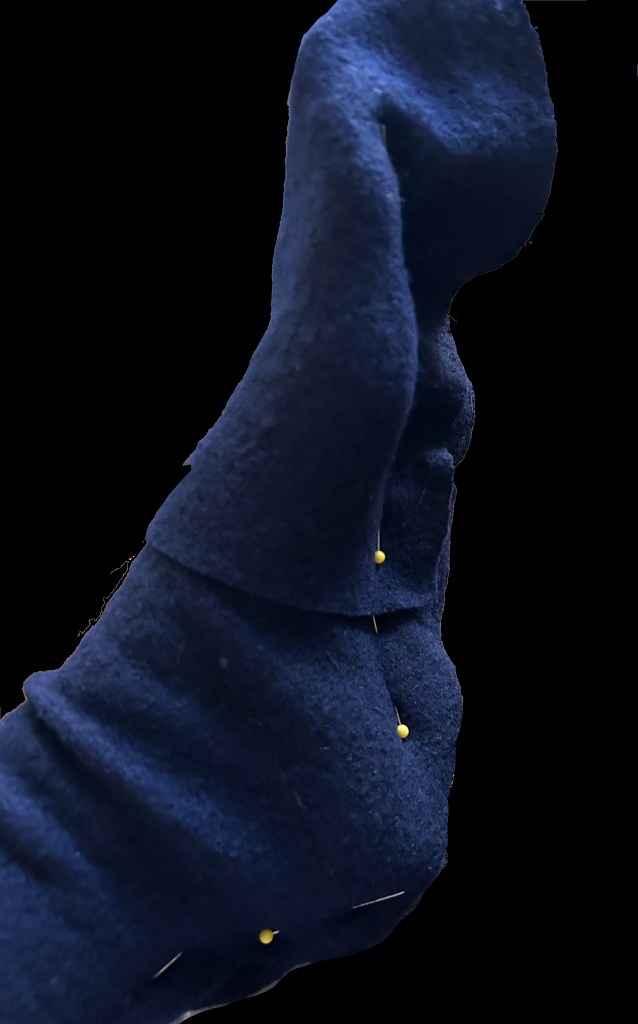
Step 6: Now to add the sleeves. Slide them in so right sides are together, and pin around the edge of the arm hole and sew. When finishing the sleeve, be sure to close and gap present on the side.

Congrats! You’ve constructed your coat! Now to finish it off and make it look pretty!

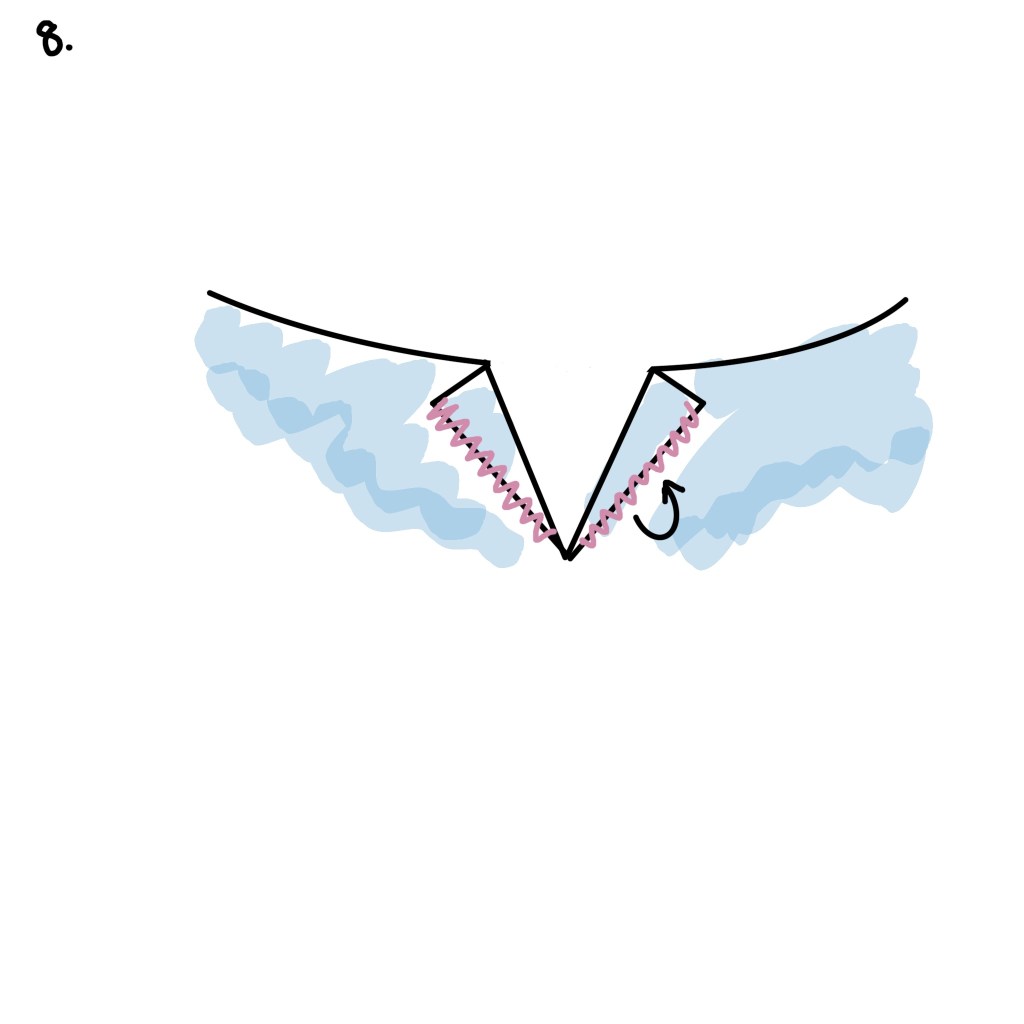
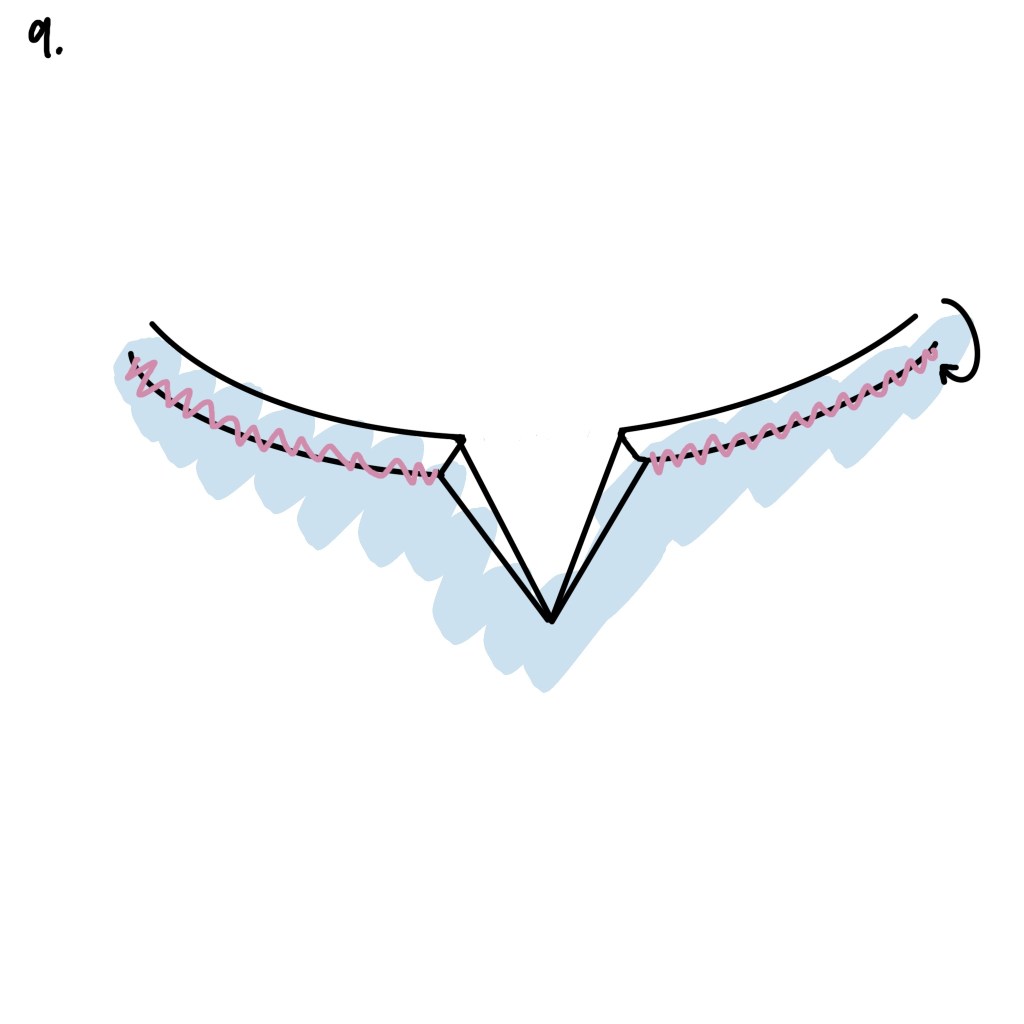
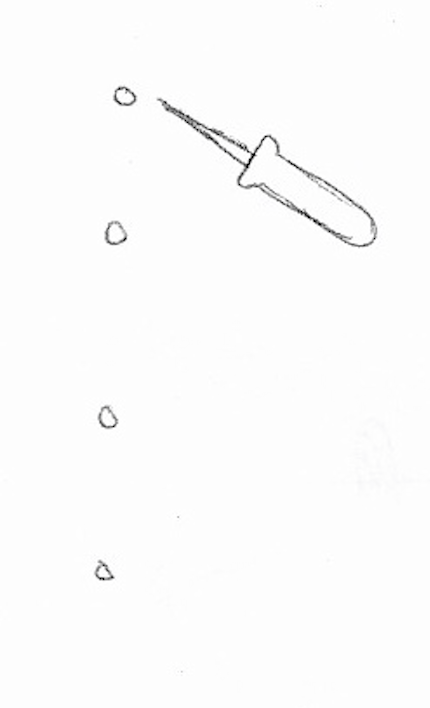
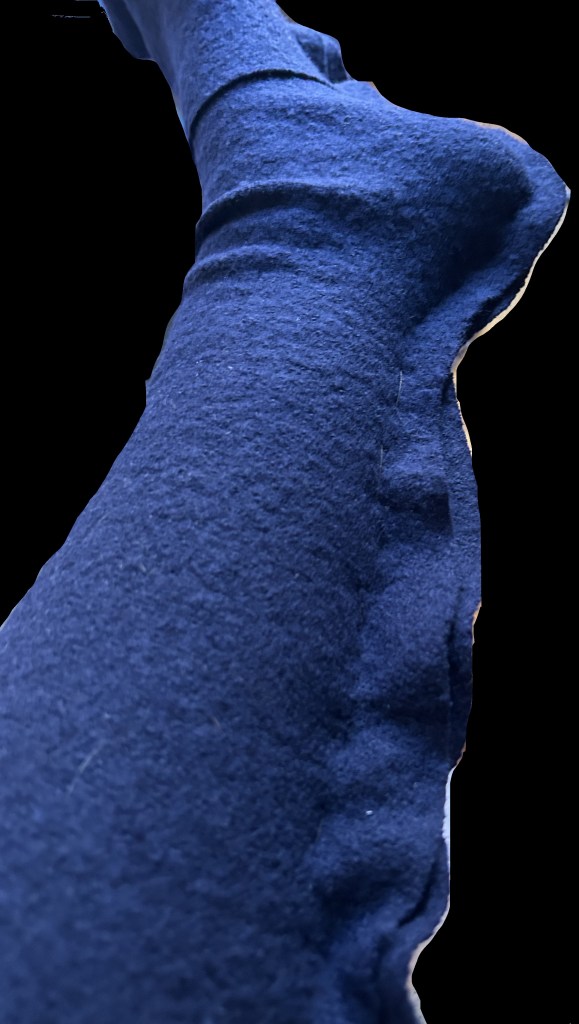
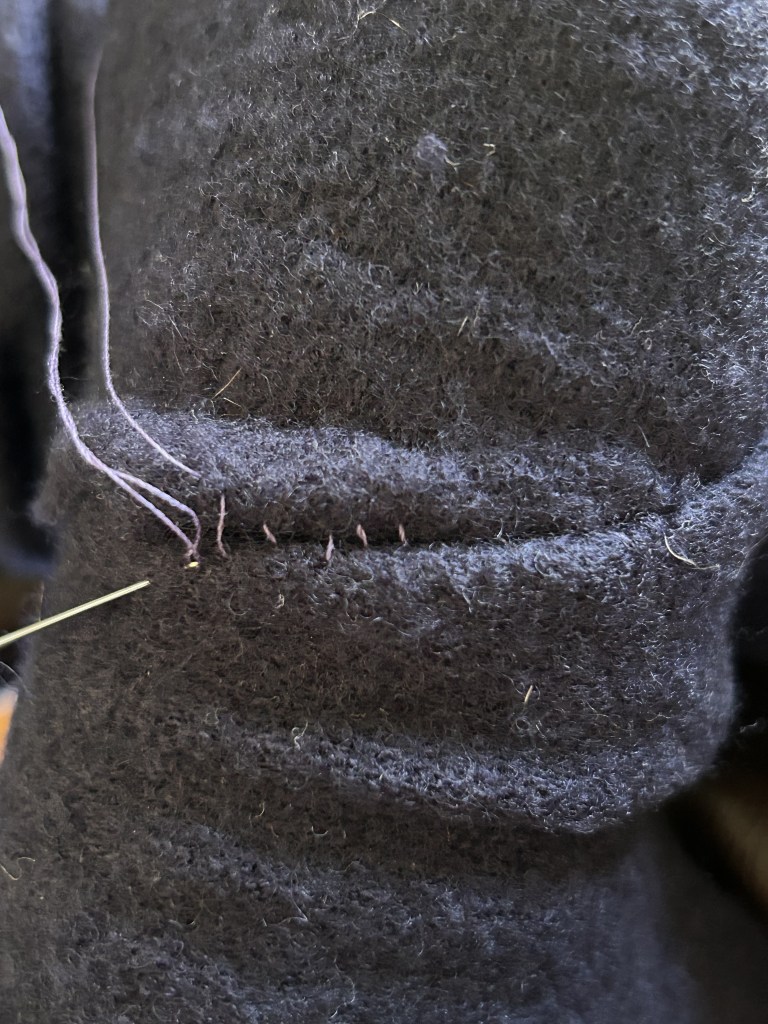
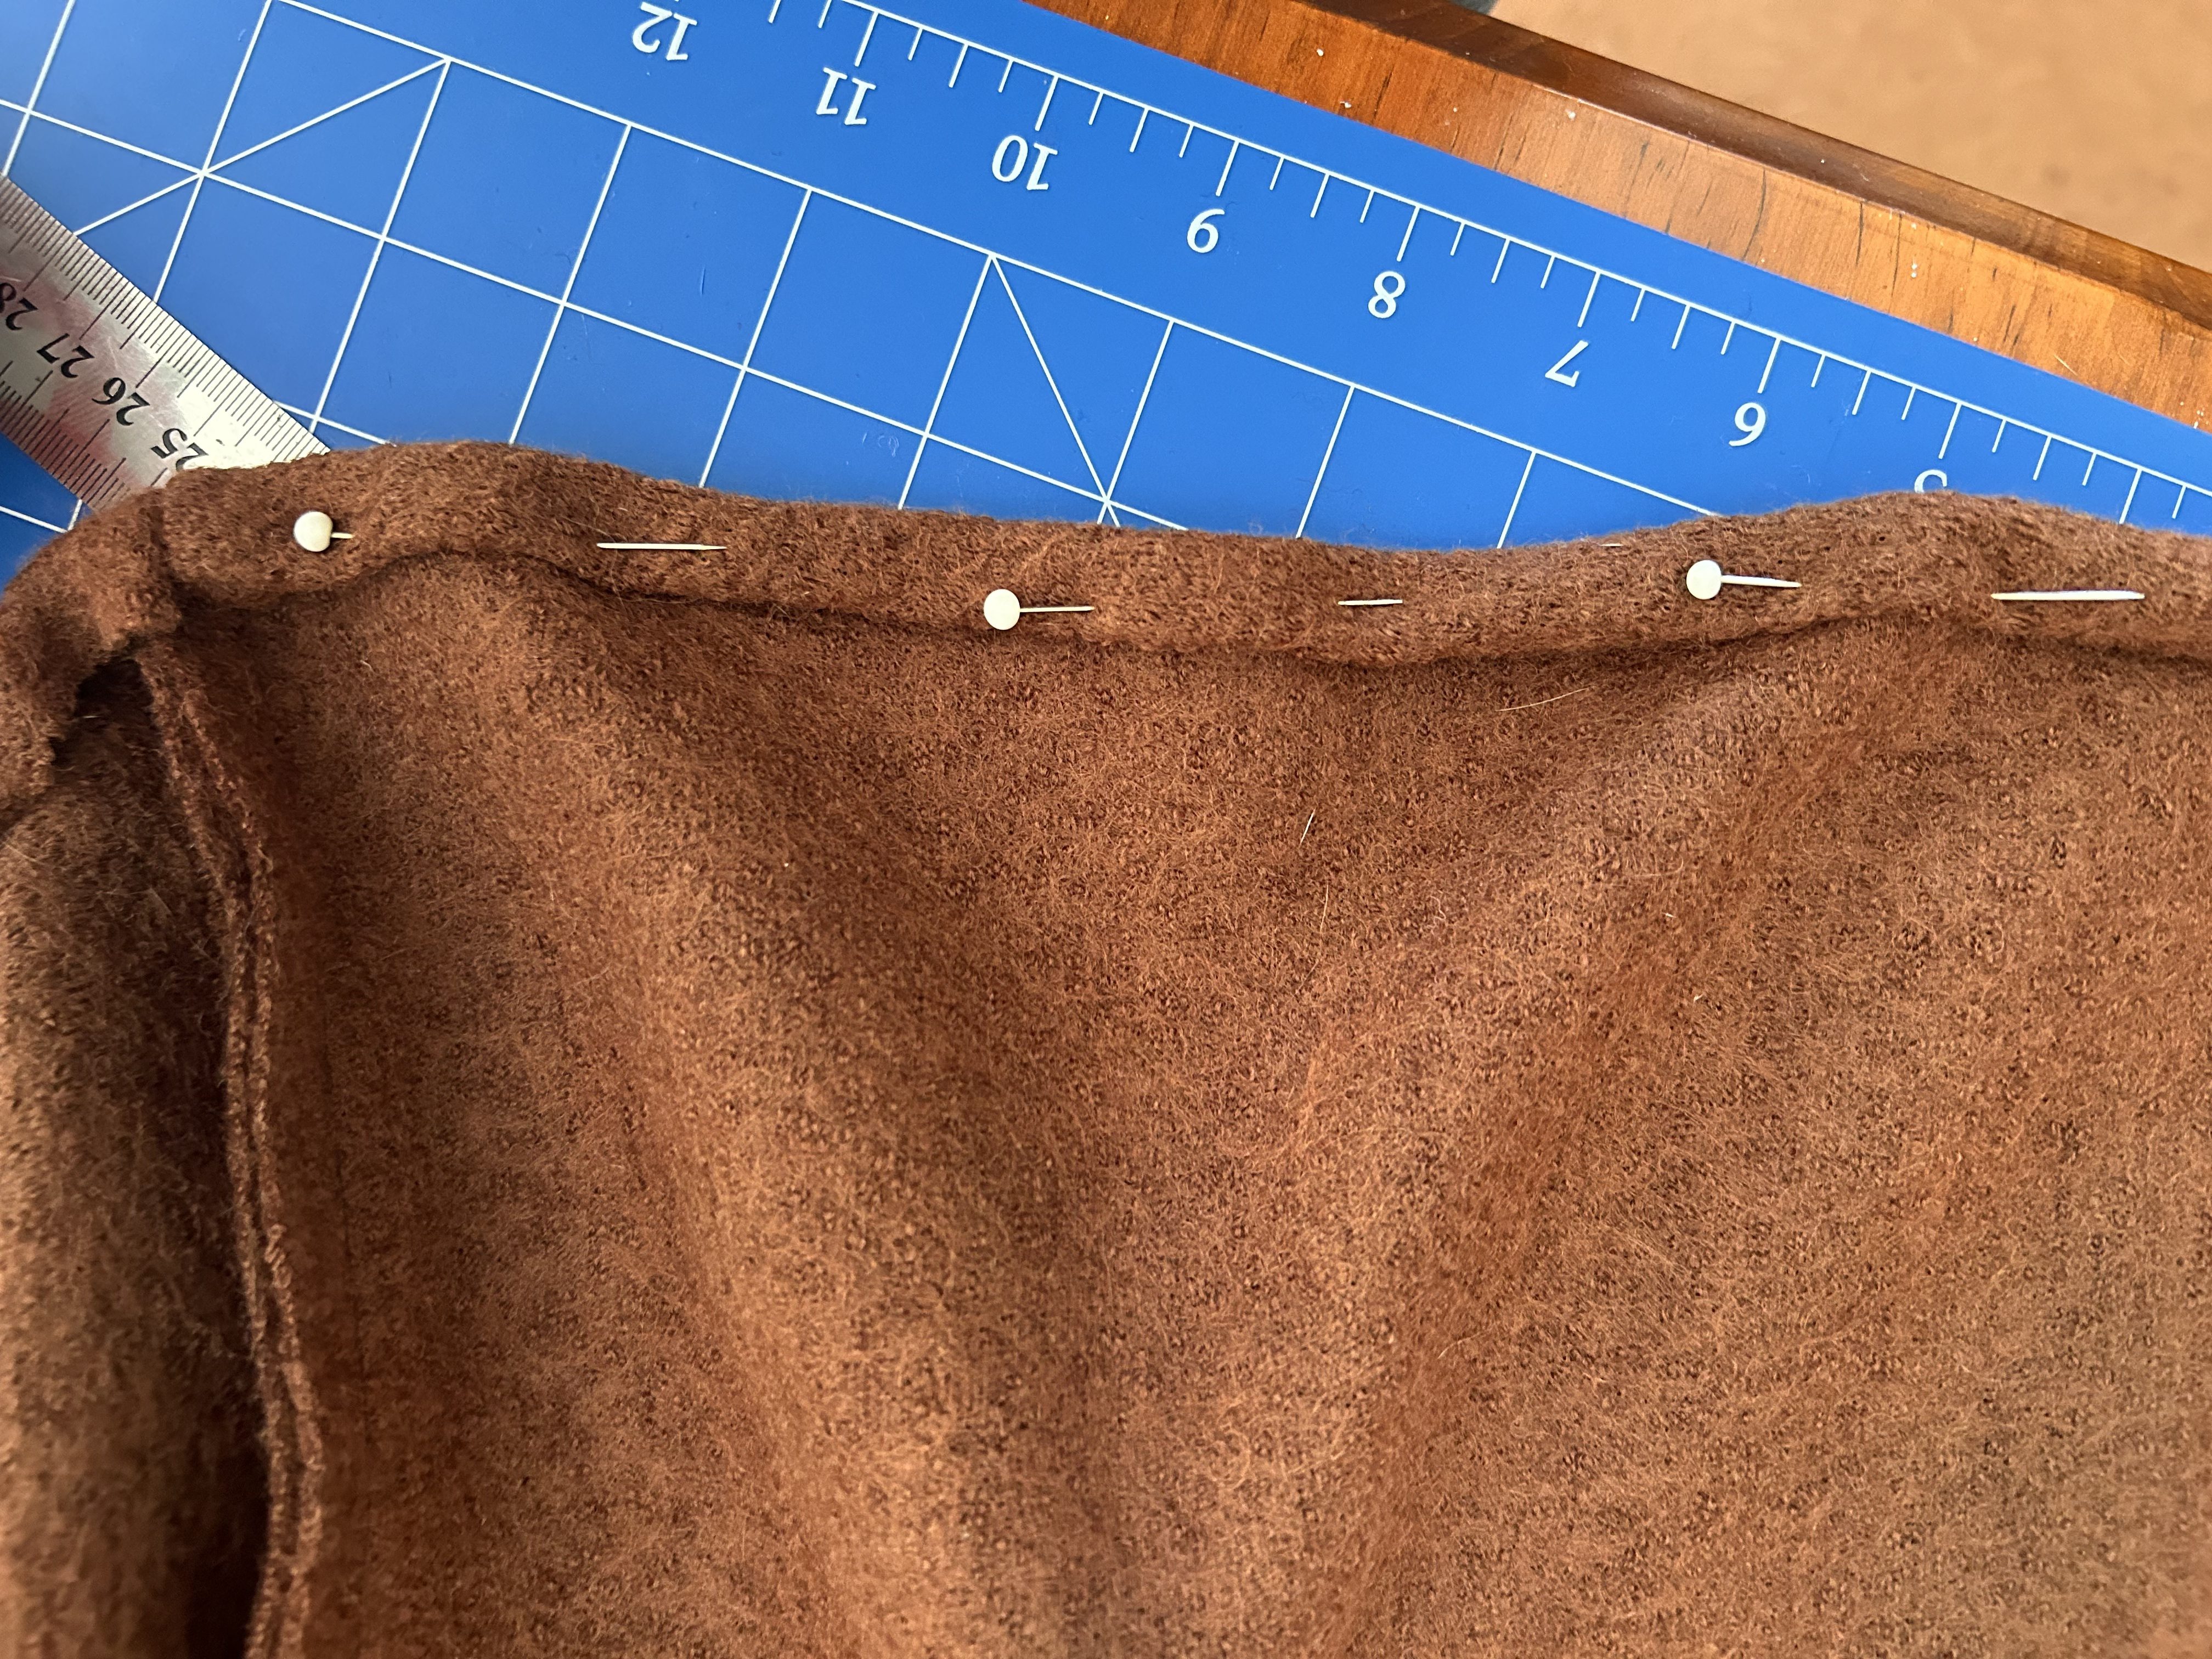
Step 7: The hemming. This bits easy so don’t worry. Simply roll the raw edge over twice, pin then sew! I did this all in one go, starting at the bottom of one end of the coat.

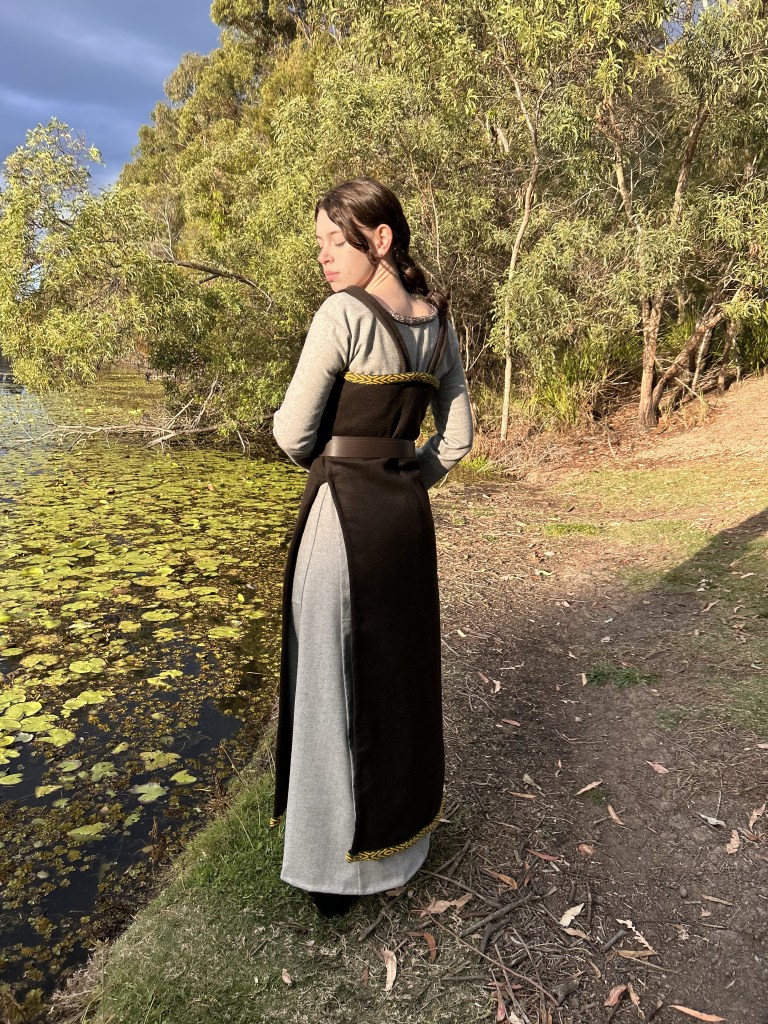
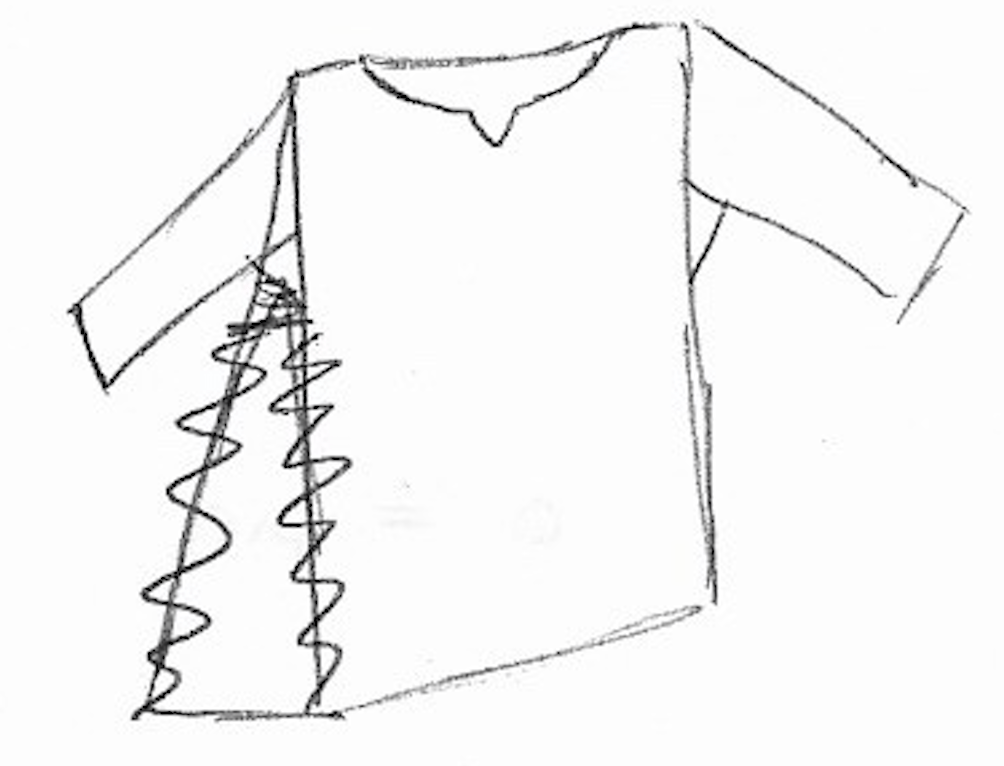
That’s it your done! Unless you want to do the optional step 8 of adding in some tablet woven trim (I get mine from GewandUndTand on Etsy) along to front! Close it off with a brooch and you’re ready to hit the town! (You can also wear this as an oversized cardigan too)

I would love to see how your coat turned out! So be sure to tag me on instagram @medievalmusgrave. I’ll see you in the next one (which will hopefully be soon). Happy sewing!

Viking Apron Dress (Hangerok)

Hello! Welcome back! Namely to around the 10th Century. Today I will be showing you how to make a viking apron dress.

Brief History

The apron dress was used as an overgarment, that was fastened together by two tortoise brooches at the front.

The apron dress goes by multiple different names such as trรคgerrock and hรคngerock and smokker. There have been many different dig sites that have each unveiled new information. At the Birka site the fragments of the hรคngerock are small, but they do tell us that they were made of wool. The original colour of wool is hard to identify as it ages, as it can be stained by the body decomposition and the soil, but they have found evidence of a dark blue and dark brown wool (I used dark brown for my garment). They have also found evidence of linen hรคngerocks.

As mentioned before the hรคngerock was fastened with two loops that would be held together by a brooch. Linen, wool and even silk loops have been found in graves, with some of the loops having an extra bit of fabric on the inside to add strength, this has mostly been seen in the silk loops.

Decorative trim has also been found, thought to have hidden the top stitches of the hรคngerock. Silk, tablet woven trim, wool string, and braided string has been found, with some of the finds leading archaeologists to believe tools were hung from these trims.

If you would like to read more on viking hรคngerocks check out this page here.

Tutorial

Alright! Let’s jump into making this hรคngerock. For this project, I used around 1.5m of dark brown wool, which as discussed above has been found at burial sites.

Below is the pattern for your hรคngerock. How easy?

For this project you will need the following measurements:

  • Bust – all the way around divided by 2 (piece A)
  • Just above the bust to around mid shin – you can change where you’d like it to finish based on your personal preference (piece A)
  • Strap length x 2 – just lay your measuring tape over your shoulder, so the back lines up with the top of your bust and it finishes just below your collar bone roughly (add a few centimetres for luck) For the width I used around 8cm, again you can change this, just make it 2x wider than what you want the finished strap to be (piece B).

Now that you have all of your measurements, lets get started:

Step 1: Begin by sewing the sides of pieces A together on the sides, to around your waist.

Not pictured, but fold down the top of the fabric and fold it down to create a clean edge. Repeat this for the sides and bottom. I’d recommend using a whip stitch.

Step 2: Fold each side of piece B.1 and B.2 towards the middle so that they meet next to each other, and sew them together to create a long tube.

Step 3: Fold the new rectangles in half and sew together. You can see what it should look like from the side at the top left of the image.

Step 4: Fold both piece B.1 and B.2 in half. Leaving a gap at the fold, sew the two sides together, so that the finished pieces will lay flat. I would recommend a ladder stitch.

Step 5: Sew both of pieces of B.1 on the back of piece A, closer to the centre but not entirely in the centre.

Sew both pieces of B.2 to the front of piece A so that they sit inline with your breasts.

Both loops should meet together.

Step 6: Decoration time! Now you can add your brooches and tablet woven trim. I got my brooches off of amazon which you can find here! But you can find way more options on amazon.

For my tablet woven trim I got mine off of Etsy. I put my tablet woven trim on the top and bottom of my hรคngerock.

And that’s it! You’re done, easy as pie! There are other styles you can do where the hรคngerock has side gores similar to the viking dress I made, but I chose not to make that style this time around.

You can finish off your look with a belt bag/pouch (I bought mine from a re-enactor at the Abbey Medieval Festival) and a belt. The belt seen in my pictures is not very accurate, women were thought to have worn belts made from a long tablet woven trim rather than leather, but leather belts would’ve been a lot thinner in width.

I would love to see your creations on instagram, so be sure to tag me @medievalmusgrave


Follow me on Instagram and share your creations!


Viking Dress Tutorial

Hello! Welcome back! Today I will be showing you how to make a Viking dress. This pattern consists of three shapes; rectangles, triangles and two squares. How easy!

Brief History

Unfortunately there isn’t much artwork of Vikings or their clothing, or much available information on females clothing.

What we do know is the materials their clothing was made from, such as wool and flax! This dress is meant to be worn as an undergarment and is thought to have been a plain or natural colour, but don’t let that stop you! There’s nothing to say they didn’t use bright colours as they had lots of dying options.

Plants used for dying clothing included:

  • Woad to get blue
  • Madder to get red
  • Hedge Bedstraw to get orange or rose
  • Heather and scentless mayweed for yellow
  • Greater knapweed for green and many more

look at all the bright and beautiful colours!

Tutorial

Alright! Let’s get stuck in to making this dress! For this dress I chose to use a woollen herringbone fabric, a fabric that is thought to have a similar weave to Viking age clothes.

Below is the pattern for your dress, much like other clothing from the Middle Ages, it’s very simple! (P.S do you like the new style?)

For this project you will need the following measurements (refer to above image to see where they apply if you’re a more visual learner);

  • Full Bust divided by 2 – this will be the width of your rectangular body piece (A), you will need 2 of these pieces.
  • Shoulder to floor – I recommend having the top of your tape measure on the floor and hold the rest on the centre of your shoulder. This will be for the length of your rectangular body piece (A).
  • Shoulder to wrist – this will be the length of your sleeve (B).
  • Bicep circumference – this will be the width of your sleeve (B).
  • Waist to floor – or for a little extra room measure from your undercuts to the floor. To find your waist, bend to the side and where your skin folds is your waist (D)
  • Pattern piece C is 10cm x 10cm, and this is what I would recommend, but feel free to make this bigger.
  • For the base of my gores (D) I used the measurement of 35cm, but if you would like a wider dress circumference, make this bigger.

Now that you have all your measurements, here is a recommended pattern layout, not entirely to scale but it’s a good guideline:

Construction

Alright lets get sewing!

Step 1: Begin by sewing piece A together at the shoulders. Be sure to leave room for your head!

Step 2: Mark out a neckline shape with chalk or washable fabric marker, I recommend doing this while wearing your garment. From the centre of your neckline, draw a 2 inch (4.5cm) line. Cut this out once you’re happy with the shape.

Step 3: Moving onto the sleeves! Sew one side of C to the length of B, as pictured.

Throughout all the sleeve steps, overlap each stitch to avoid holes.

Step 4: Now sew side 1 (as pictured) of piece B to side 2 (as pictured) of piece C.

It should make piece C look like a diamond when attached.

Step 5: when the sleeve is folded in half it should look like a triangle.

With the sleeve folded in half, sew down to the wrist. Repeat these steps for the other sleeve.

Step 6: Now to attach the sleeves to the body!

With right sides together, pin the sleeves to the body with the top of your sleeve on the shoulder seam, and sew.

Step 7: Now to attach the gores (D)!

Starting from the bottom of the dress attach one side of D to the front of A, and the other side of D to the back of D.

Once gores are attached, sew the side seams between the armpit and top of the gores closed.

Congrats! The construction is complete!

Step 8: Now to make things neat.

Fold the sides of the split on your neckline inwards, twice, so it is rolled under itself.

Pin and sew down with a whip stitch.

TIP! to avoid seeing stitches on the outside of your dress, only pick up a small amount of fabric when sewing it down.

Step 9: With the rest of the neckline, fold it inward twice, so it’s rolled under itself, just like the slit.

Pin and sew with a whip stitch.

Repeat this to hem the wrists, and skirt of the dress.

Step 10: To lay all the inseams flat, I used a blanket stitch and hand stitched all of the seams down to one side.

Time consuming, but so worth it!

Step 11: Add your tablet woven trim!

I got mine from Etsy, you can get the same one here!

I just whip stitched this to the neckline and wrists of my dress, but you can also add this to the hem!

Congratulations! You’re finished! I’m sure it looks great! Be sure to tag me on instagram if you share your creation @medievalmusgrave, I’d love to see it!


Follow my instagram and share your creations!


Viking Tunic

Hello! Welcome back! Today I will be showing you how to make a viking tunic.

This garment, like other items of clothing from the early Middle Ages, are incredibly easy to make. You only use rectangles and triangles.

Brief History

Viking tunics, were an everyday item of clothing for both men and women, and were between mid thigh and knee length. Made from wool, flax, linen or animal skins, they were made in the home by women, and often decorated with tablet woven trims.

Many people think that the Middle Ages would’ve had dull colours, by Vikings loved their colour! They would use plants to dye their clothing:

  • Woad to get blue
  • Madder to get red
  • Hedge Bedstraw to get orange or rose
  • Heather and scentless mayweed for yellow
  • Greater knapweed for green and many more

Just look at all of those beautiful colours!

Tutorial

Alrighty let’s get started! For this tutorial I created a key:

Here is the pattern for your tunic.

For this project you will need the following measurements:

  • Chest – width of piece A
  • Shoulder to mid thigh/knee x2 – for length of piece A
  • Shoulder to wrist (arm length) – for length of piece B
  • Bicep circumference – for width of piece B
  • Head circumference

For the gores, I made the width 48cm (with seam allowance) and 65cm tall (with seam allowance). The gussets for the armpit were 10cm x 10cm.

Recommended fabric layout:

Construction

With all your pattern pieces cut out, lets get started!

Step 1: Sew one side of piece C to the length of piece B

Step 2: Sew side A to side B, to create a diamond shape.

Step 3: Sew down the length of your sleeve. It should look like this when laid flat.

Step 4: Pin your tunic piece where the middle line is.

Step 5: Sew in your sleeves with right sides together, matching the top of the shoulder to your pinned shoulder seam.

Step 6: Using your head circumference, mark out your neckline, with a 1.5 inch line in the centre front, to create that ‘v’ shape.

Step 7: Add in your side gores. Start sewing from the bottom up, then close the gap between the armpit and top of the gore.

Step 8: On your neckline, fold the sides of the ‘v’ slit to one side, and fold it over once more. Whip stitch this down to created a felled seam. You will need to create lots of tiny stitches at the point of the ‘v’ to prevent ware and tear.

Step 9: Fold over each of your hems twice, and whip stitch them down.

*Optional* step 10: Sew on some decorative tablet woven trim to the neckline and cuffs of your sleeves. I got mine from GewandUndTand on Etsy

And just like that you’re done! What’s that? You want a bonus? Well ok… here’s how I made the pants for my partner.

Quick and Simple Pants

I had no idea how to make pants and that was scary for me, so I found a pattern that looks like this online, but I can’t find the original source now…

That’s literally the pattern, how simple??

Just sew up the sides, and up the inner leg.

Fold over the waistline and ankles and sew a little tunnel for you to insert your elastic.

And that’s it. All done! I hope to learn how to properly make pants in the future, but these worked for now.

Be sure to share your creations with me on Instagram @medievalmusgrave


Sewing my way through the Middle Ages and beyond


Follow me on Instagram and tag me in your recreations!

15th Century Kirtle

Hello! Welcome back! Today I will be showing you how to create a 15th century kirtle, without having to draft up your own pattern. AKA I was lazy and on a time crunch for this dress and decided to play a dangerous game, but I won. So I’m going to show you how!

Brief History and Artwork

The 15th century or 1400’s, is where we start to see a real change in medieval clothing. Clothing is fitted, women preferred a short sleeved kirtle with the option to pin on a long and often decorative sleeve, necklines became lower, and everything was becoming a lot more fancy.

Wool was still one of the most popular fabric choices for the common folk, along with linen for wimples and chemises. While the poor were left with the wool, the wealthy adorned fine patterned silks with rich colours.

Lacing also became popular at this time. Front and side lacing was reserved for those who didn’t have someone to assist them with dressing (the poor) while the rich would have back lacing.

In the images below, you can see the construction lines of the dresses, the different types of lacings and fastenings, and examples of pin on sleeves. These pieces of artwork were my main inspiration in the creation of my kirtle.

Now with the brief history out of the way let’s get onto the tutorial!

Tutorial

Again, this isn’t the most professional pattern and dress making ever, but it worked for me and I’m sure it will work for you. It’s also very beginner friendly.

My mum wore a similar dress to the medieval festival but with the 13th century kirtle construction, just swapping out the sleeves and adding the addition of front lacing. Something else that could be easier.

I am also trying something new. I filmed portions of this dress making and will include besides instruction. Let me know what you think.

For this kirtle you will need the following measurements:

  • Bust divided by two – for example if your full bust measurement (all the way around) is 80cm, you will use 40cm for your measurements.
  • Waist – to find your waist, bend to the side and where your skin creases is your waist.
  • Shoulder to floor
  • Waist to floor
  • Shoulder Circumference
  • Hand – measure the circumference of the largest part of your hand.
  • Shoulder to wrist (overarm)
  • Armpit to wrist (underarm)

Kirtle Pattern:

There are other ways to create this dress, namely with a seperate bodice and skirt piece, where the skirt is one much longer piece of fabric. For the bodice, your can use the pattern you create today to draft up a bodice pattern.

Recommended Fabric Layout:

My fabric was 150cm in width and 250cm in length.

As you can see here I used a slightly different layout, and I had quite a lot of fabric leftover.

The sleeves I’m using for this pattern are the same as the ‘S’ sleeve, which you can find a tutorial to here, but are cut shorter. I just traced a new pattern from my old one and cut off a large portion of the length. Leave the sleeves to cover around 3/4 of my bicep.

Construction

Now you’ve cut your fabric, lets get into the construction!

Key for my doodles:

Step 1: Begin by sewing the shoulder sleeves, but leave enough room for your head!

Step 2: With chalk or a removable fabric marker, mark out your neckline. I used a tank top with a low square neckline as a guide. Mark out the centre of your neckline (which should be in the centre of piece A) with a line. Cut out your neckline but not down the line. Try on your kirtle at this stage to make sure you like your neckline

Step 3: With your kirtle on, or using a a tank top for reference, mark out the arm holes and cut. This step isn’t necessary for a fabric like linen or cotton, but I wouldn’t skip it if you’re using wool… unless you want to look like a medieval version of Steve from Minecraft.

While still wearing your kirtle, mark out your waist, and belly button, or just below your belly button.

Step 4: Sew your sleeves together so they look like this:

Step 5: Sew in your sleeves, making sure that the sleeve seam is at the back of your garment.

With a seperate stitch, sew from armpit to waist.

Step 6: Put your kirtle back on (inside out) and while pulling on the sides mark out your waist to take in your dress, from under your bust to your waist. This will also add bust support.

Once marked out, sew along your marking and cut away the excess fabric.

It should look like this once you’ve taken it in:

Step 7: Sew down the sides of your skirt.

Step 8: Cut up the middle front and back of your garment, and across the waist, underneath where you took it in.

The kirtle once it’s been cut.

Step 9: Sew the back bodice pieces together.

Step 10: Sew up the front skirt to your naval marking.

Step 11: Add in the extra skirt fabric (piece B) to the back of the skirt.

Step 12: Sew the front of your skirt to the front of your bodice.

Step 13: Pin pleats into the back of your skirt. The sew the back of your skirt to the back of your bodice.

Woo hoo! You’re done the construction! All that’s left is to hem the neckline, sleeves and skirt. For the neckline, and front (where the eyelets will go) I folded it over once and whip stitched it down. For the selves and hem, I folded it over twice and whip stitched it down.

Eyelets

Now I must admit, my drawings for how to do eyelets isn’t the best, but I’m hoping I can explain it well enough.

Pin where your eyelets will go (indicated by white circle) I did mine alternating, about an inch apart from each other. With an awl create a hole, make sure your hole is large enough for your lacing to fit through.

To secure it, you can use ordinary thread, but I’d recommend embroidery thread, as it does a lot of the work for you.

Starting from the inside of your garment, push your needle through to the front.

Loop your needle back through the hole made by your awl and go back out to the front of your fabric.

Continue this all the way around, stretching out your hole as you go. Finish your stitch at the back of your fabric.


And with a little bit of lacing, you’re done! For the most fashionable look, I recommend pairing this with a 14th century hood and a cute embroidered coin purse.

Be sure to share your creations with me on Instagram @medievalmusgrave


Did you find this helpful?


Sewing my way through the Middle Ages and beyond


Follow me on Instagram and tag me in your recreations!

Fitted ‘S’ Sleeve Tutorial

Hello! Welcome back! Today I will be showing you how to make a more complicated, albeit a much more fitted, sleeve for your medieval clothing.

This sleeve is seen in my 15th century kirtle tutorial, but in a shorter format.

Brief history

I do not have much history for this post, as sleeves are surprisingly difficult to find information on. Who would’ve thought. But what we do know is that the square sleeve, as seen in my 13th century kirtle tutorial and my Viking tunic and dress tutorial, would’ve been used in those periods, before clothing started to get fitted, which was around the 1300’s (14th century). We can safely assume that this sleeve would’ve come into fashion around this time but probably not much early, as while they are more complicated, they also are not as fabric efficient.

But I’m not an expert, so uh… don’t use this for any research assignments kids. Cheers.

Below are some images of tunics found with this fitted ‘S’ sleeve. The easiest way to tell the difference is by looking for an armpit gusset. If it lacks this piece, it’s most likely been constructed with the same method I’m about to show you.

Tutorial

Alrighty, let’s get stuck in. I want to preface that you really should make a mockup on scrap fabric. This is not something you want to mess up using your expensive fabric… believe me.

For this sleeve you will need the following measurements:

  • Shoulder to wrist (overarm)
  • Armpit to wrist (underarm)
  • Shoulder circumference
  • Widest part of hand circumference

Add seam allowance to all of your measurements!

Step 1: On your scrap piece of fabric in a straight line mark out the measurement of your overarm.

Step 2: Now, mark your underarm measurement to the side of your overarm (the distance doesn’t matter too much at this point) Make sure the bottom of these measurements line up horizontally.

Step 3: Now mark out your shoulder measurement at the top of your two lengths, and your hand measurement at the bottom, in the middle of your two length markings.

Step 4: Using your previous measurements and markings as guide, carefully draw out the ‘S’ shape at the top of your sleeve, being sure to hit all the markings of your shoulder and two widths. Draw a line from the edge of your ‘S’ curve down to the hand measurement as indicated by the dotted lines.

And you’re done! Be sure to pin the sides together and try it on and make any necessary adjustments until you get a snug fitting sleeve. I found that I had to widen it in the middle to make room for my elbow to bend properly. I personally have no gains so I didn’t have to worry about the bicep area… kinda made me sad.

A note for construction

When you attach this to your tunic or kirtle, place the seam running down the back of your arm. You can easily do this by finding the middle of the shoulder (the large hill shape) and pinning that to the top of your shoulder seam.

Also when you cut your sleeve, make sure you have two mirroring pieces or you’ll have a backwards sleeve! How embarrassing (I say that like I haven’t done exactly that).


You’re all done! Congratulations! You have now evolved your sleeve to a level 2! If you found this helpful, be sure to share it with your other historical re-enactors and check out some of my other posts! See you next time xx


Did you find this helpful?


Sewing my way through the Middle Ages and beyond


Follow my Instagram and tag me in your recreations!

Simple 13th Century Kirtle

Welcome back! In this written tutorial, I will be showing you how to make the most basic of medieval kirtles, from around the 13th century. This kirtle is made up of rectangles, squares and triangles. How easy?! Lets get sewing!

Disclaimer!

I first made this dress around 3 years ago and don’t have any pictures of the actual sewing process, so to make up for it, I have drawn some little diagrams of the sewing process. The dress I made, also had a different (albeit a much more complicated) sleeve pattern to what we will be using in this tutorial, but I’ll give that it’s own tutorial at a later date which I’ll link here.

My final dress also has pieces of white fabric to fill in the neckline, as I realised I’d get sunburnt with how wide my neckline was. This is not necessary nor was it planned, be sure to measure the neckline while wearing your dress!

Breif history and artwork

As stated this dress is from around the 13th century and one of the most simple constructions of a medieval kirtle.

Kirtles were worn over a linen chemise (or shift/smock whatever name you choose) and sometimes under a surcote gown or other garment. Kirtles were mostly made out of wool however linen may have been used in hot weather.

Kirtles and clothing in general at this point in history were very loose fitting and had minimum shape. Any shape seen was created by a belt. This tutorial does have the option to add in bust support by taking in the waist, however this isn’t entirely historically accurate, but it is the option I chose for my kirtle.

Tutorial

Alrighty! Let’s get started. So we know that kirtles would’ve been made out of wool, but wool is expensive! For my first creation of this I used a cheap cotton, which still looked great!

For this project I used around 3m of fabric that was 112cm in width. But you can figure out how much fabric you will need by finding the area of each pattern piece, add it together and convert it to metres.

Measurements:

The measurements you will need for this project are as follows:

  • Bust divided by 2 (or widest part of torso, measure all the way around). This will be for pattern piece A.
  • Shoulder to floor (I recommend having the start of your tape measure on the floor so you know what your measurement is without loosing any length) This will be for pattern piece A.
  • Waist to floor (to find your waist, lean to the side and where your skin creases is your waist) This will be for pattern piece C.
  • Bicep circumference. This will be for pattern piece B.
  • Shoulder to wrist. This will also be for pattern piece B.

Remember to add around 4cm of seam allowance to all measurements!

Here is an image of the pattern pieces, with measurements.

Pattern piece A will be the main body of the kirtle, piece B and D will be for the sleeve (I do recommend part D be 10cm x 10cm minimum as this will be the armpit gusset) and part C will be the gores of the kirtle.

To get the width of your gores you have to decide how big you want the circumference of your kirtle. I used 3m or 300cm for mine. I then subtracted my full bust measurement from 300cm and divided it by 4 to get the width.

The sleeves for this pattern are quite loose, if you’d wish for a simple, more fitted sleeve, measure the widest part of your hand and taper the shape from the bicep to the hand measurement as seen below.

For a snug fitting sleeve with no armpit gusset (similar to modern day sleeves) check out this blog post on how to make a ‘S’ sleeve.

Here is a recommended layout for your pattern pieces of your kirtle. Be sure to use chalk or a wash out fabric marker to keep your final product looking clean.

Construction:

Now that you’ve cut out all of your pattern pieces it’s time to start sewing.

For my illustrations I have created a key for you all!

Step 1:

You want to begin by sewing the shoulder seams of your kirtle, but be sure to leave enough room for your head to fit through!

Slide it on and with chalk or a removable fabric marker, trace out your desired neckline shape and cut it out.

Step 2:

Now for the sleeves! Sew one side of your arm gusset (piece D) to one side of piece B.

Step 3:

Now attach the right side of part D to the other side of part B, so the gusset creates a diamond shape.

Step 4:

Now sew down the straight side of your sleeve, so when laid flat it looks like this!

Now to attach the sleeves to kirtle body. If you’re using a stiffer fabric, I recommend putting on your kirtle inside out and tracing out an arm hole to avoid having block shoulders, this isn’t necessary for a light material like cotton or if you’d like a drop shoulder look.

Step 5: With right sides together pin the sleeve to the arm hole with the shoulder seams lined up and sew all the way around. Try this on now, so you can make any necessary adjustments before moving on.

Step 6: Now it’s time to attach the side gores. With two of your full gores, attach them from the bottom up. Gores are possible to sew purely on a machine but can be difficult to can a nice point. If you’re not confident on a machine or don’t want any puckering I’d recommend sewing the point of your gores by hand.

Once you have placed in your gores, sew up the side seam from armpit to the top of your gore.

Step 7: Now for a scary part. Cutting your garment!

First measure from the bottom of the kirtle to your waist measurement and mark it out on the front and back. The cut up that line.

Attach the back gore the same as the side gores before moving to the front.

Step 8: With your two half triangles, sew them together on the straight line. This is your front gore (for a lil extra fancy up front). Attach this the same as your other gores.

Congratulations! You’ve done all the construction of your kirtle! I’m sure it looks amazing! This step is optional, but if you wish for some bust support you can take in your kirtle on the sides. Simply flip it inside out, pop it on, and with your fabric marker or chalk, pull at the waist and mark your body shape. Then just sew along your marked line, and cut the excess or for a more reversible take in, fold towards the back and tack it down with a hidden whip or ladder stitch.

Now to neaten up the hems and if you want to, fell the seams!

Step 11: For hemming around the neckline, sleeve cuffs and skirt hem, fold the fabric over once, then fold it over a second time and whip stitch it down (I recommend doing this by hand)

For felling the seams, I have previously just folded them over to one side and used a blanket or whip stitch to keep your seams from fraying. This can also be done with an overlocker (If you’re lucky enough to have one) or with a zig-zag stitch on your sewing machine for a faux overlock look.

Congratulations! You’re all done! Below are some images of the kirtles I made for me and my mum! I’d love to see your creations so tag me on Instagram @medievalmusgrave.


Did you find this helpful?


Sewing my way through the Middle Ages and beyond


Basic Medieval Hose

Medieval Hose Tutorial

Welcome! In this written tutorial I will guide you through the how-tos on creating a pair of medieval hose. Lets jump in!

A Brief History on Hose

Medieval women’s hose are one of the more difficult articles of clothing found in period artwork. Usually only seen in small portions, peeking out from under their skirts while performing certain activities… some… not so PG.

However, from the examples we can see, we are able to pick out a few details. We can see that a woman’s hose were usually knee high, skin tight, and held up by garters.

Garters are an important after-thought for your hose. While we do have examples of some beautifully embroidered garters (reserved for the wealthy), many women opted to use a scrap of fabric, tied either around the calf or just under the knee.

The hose themselves would have been made from a wool or linen. For the recreation of these garments, I would recommend using a wool twill. A not so stretchy fabric on the straight, but it has a fair bit of give on the bias (Remember that term! It’s important for later). For my personal pair, I used scraps of a cotton wool blend that I used to create my partners Viking tunic.

Tutorial

Right! Now that’s out the way, let’s get stuck in!

This iteration of the hose is made in two pieces. One that wraps around the ankles and calf up to the knee, and one that goes around the top of your foot and toes. See below.

We will begin this adventure by creating a mock up. For this you will want to use a fabric, that isn’t your good and most likely expensive fabric, with a similar stretch to the fabric you plan on using for your final. I used a white linen, spare from creating my medieval chemise.

Once you have your fabric, you want to begin by laying it over your leg on the bias (the diagonal, stretchy way of your fabric, give it a tug to figure out where the bias is) and pinning it directly to the shape of your leg, down the back of your calf and to the arch of your foot.

Once you have your pins in, you can mark it with pen, trim off the excess of fabric, remove the pins and neaten up the edges to get your pattern pieces.

With your pattern pieces, lay them out on your good fabric, going in the bias direction, and cut them out, giving yourself enough seam allowance to allow for any stretch differences.

As seen below, you can identify the area that goes around the calf, ankles and heels.

Now it’s time to start sewing. If you’re ballsy you can fold the top half of the pattern in half, pin and run it through your sewing machine. However, this is not how I did it.

Instead, I repined the pieces to my leg and basted them together, before removing the hose from my foot and running the middle seam (from the knee to the top of my toes) through my sewing machine. Once this was done, I returned to the couch for a bit of hand sewing.

We are now going to attach the top of the foot to rest of the hose. I’m sure that this step is possible to do on a sewing machine, but to be completely honest… I couldn’t be bother to awkwardly twist it through my machine. SO! Hand sewing it was.

When sewing this seam, I would recommend wearing the hose. I did try sewing it off of my foot, but the seam ended up frumpy and extremely uncomfortable to stand on and I ended up re-sewing it after.

To sew the pieces together, I wore my hose right side out and ladder stitched around the seam. If you don’t know what a ladder stitch is, it is simply sliding the needle through a small amount of fabric, horizontal to the edge of the fabric, then doing it again on directly adjacent on the other edge, and working your way up the seam, making it look like a ladder. But be sure to tighten your stitch at regular intervals.

Once this seam is complete, it’s time to neaten them up, but this step is optional. If you wish to, and desire a more finished look, or you’re using a fabric that enjoys fraying, I would recommend doing these next two steps.

Begin by felling the inside seams, by folding them to one side and whip stitching them down. Once this is done, it’s time to fold over the top seam that goes around your calf, or just above your knee and stitch it down. You can either fold it down once if using a non fraying wool, or alternatively, you can fold it once by about 1cm, then fold that over again once more, and whip stitching it down to avoid unnecessary wear and tear.

Felled seam. Illustration by Sidney Eileen

And with that final stitch you’re done! Congratulations on your new, personally tailored medieval hose! You are officially ready to jig around like a true medieval lady ๐Ÿ˜‰

Did you find this helpful?


Sewing my way through the Middle Ages and beyond