

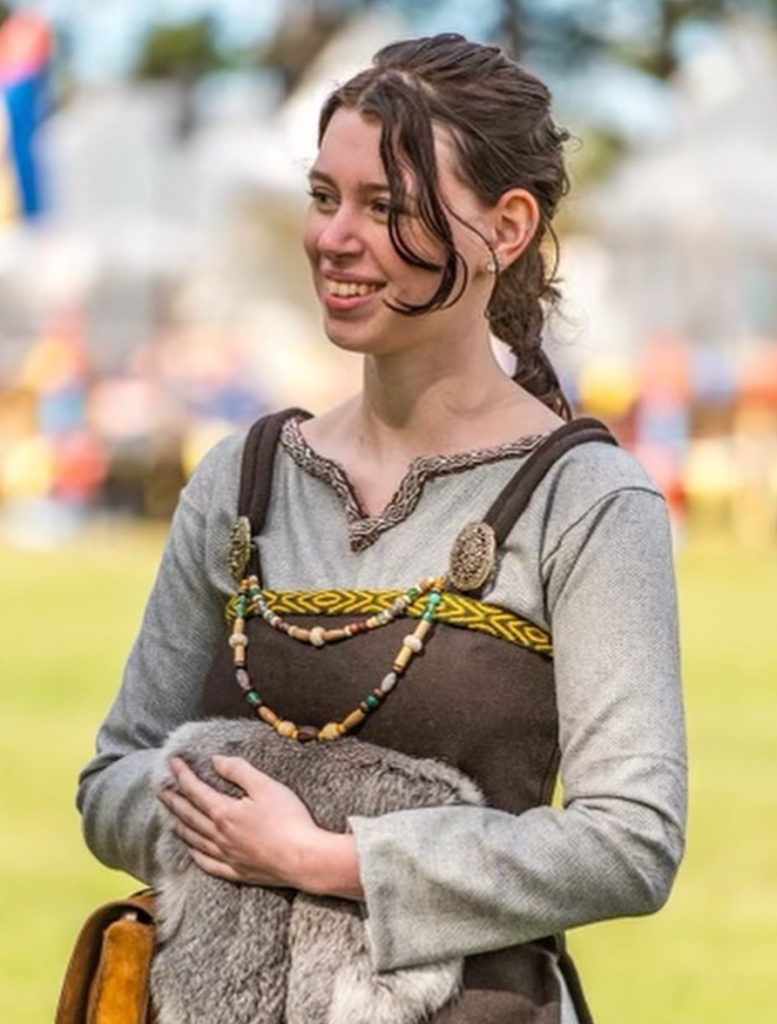
Hello! Welcome back! Namely to around the 10th Century. Today I will be showing you how to make a viking apron dress.
Brief History
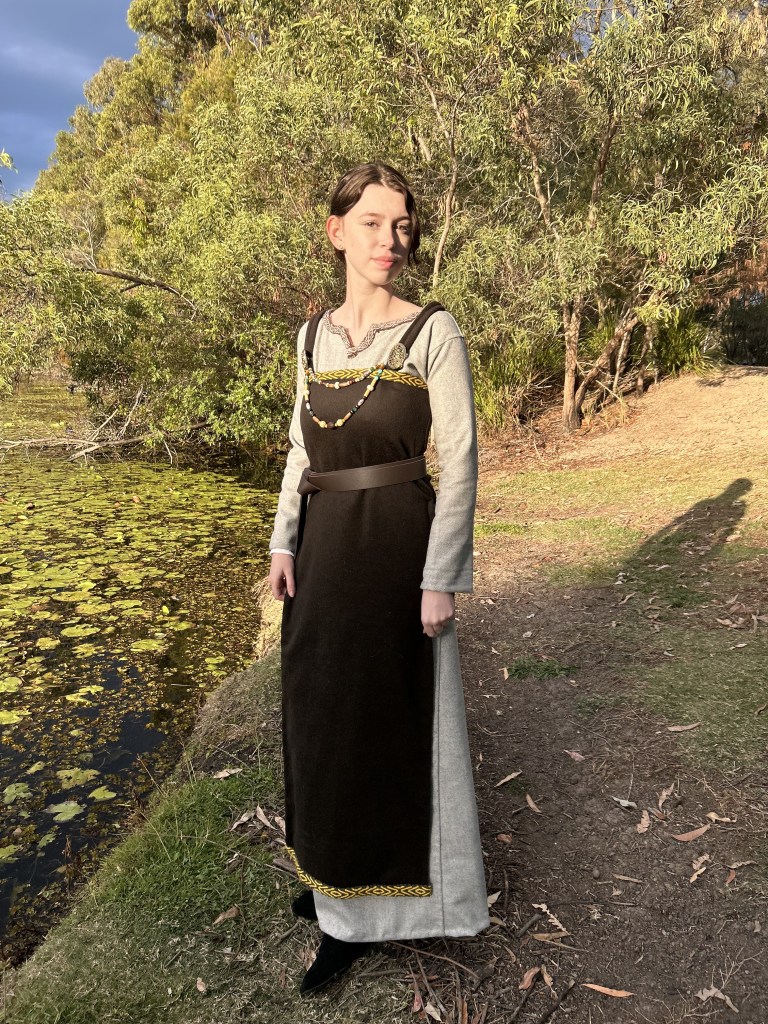
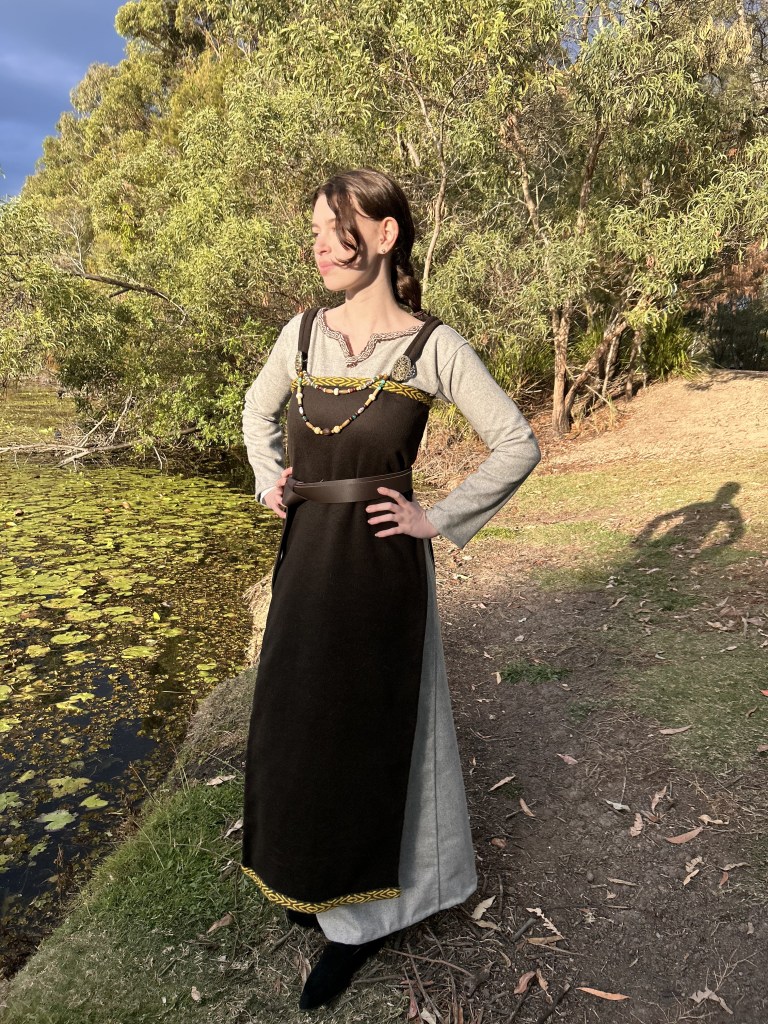
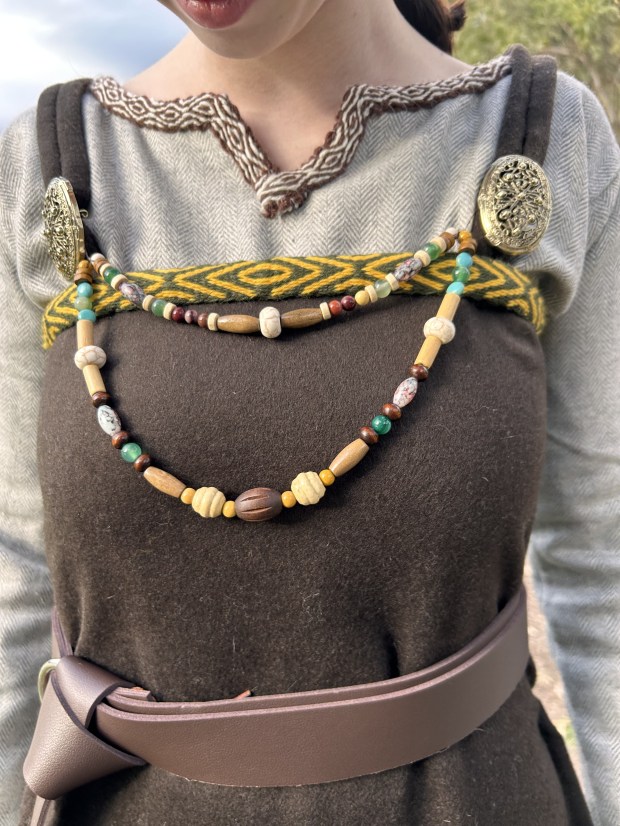
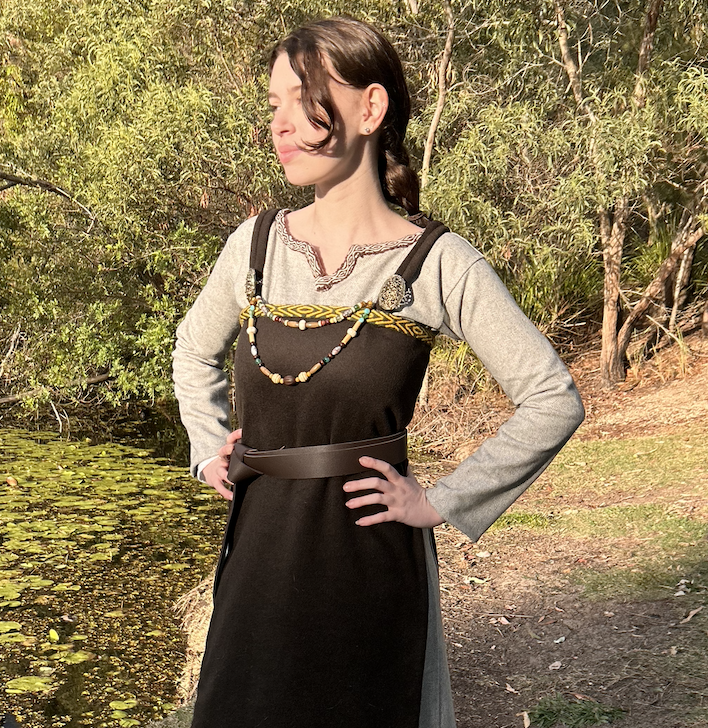
The apron dress was used as an overgarment, that was fastened together by two tortoise brooches at the front.
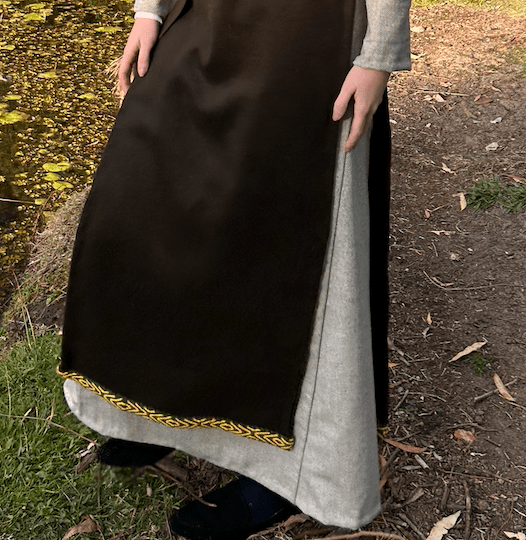
The apron dress goes by multiple different names such as trägerrock and hängerock and smokker. There have been many different dig sites that have each unveiled new information. At the Birka site the fragments of the hängerock are small, but they do tell us that they were made of wool. The original colour of wool is hard to identify as it ages, as it can be stained by the body decomposition and the soil, but they have found evidence of a dark blue and dark brown wool (I used dark brown for my garment). They have also found evidence of linen hängerocks.
As mentioned before the hängerock was fastened with two loops that would be held together by a brooch. Linen, wool and even silk loops have been found in graves, with some of the loops having an extra bit of fabric on the inside to add strength, this has mostly been seen in the silk loops.

Decorative trim has also been found, thought to have hidden the top stitches of the hängerock. Silk, tablet woven trim, wool string, and braided string has been found, with some of the finds leading archaeologists to believe tools were hung from these trims.

If you would like to read more on viking hängerocks check out this page here.
Tutorial
Alright! Let’s jump into making this hängerock. For this project, I used around 1.5m of dark brown wool, which as discussed above has been found at burial sites.
Below is the pattern for your hängerock. How easy?
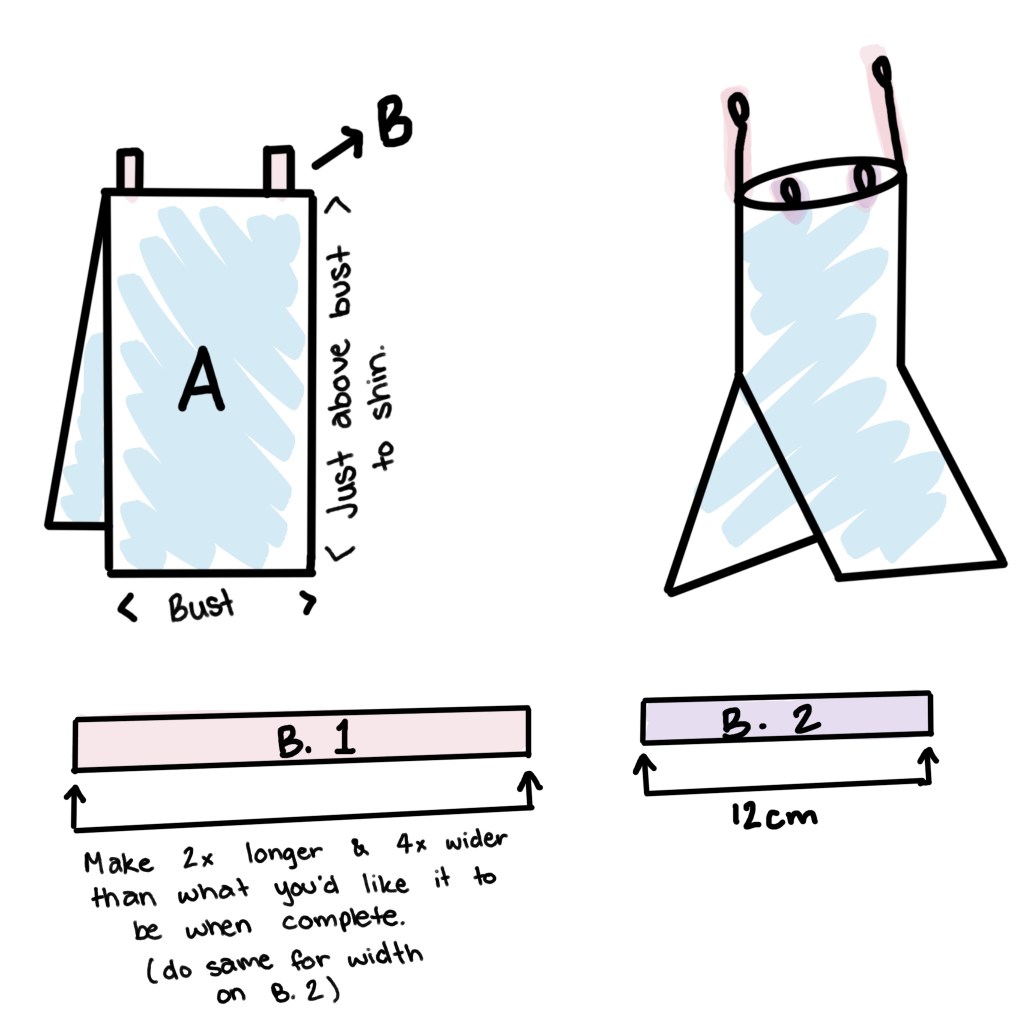
For this project you will need the following measurements:
- Bust – all the way around divided by 2 (piece A)
- Just above the bust to around mid shin – you can change where you’d like it to finish based on your personal preference (piece A)
- Strap length x 2 – just lay your measuring tape over your shoulder, so the back lines up with the top of your bust and it finishes just below your collar bone roughly (add a few centimetres for luck) For the width I used around 8cm, again you can change this, just make it 2x wider than what you want the finished strap to be (piece B).
Now that you have all of your measurements, lets get started:
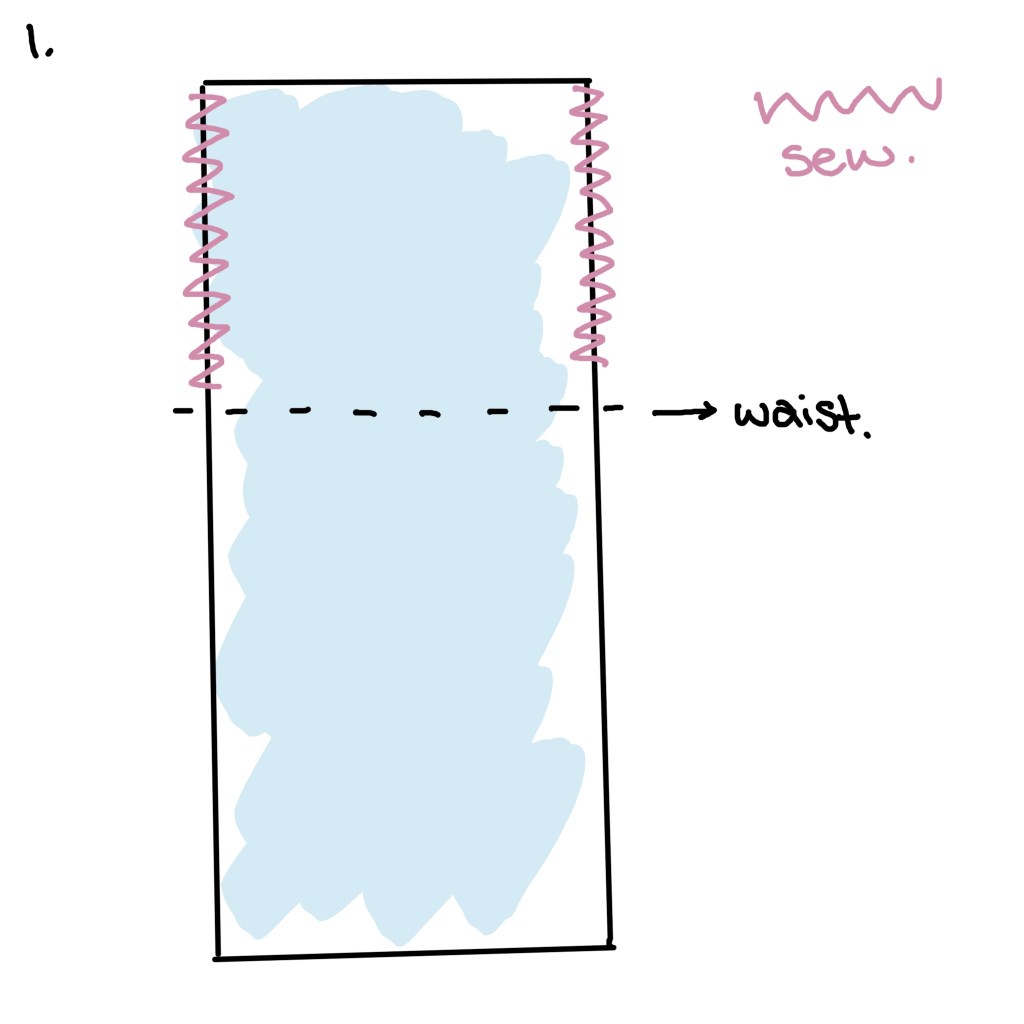
Step 1: Begin by sewing the sides of pieces A together on the sides, to around your waist.
Not pictured, but fold down the top of the fabric and fold it down to create a clean edge. Repeat this for the sides and bottom. I’d recommend using a whip stitch.
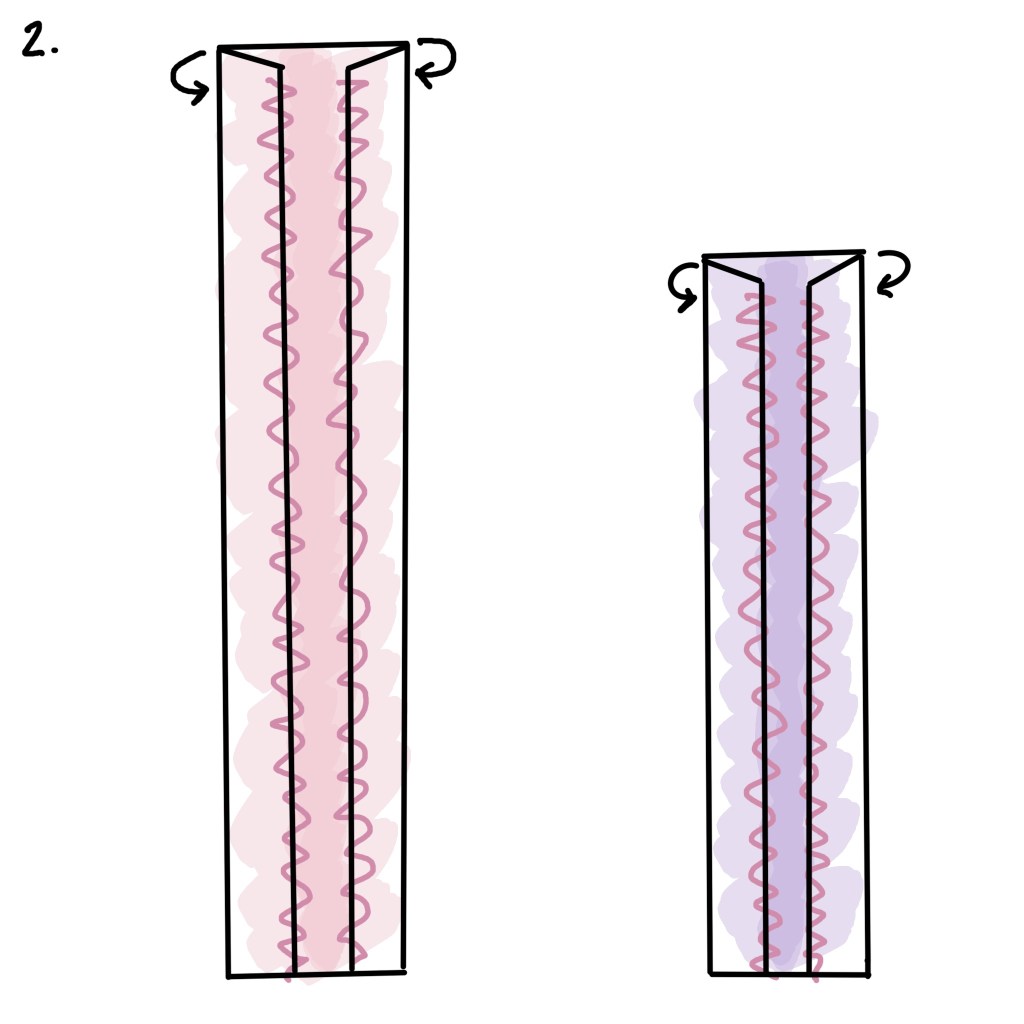
Step 2: Fold each side of piece B.1 and B.2 towards the middle so that they meet next to each other, and sew them together to create a long tube.
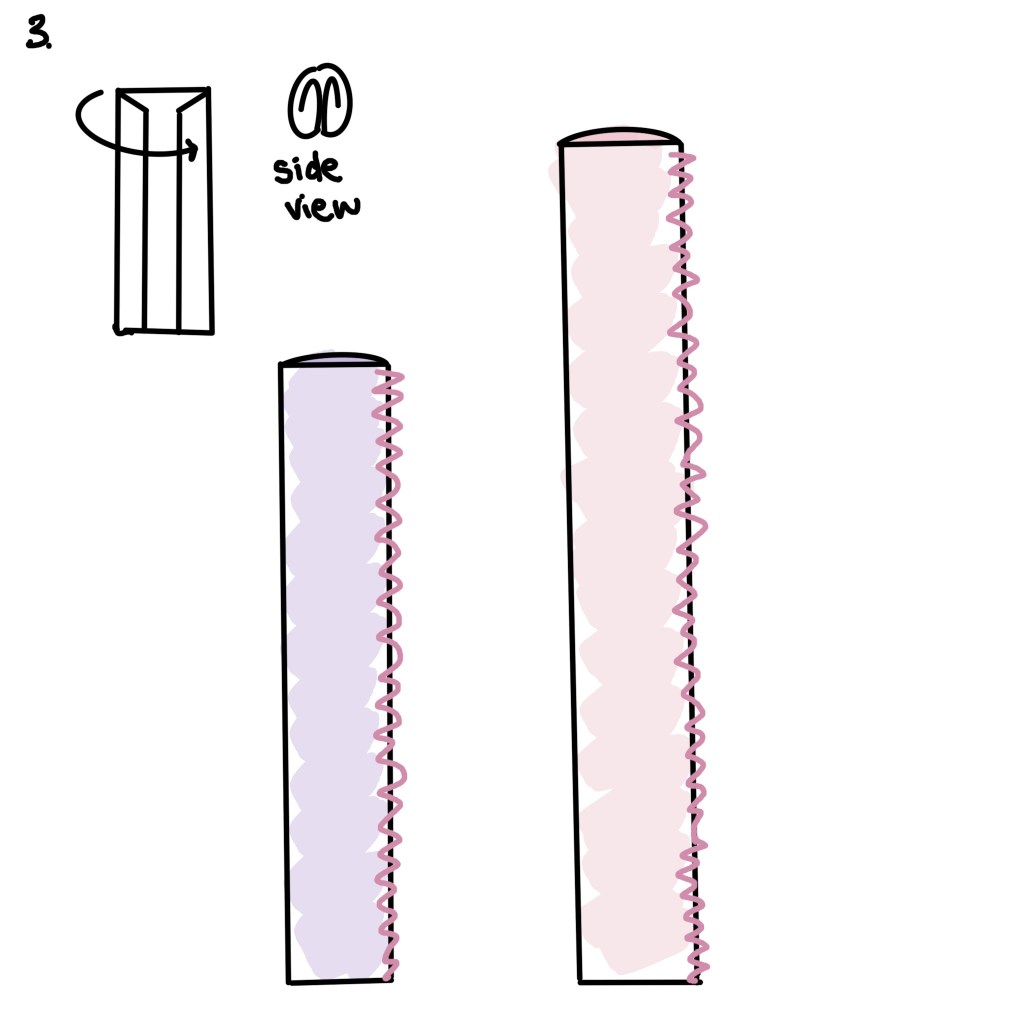
Step 3: Fold the new rectangles in half and sew together. You can see what it should look like from the side at the top left of the image.
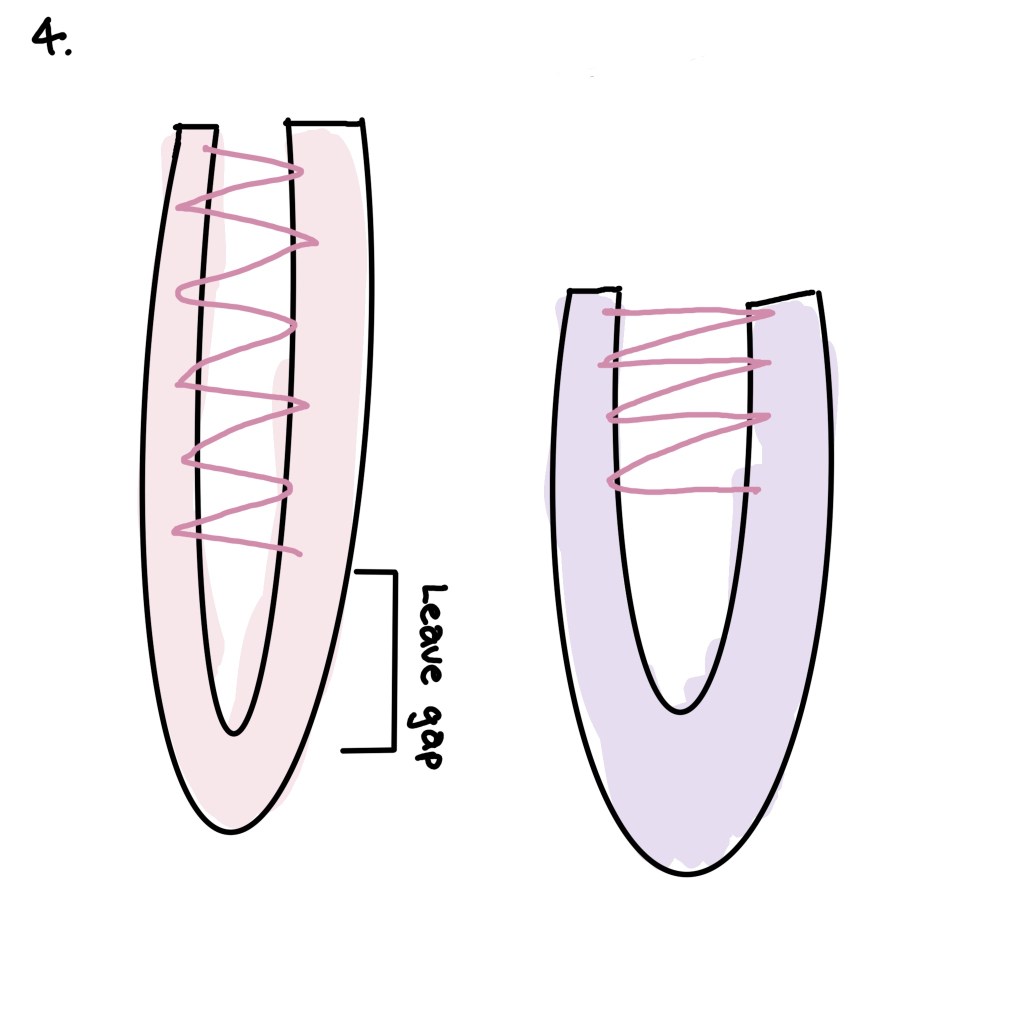
Step 4: Fold both piece B.1 and B.2 in half. Leaving a gap at the fold, sew the two sides together, so that the finished pieces will lay flat. I would recommend a ladder stitch.
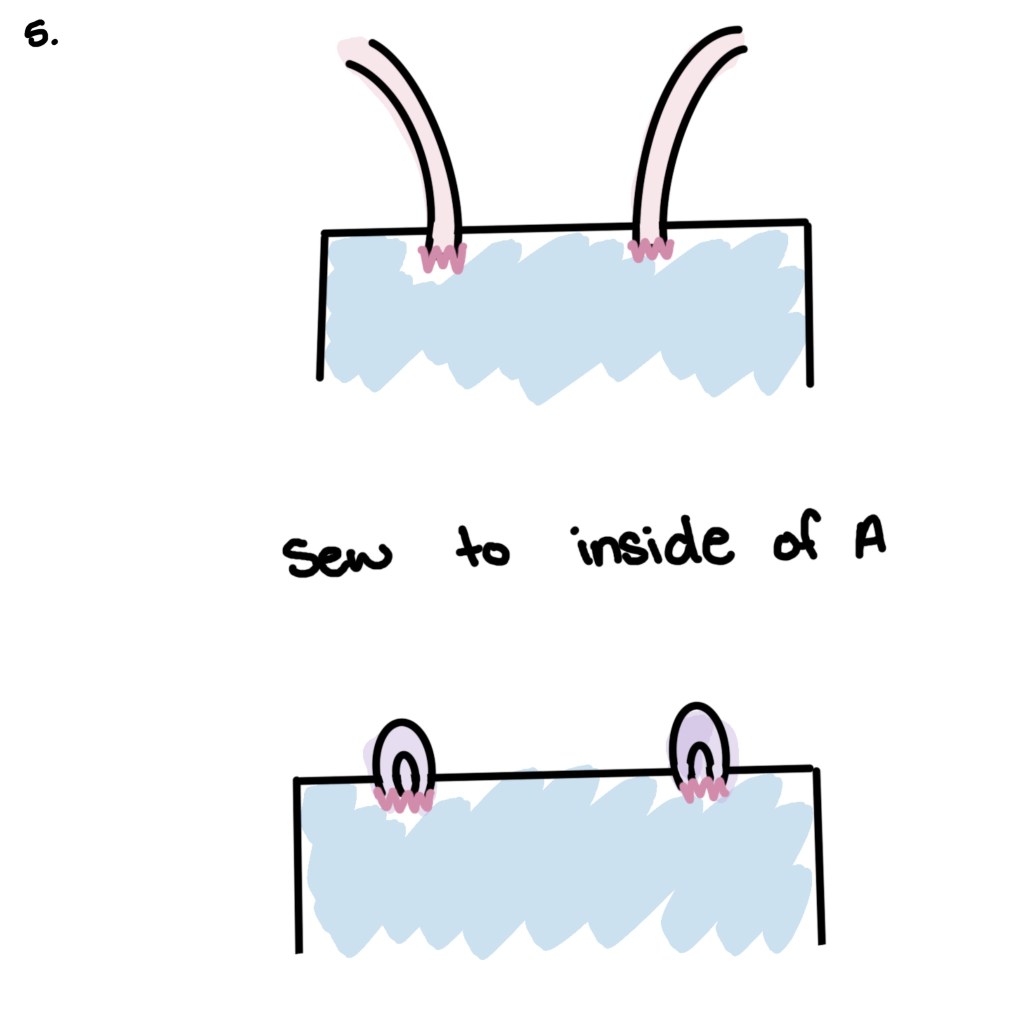
Step 5: Sew both of pieces of B.1 on the back of piece A, closer to the centre but not entirely in the centre.
Sew both pieces of B.2 to the front of piece A so that they sit inline with your breasts.
Both loops should meet together.
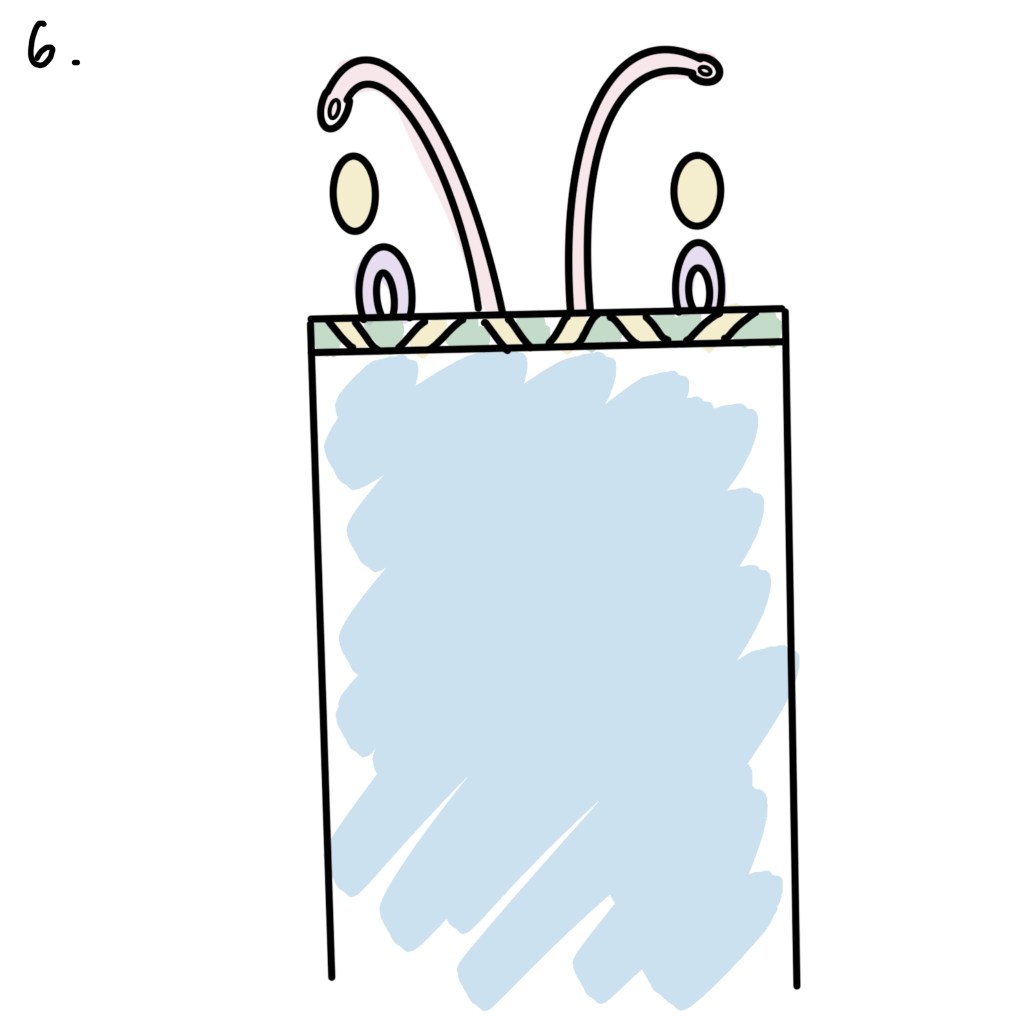
Step 6: Decoration time! Now you can add your brooches and tablet woven trim. I got my brooches off of amazon which you can find here! But you can find way more options on amazon.
For my tablet woven trim I got mine off of Etsy. I put my tablet woven trim on the top and bottom of my hängerock.
And that’s it! You’re done, easy as pie! There are other styles you can do where the hängerock has side gores similar to the viking dress I made, but I chose not to make that style this time around.
You can finish off your look with a belt bag/pouch (I bought mine from a re-enactor at the Abbey Medieval Festival) and a belt. The belt seen in my pictures is not very accurate, women were thought to have worn belts made from a long tablet woven trim rather than leather, but leather belts would’ve been a lot thinner in width.
I would love to see your creations on instagram, so be sure to tag me @medievalmusgrave
Follow me on Instagram and share your creations!
