

Hello! Welcome back! Today I will be showing you how to make a more complicated, albeit a much more fitted, sleeve for your medieval clothing.
This sleeve is seen in my 15th century kirtle tutorial, but in a shorter format.
Brief history
I do not have much history for this post, as sleeves are surprisingly difficult to find information on. Who would’ve thought. But what we do know is that the square sleeve, as seen in my 13th century kirtle tutorial and my Viking tunic and dress tutorial, would’ve been used in those periods, before clothing started to get fitted, which was around the 1300’s (14th century). We can safely assume that this sleeve would’ve come into fashion around this time but probably not much early, as while they are more complicated, they also are not as fabric efficient.
But I’m not an expert, so uh… don’t use this for any research assignments kids. Cheers.
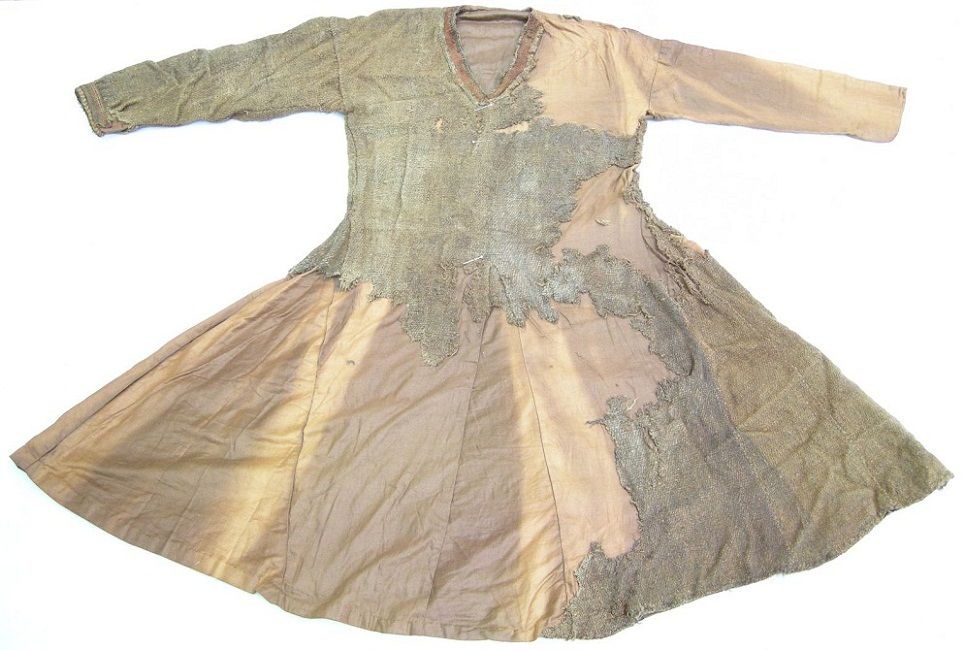
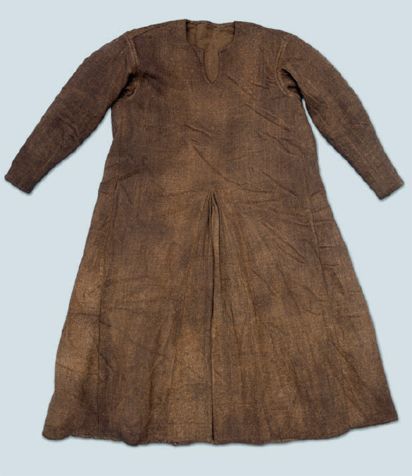
Below are some images of tunics found with this fitted ‘S’ sleeve. The easiest way to tell the difference is by looking for an armpit gusset. If it lacks this piece, it’s most likely been constructed with the same method I’m about to show you.
Tutorial
Alrighty, let’s get stuck in. I want to preface that you really should make a mockup on scrap fabric. This is not something you want to mess up using your expensive fabric… believe me.
For this sleeve you will need the following measurements:
- Shoulder to wrist (overarm)
- Armpit to wrist (underarm)
- Shoulder circumference
- Widest part of hand circumference
Add seam allowance to all of your measurements!
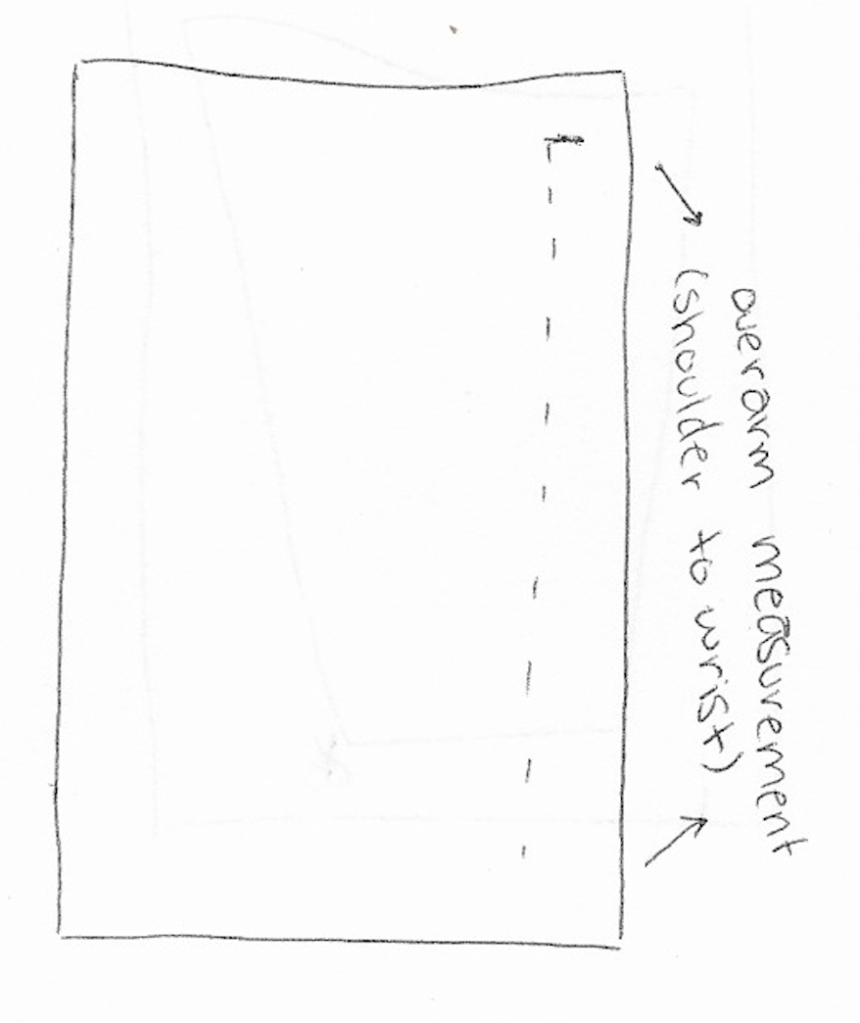
Step 1: On your scrap piece of fabric in a straight line mark out the measurement of your overarm.
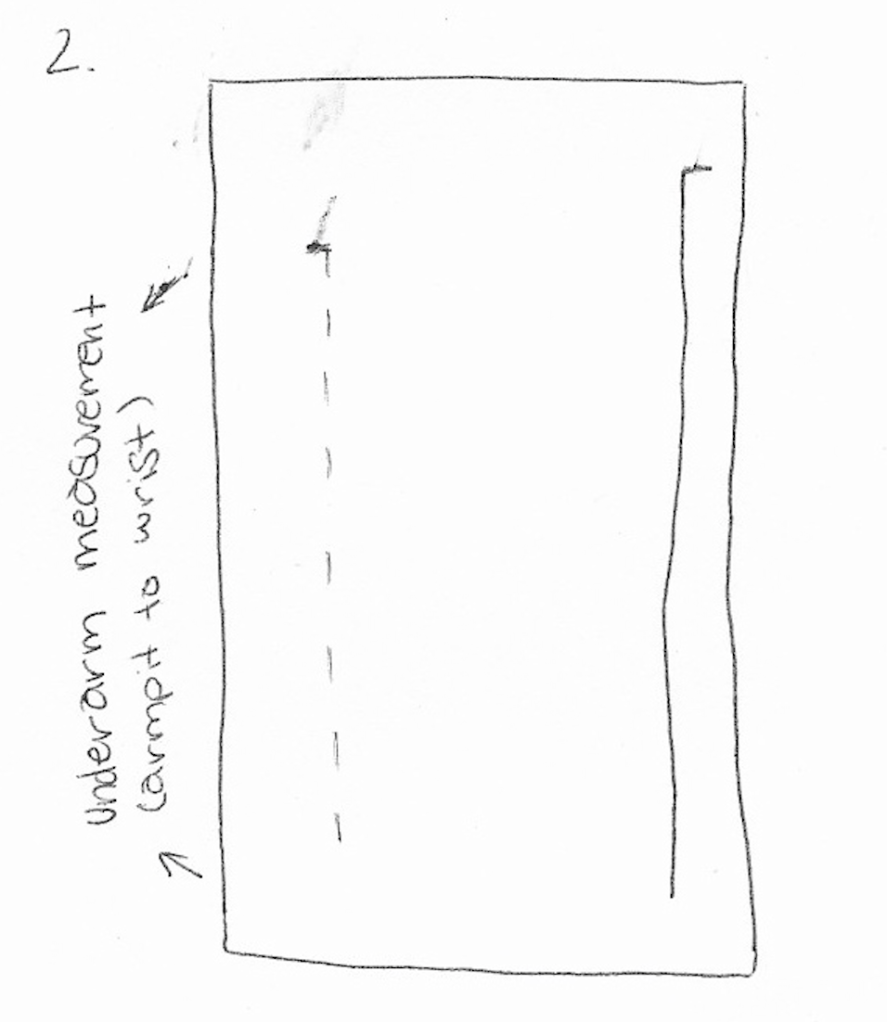
Step 2: Now, mark your underarm measurement to the side of your overarm (the distance doesn’t matter too much at this point) Make sure the bottom of these measurements line up horizontally.
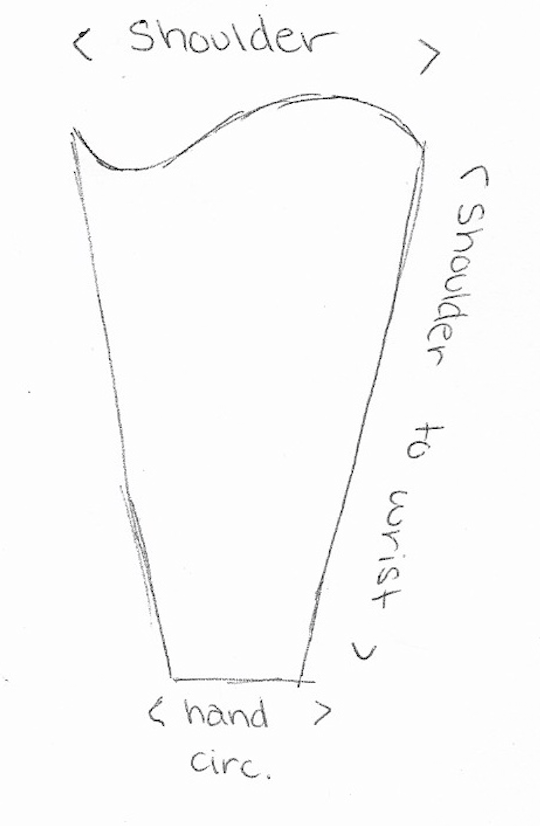
Step 3: Now mark out your shoulder measurement at the top of your two lengths, and your hand measurement at the bottom, in the middle of your two length markings.
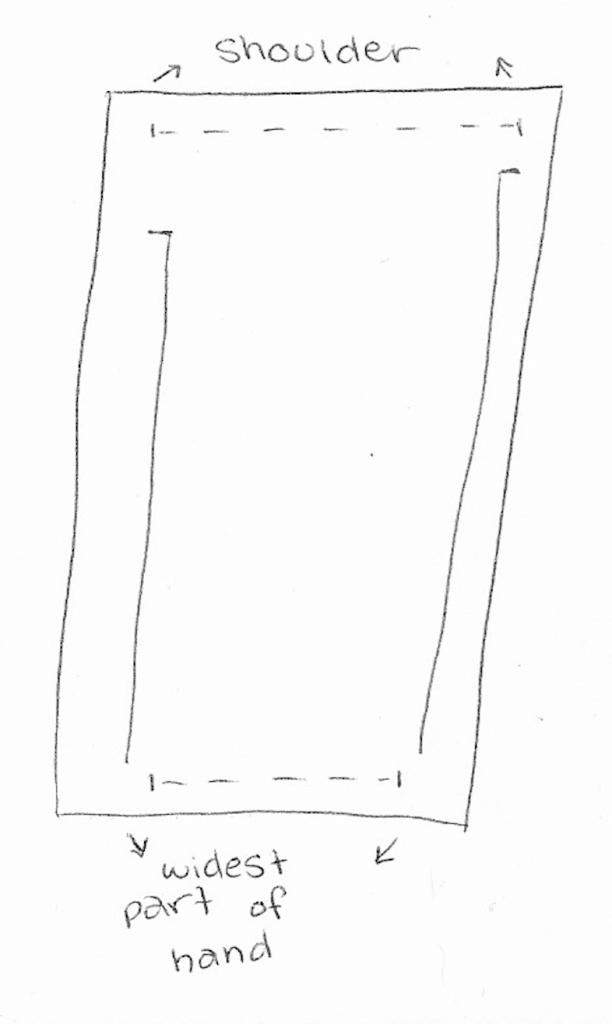

Step 4: Using your previous measurements and markings as guide, carefully draw out the ‘S’ shape at the top of your sleeve, being sure to hit all the markings of your shoulder and two widths. Draw a line from the edge of your ‘S’ curve down to the hand measurement as indicated by the dotted lines.
And you’re done! Be sure to pin the sides together and try it on and make any necessary adjustments until you get a snug fitting sleeve. I found that I had to widen it in the middle to make room for my elbow to bend properly. I personally have no gains so I didn’t have to worry about the bicep area… kinda made me sad.

A note for construction
When you attach this to your tunic or kirtle, place the seam running down the back of your arm. You can easily do this by finding the middle of the shoulder (the large hill shape) and pinning that to the top of your shoulder seam.
Also when you cut your sleeve, make sure you have two mirroring pieces or you’ll have a backwards sleeve! How embarrassing (I say that like I haven’t done exactly that).
You’re all done! Congratulations! You have now evolved your sleeve to a level 2! If you found this helpful, be sure to share it with your other historical re-enactors and check out some of my other posts! See you next time xx
Did you find this helpful?
Sewing my way through the Middle Ages and beyond
Follow my Instagram and tag me in your recreations!

2 Comments